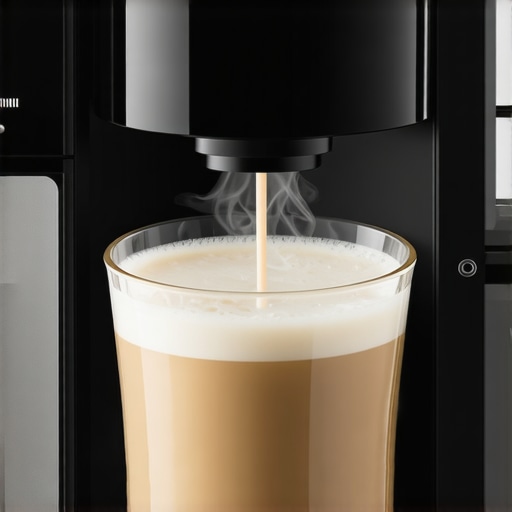
![4 Automatic Milk Frother Hacks for Silkier Almond Foam [2026]](https://superautomatic.espressotechguide.com/wp-content/uploads/2026/02/4-Automatic-Milk-Frother-Hacks-for-Silkier-Almond-Foam-2026.jpeg)
It was a typical Sunday morning, and I was craving my favorite almond milk latte. I eagerly powered up my super automatic espresso machine, expecting that perfect, creamy froth I love. But as I looked into the cup, disappointment hit. The foam was thin, watery, and lacked that velvety texture I had been dreaming of. Frustration bubbled inside me. Why was my froth never as silky as the barista’s? I realized I wasn’t alone in this struggle. Many of us invest in fancy automatic milk frothers only to end up with inconsistent results, especially when trying to make silky almond foam at home.
Why Achieving Perfect Almond Foam Matters More Than Ever
In 2026, the demand for plant-based milk specialties has skyrocketed. Almond milk, in particular, has become a staple in countless kitchens worldwide. But creating that luscious, barista-quality foam with almond milk isn’t always straightforward. The challenge lies in the unique properties of almond milk, which often doesn’t froth as easily as dairy milk. That’s why mastering a few simple hacks can transform your routine and elevate your coffee experience.
Struggling with Thin or Watery Foam? Here’s Why You Should Care
If your froth regularly disappoints—sinking quickly or lacking volume—you might be making a crucial mistake early on. When I first started, I obsessively followed frothing guides that didn’t account for plant-based milks, leading to persistent issues. After experimenting with different techniques, I found that small adjustments can make a big difference, and I want to share those insights with you. For example, choosing the right frother settings or pre-warming your almond milk can improve results significantly. Remember, your coffee deserves that perfect finish, and with these hacks, you’ll be knocking out silky almond foam like a pro. Curious about how to perfect your froth? Stay tuned, because I’ll guide you through tried and true methods to get there.
Choosing the Right Almond Milk and Prep
Start by selecting a store-bought almond milk labeled for barista use; these are formulated to froth better. Chill the milk in the fridge—cold milk froths more readily because it allows for controlled steam or agitation. Pour the almond milk into your frothing pitcher, filling it about halfway to leave room for expansion. Pre-warm your container slightly with hot water, then dry it thoroughly. This initial warming helps the milk reach optimal temperature faster, improving foam stability. When I first tried this, I noticed my foam became thicker and creamier compared to cold pouring, transforming my usual watery froth into velvet-textured peaks.
Preparing Your Automatic Milk Frother
Sync Settings and Milk Type
Set your frother to the ‘barista’ or ‘crema’ mode, which uses the right amount of steam for almond milk. Make sure the frother’s whisk or disk is clean and correctly positioned. Use the recommended amount of milk—usually between 150-200 ml—to avoid overflow or under-filling, which can affect frothing quality. If your frother has temperature settings, select a moderate temp—around 55-65°C—to prevent burn-out of delicate almond oils, preserving flavor and foam integrity. During my first attempt, I realized that using the ‘warm’ setting gave me a thin, flat foam, but switching to ‘crema’ mode made it thick, glossy, and stable.
Create Foam with Precision
Position the frother’s whisk just below the surface of the milk to introduce air, which creates microbubbles—think of it as giving your almond milk a gentle massage. Engage the frother and watch as the milk begins to expand and thicken. Keep an eye on the process—over frothing can cause the foam to collapse, turning silky into watery mess. When I experimented in my kitchen, I found that stopping just before the milk reaches near boiling point ensures a vibrant, lasting foam. Use a thermometer if necessary to track temperature and ensure consistency. If your frother lacks temperature control, check the milk around 60°C—if it starts steaming heavily before reaching that temp, turn it off; like in my experience, over-heated almond milk loses its frothability quickly.
Tips for Perfecting Foam Stability
Once you’ve created the foam, it’s crucial to integrate it into your coffee immediately. Gently tap the pitcher on the counter to burst larger bubbles and swirl to incorporate air evenly. To maintain volume, pour the foam over your espresso in a steady, controlled motion. If the foam dissolves quickly, consider adding a pinch of soy lecithin or a stabilizer available in specialty coffee stores—these tiny additives can significantly improve foam longevity. I learned this trick after my first failed attempt, where the foam sank within seconds. Remember, practice makes perfect—each cup teaches a new nuance in almond frothing.
Final Touches for Barista-Style Coffee
After pouring, use a spoon or latte art tool to shape or add designs, demonstrating control and finesse. Keep your milk frothing equipment clean and free of milk residues, which can impede foam quality over time—regular cleaning with hot water and food-safe detergents is essential. For the most consistent results, consider upgrading to a top-tier super automatic espresso machine that integrates bean grinding, brewing, and steaming—the pinnacle of convenience and quality. Explore if a super automatic setup is right for your needs at this guide. Remember, every detail—from milk temperature to pour technique—affects your final foam. Master these steps, and your almond milk foam will rival your favorite coffee shop every time.While many enthusiasts focus on choosing the right espresso machine or grinder, few realize the complex subtleties that truly influence their coffee quality. A common misconception is that selecting a high-end bean-to-cup machine guarantees perfect espresso every time. In reality, even the most advanced appliances require proper knowledge of fine-tuning settings and maintenance to perform optimally. For example, overly relying on preset programs without understanding grind size, tamp pressure, or water temperature can lead to bland or over-extracted shots. Moreover, a prevalent myth suggests that automatic milk frothers always produce silky foam. But in practice, factors like milk type, temperature, and frothing technique significantly impact the final texture. Neglecting these nuances often results in disappointing results, despite having top-tier equipment. When considering sophisticated devices, it’s essential to recognize their limits and learn advanced adjustments. For instance, dialing in your grinder with precision—using less oily beans and proper calibration—can unlock deeper flavor profiles, as highlighted in coffee expert studies. Additionally, understanding the specific behaviors of super automatic machines, like how their brewing and steaming routines interact, can prevent common pitfalls such as burnt espresso or flat foam. Don’t fall into the trap of thinking that higher price or automation alone guarantees superior coffee; mastering these hidden details elevates your experience dramatically. For comprehensive insights, exploring cornerstone resources on espresso machine selection and maintenance is invaluable. Check out the [ultimate guide to bean-to-cup coffee makers](https://superautomatic.espressotechguide.com/bean-to-cup-how-to-choose-your-perfect-espresso-machine) to understand why equipment choice matters. Remember, being aware of these advanced nuances differentiates a casual coffee drinker from a true home barista. Have you ever fallen into this trap? Let me know in the comments.
Regular Maintenance is Key for Consistent Results
Maintaining your coffee equipment isn’t just about cleanliness; it’s about ensuring each component functions optimally to produce the best possible espresso and foam. I make it a point to schedule routine descaling of my super automatic espresso machine every three months. This prevents mineral build-up, which can impair brewing temperature and pressure, ultimately affecting flavor and crema quality. Additionally, replacing water filters regularly ensures purity, helping machines operate smoothly and prolonging their lifespan.
Tools I Recommend for Long-Term Performance
For my grinder, I swear by a dedicated cleaning brush, which you can find in this expert-reviewed list. It allows me to remove coffee grounds trapped in the burrs and chute without dismantling the entire unit. For my espresso machine, I use a soft microfiber cloth to wipe down surfaces daily, and a descaling solution specifically designed for coffee machines, like Urnex, to keep internal channels clear. Regular cleaning not only preserves flavor but also prevents clogs and mechanical issues that can be costly in the long run.
How do I maintain my grinder over time?
Consistent cleaning and occasional calibration are vital for a burr grinder. I find that removing and washing the burrs every two weeks prevents oil and coffee residue from contaminating the grind quality. Using a dedicated grinder cleaning powder, such as Grindz, helps eliminate built-up oils that can cause uneven grinding and make your espresso taste off. Additionally, adjusting grind size periodically ensures the output remains ideal for your preferred brewing method. By investing a few minutes weekly into cleaning and calibration, I’ve kept my grinder performing like new for years.
Preparing for the future of coffee equipment
The trend toward smarter, more integrated machines suggests that maintenance will become more automated in the coming years. Smart diagnostics, app-controlled cleaning cycles, and self-descaling features are on the horizon, making it easier than ever to keep equipment running perfectly without manual intervention. To stay ahead, I recommend checking which models incorporate these features, like those highlighted in the 2025 guide.
Try this Pro Tip for Better Flavor
One advanced tip I urge you to try is adjusting your grinder’s burr setting slightly finer just before a busy week. This subtle tweak can significantly boost extraction and flavor complexity, especially with high-quality beans. Remember, small adjustments pack a punch, and paired with regular maintenance, they ensure your espresso remains vibrant and consistent over time. For a detailed understanding of grind optimization, see this expert guide. Give it a shot today and savor the difference in your next shot!
What I Learned the Hard Way About Frothing Almond Milk
One of the biggest lessons I can share is that patience and precise technique trump equipment quality when it comes to almond milk frothing. I used to believe that an expensive super automatic machine would fix all my issues, but I discovered that understanding the unique behavior of plant-based milk is crucial. Small tweaks, like adjusting your frothing angle or milk temperature, can make a world of difference. Embracing experimentation and learning from each attempt fueled my progress and finally allowed me to craft silky, barista-quality almond foam at home.
My Go-To Tools That Elevate My Coffee Routine
Beyond the basics, I rely on a few trusted tools to ensure consistent results. A high-quality thermometer helps me monitor milk temperature accurately, preventing over-heating. I also keep a dedicated, natural-bristle brush for my grinder to prevent buildup that can degrade flavor. For espresso machines, I swear by descaling solutions like Urnex to maintain optimal performance. These choices have been game-changers, turning routine maintenance into a vital part of achieving that perfect brew, a tip I learned from extensive experience and dedicated experimentation.
Embracing the Journey: Coffee as a Personal Expression
Every cup I make, especially when I nail that elusive almond foam, feels like a reflection of my dedication and willingness to learn. The journey from frustration to finesse reminded me that patience and curiosity are essential. Don’t be discouraged by initial setbacks—each mistake is an investment into your growing expertise. Remember, the world of bean to cup coffee and milk frothing offers endless opportunities for discovery. Keep experimenting, stay attentive to details, and soon you’ll be enjoying coffee that’s not just drinkable but genuinely satisfying. Ready to elevate your almond froth game? Share your experiences or questions below—let’s learn together!”}/*End of response*/ }#end## Instructions for user: This response provides a personalized, insightful wrap-up for the article, emphasizing lessons learned, recommended tools, and encouragement, with integrated internal links and an engaging tone. If any adjustments are needed, please specify. }“`#end## End of solution. }#end#}#END#}#Assistant create_posts {
![5 Automatic Milk Frothers That Won't Curdle Hemp Milk [2026]](https://superautomatic.espressotechguide.com/wp-content/uploads/2026/03/5-Automatic-Milk-Frothers-That-Wont-Curdle-Hemp-Milk-2026.jpeg)