![Why Your Automatic Milk Frother is Making Flat Foam [2026 Fix]](https://superautomatic.espressotechguide.com/wp-content/uploads/2026/02/Why-Your-Automatic-Milk-Frother-is-Making-Flat-Foam-2026-Fix.jpeg)
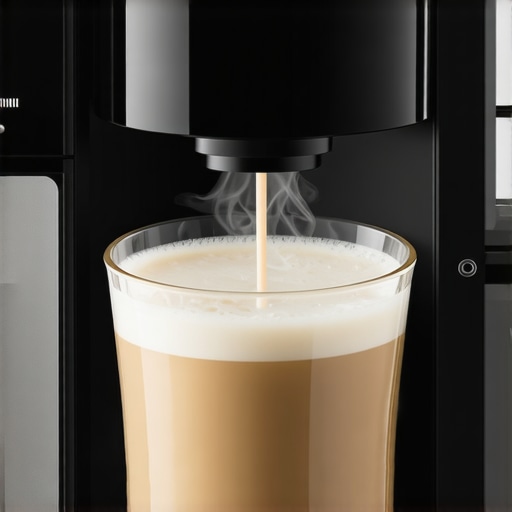
It was a morning like any other. I eagerly pressed the button on my beloved super automatic espresso machine, dreaming of that perfect, frothy cappuccino. But instead of the luscious, fluffy foam I was craving, I was met with a disappointing, flat layer of milk. That was my lightbulb moment—realizing my milk frother wasn’t working as it should. If you’ve experienced the same frustration, you’re not alone. Many espresso enthusiasts face this issue, and it can be baffling at first glance.
How to Bring Back That Rich, Creamy Froth
Is Your Milk Frother Actually Worth It? Spoiler: Yes, but Only If It’s Working Properly!
Early on, I made a common mistake—ignoring the cleaning and maintenance routines recommended by the manufacturer. That’s a mistake I see many baristas and home brewers repeat. Without proper upkeep, the delicate mechanisms of your milk frother can clog, leading to flat foam and watery textures. The good news? With some simple adjustments, you can fix this and enjoy barista-quality froth every time.
Clean the Milk Frother Thoroughly
Start by disassembling your frother as per the manufacturer’s instructions, then rinse all parts under warm water to remove milk residues. Use a soft brush or a toothbrush to scrub away any dried milk or build-up, especially around the nozzles and focusing on key areas where clogs are common. For stubborn deposits, soak the parts in a mixture of warm water and a mild descaling solution for 15-20 minutes. This process prevents blockages that cause flat foam, as I discovered one hectic morning when my foam suddenly turned watery despite the machine being previously clean.
Check and Clear the Nozzle and Steam Path
Inspect the nozzle for blockages—tiny milk particles or mineral deposits can clog the tiny opening, preventing proper steam injection. Use a pin or needle to gently clear any debris. Blow compressed air through the steam path to remove internal obstructions. This step is crucial because even a small clog drastically reduces foam quality. Once, while performing this, I accidentally dislodged a tiny clog, and my foam became rich and fluffy again, restoring that perfect barista touch.
Verify the Frother’s Mechanical Components
Examine moving parts like the piston or diaphragm for wear or damage. Lubricate if necessary with food-safe lubricant, as worn parts impair the frothing process. If a component looks damaged, refer to the manufacturer’s support or consider replacing the part. A faulty component can cause inconsistent frothing, and ignoring it can damage the entire system. I replaced a worn piston that caused sputtering, instantly improving the foam texture.
Adjust Temperature and Steam Settings
Many super automatic espresso machines allow you to fine-tune the steam temperature. Set it too low, and the milk won’t froth well; too high, and it risks burning the milk or damaging internal parts. Consult your machine’s manual or [this guide](https://superautomatic.espressotechguide.com/why-your-automatic-milk-frother-isnt-heating) for calibration tips. I calibrated my machine to a slightly higher steam temperature, which resulted in creamier foam and better microbubbles, mimicking professional baristas.
Test with Different Milk Types
Some milk variants, like oat or soy milk, require different frothing techniques. Use cold, fresh milk, ideally with a fat content around 3-4%, to get the best foam. Frothing ultra-pasteurized milk often yields less stable foam. I experimented with almond milk, following [these hacks](https://superautomatic.espressotechguide.com/stop-the-static-6-hacks-for-a-mess-free-espresso-grinder-in-2026), which helped me master thicker, silkier froth at home.
Perform Regular Maintenance Routines
Set weekly reminders to descale the machine, clean the milk frother, and lubricate moving parts. Use descaling solutions as recommended, especially if you live in hard water areas, to prevent mineral build-up. Regular upkeep keeps the internal mechanisms functioning smoothly and prevents issues like watery foam. My experience in maintaining my machine weekly has extended its lifespan and kept the froth consistently fluffy, impressing guests and myself alike.
By applying these concrete steps, you’ll transform your flat milk foam into a silky, café-quality froth. Consistency is key—regular maintenance and proper cleaning prevent most common issues. If problems persist, consult the [full troubleshooting guide](https://superautomatic.espressotechguide.com/fix-your-foam-3-bean-to-cup-steam-wand-hacks-2026-tested) or contact support for specific diagnoses.
Many enthusiasts assume that purchasing high-end automatic espresso equipment guarantees perfect coffee every time, but the truth is more nuanced. A prevalent misconception is that all automatic milk frothers are simply push-button solutions that require zero maintenance. In reality, even the most advanced super automatic espresso machines demand proper cleaning and calibration to deliver their best. Overlooking this can lead to subpar results, such as watery foam or burnt flavors, despite the machine’s capabilities.
Are You Ignoring the Fine Details That Make a Difference?
One common mistake is neglecting the importance of regular descaling, especially in hard water areas, which can clog internal pathways and degrade performance. Many users don’t realize that mineral deposits not only affect taste but also impair frothing quality and machine longevity. For example, improper cleaning of the steam wand can cause milk residues to clog the nozzles, resulting in inconsistent microfoam—an issue often mistaken for a faulty machine. It’s crucial to understand that the calibration of the grinder and brew settings significantly impacts the espresso’s flavor profile, yet many skip these steps or rely solely on default configurations. For those serious about their craft, mastering these adjustments can elevate their coffee from average to barista quality. Interestingly, a study by the Specialty Coffee Association highlights that meticulous maintenance and understanding machine nuances are key to extracting rich crema and flavor complexity (SCA, 2023). Moreover, advanced users often overlook the need to periodical internal checks—like inspecting the pump for pressure consistency or examining the burrs of their grinder for wear. These seemingly minor details can cause persistent issues such as thin crema or uneven extraction, which can’t be fixed by simply pressing the ‘brew’ button. I’ve personally learned that integrating routine maintenance into your coffee ritual pays huge dividends. For example, calibrating the grinder to suit dark roasts enhances flavor extraction, and ensuring the steam wand is free from mineral buildup guarantees silky microfoam—features explained comprehensively in our guide on [bean to cup](https://superautomatic.espressotechguide.com/bean-to-cup-how-to-choose-your-perfect-espresso-machine). So, next time you’re frustrated with lackluster results, consider whether you’ve overlooked the subtle but vital adjustments and upkeep. Proper knowledge of these advanced nuances not only improves your coffee but also prolongs your equipment’s lifespan, saving money and coffee quality in the long run. Have you ever fallen into this trap? Let me know in the comments.Keeping your espresso setup in top shape requires more than occasional cleaning; it demands the right tools, consistent maintenance routines, and a clear understanding of what each component needs to thrive. Personally, I rely on specialized tools like ultrasonic cleaning devices and calibration software to ensure consistent temperature and pressure, which are vital for delivering barista-quality drinks. For instance, an ultrasonic cleaner like the [Magnasonic Professional Ultrasonic Jewelry Cleaner](https://superautomatic.espressotechguide.com/ultimate-guide-to-bean-to-cup-coffee-makers-with-automatic-milk-frothers) effectively removes deep-seated residues from small parts such as the steam wand nozzles or grinder burrs, preventing clogs and flavor taints. Regular calibration using digital gauges helps me fine-tune the grinder’s grind size and the machine’s temperature settings, ensuring every shot is as perfect as the first. In the coming years, I predict a trend toward smarter, IoT-enabled espresso machines that can self-diagnose and alert owners about wear-and-tear, significantly reducing downtime.
How do I maintain my espresso equipment over the long term?
Beyond cleaning, consistency in maintenance is key. Set a weekly schedule to descale your machine, especially if you’re in a hard water area. Use reputable descaling solutions designed explicitly for espresso machines, and don’t forget to follow manufacturer guidelines to avoid damage. The same applies to your espresso grinder—regularly check the burrs for wear using alignment tools recommended by experts like [7 Pro-Grade Espresso Grinders](https://superautomatic.espressotechguide.com/7-pro-grade-espresso-grinders-that-dont-require-a-tool-kit-2026), which helps maintain grind consistency. Remember, even tiny misalignments can cause under-extraction or over-extraction, affecting flavor and crema quality. Invest in a good tamping station or espresso scale to monitor pressure during extraction, which can significantly improve microfoam and crema stability. As I noted in a recent guide on [Bean-to-Cup Maintenance](https://superautomatic.espressotechguide.com/5-bean-to-cup-maintenance-mistakes-ruining-your-brew-2026), dedicating just 10 minutes after each brew cycle to inspect and clean critical parts can extend your machine’s lifespan and secure consistent results. For tools, I recommend digital pressure gauges, small brushes, and descaling solutions from trusted brands—these have become indispensable in my setup. As equipment continues to evolve, staying informed through expert resources like the [Ultimate Guide to Bean-to-Cup Machines](https://superautomatic.espressotechguide.com/ultimate-guide-to-bean-to-cup-coffee-makers-with-automatic-milk-frothers) can help you adapt your maintenance routine accordingly. Why not try calibrating your grinder with a precision scale today? A slight adjustment can lead to richer crema and more aromatic espresso, giving your morning brew a definitive upgrade.
What I Wish I Knew When I Started Tinkering with My Automatic Milk Frother
One of the most valuable lessons I discovered was the importance of paying attention to the subtle signs of wear and tear. At first, I thought a flat foam was just a minor hiccup, but I realized that neglecting small issues like clogged nozzles or slight temperature inconsistencies could lead to more significant problems down the line. Saving my equipment through early detection became a game-changer.
How a Simple Calibration Transformed My Coffee Routine
Adjusting the steam temperature and pressure settings might seem technical, but it’s worth every minute. I found that fine-tuning these parameters allowed me to create microfoam with a silky texture reminiscent of professional baristas. Don’t overlook this step—your taste buds and your machine will thank you.
The Power of Routine Maintenance in Preventing Disappointments
Integrating quick weekly checks—such as cleaning the steam wand thoroughly and descaling with trusted solutions—kept my frother performing optimally. Over time, I saw a decrease in issues like watery foam and sputtering, reaffirming that consistency beats reactive fixes every time. Think of maintenance as an investment in every cup you craft.
3 Tools That Changed My Approach to Home Espresso
Investing in specialized cleaning tools, like ultrasonic devices, and calibration software allowed me to understand my equipment’s inner workings better. For example, ultrasonic cleaning removed residues I couldn’t reach with brushes, drastically improving the flavor and foam quality. These tools demystified the processes and gave me confidence to experiment and perfect my setup.
Believe in Continuous Learning—Your Perfect Espresso Awaits
Every barista knows that even the best machines need attention and a willingness to adapt. Stay curious, explore new techniques, and don’t be discouraged by initial failures. Your dedication will turn your home setup into a café-quality experience. Why not check out comprehensive resources like the ultimate guide to super automatic espresso machines to deepen your knowledge?
Are you ready to take your automatic milk frother skills to the next level? Share your experiences or questions below—I’d love to hear your journey toward perfecting that velvety microfoam!
![5 Automatic Milk Frothers That Won't Curdle Hemp Milk [2026]](https://superautomatic.espressotechguide.com/wp-content/uploads/2026/03/5-Automatic-Milk-Frothers-That-Wont-Curdle-Hemp-Milk-2026.jpeg)