
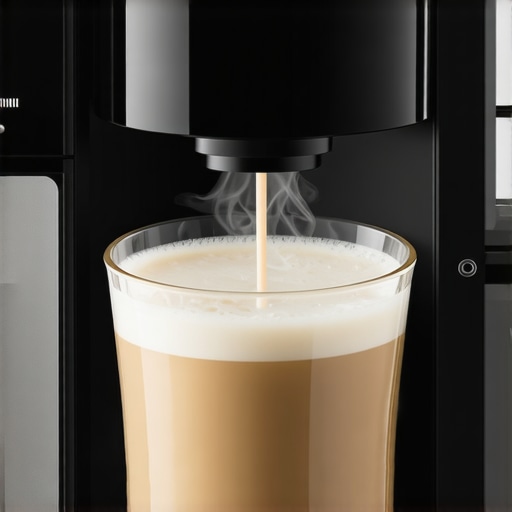
Last weekend, I was all set for my perfect morning espresso, steaming milk in my favorite automatic milk frother. But instead of that luscious, velvety foam I craved, I was met with a disappointing, flat cloud of milk. Frustration crept in as I realized I had fallen into a common trap that even seasoned coffee lovers stumble into. That lightbulb moment made me wonder—how many of us are unknowingly sabotaging our coffee’s frothy glory?
The Hidden Pitfalls Behind Flat Milk Foam
Is Your Milk Frother Still Worth It or Just a Decor?
When I started my journey into high-quality espresso and automatic milk frothers, I made the mistake of assuming that investing in top-tier equipment alone was enough. Turns out, the devil is in the details. I overlooked some crucial maintenance and technique steps, which led to the unsatisfactory foam I experienced. According to coffee expert James Hoffmann, proper handling of your milk frother can significantly elevate your coffee experience—yet many overlook the basics, leading to flat or thin froth. So, why does this happen, and what can you do to ensure your milk consistently turns out barista-quality?
Today, I want to share with you the three most common mistakes in using and maintaining your milk frother that are preventing you from achieving that perfect foam. Fixing these issues can transform your morning routine and make every cup special. Are you making any of these errors? Or worse, ignoring them altogether? Let’s jump in and get your milk frothing correctly—starting now.
Ensure Your Milk Is Cold and Fresh
Start by using fresh, cold milk directly from the fridge. Cold milk froths better because surface tension allows for a denser, creamier foam. I remember once grabbing warm milk from the counter—result: flat, unstable foam. Always select a cold milk type that suits your taste, whether whole, skim, or alternative milks.
Preheat Your Equipment for Better Foam
Warm the milk frother’s jug and attachments with hot water before filling it. This warm-up prevents temperature shock, which can create inconsistent froth. I once skipped this step and ended up with thin foam; since then, preheating has significantly improved my results.
Fill Milk to the Optimal Level
Don’t overfill. Most frothers work best when filled up to the max indicated line—usually about half to three-quarters full. Overfilling causes uneven heating and poor froth. I had a messy cleanup once when I overfilled and the milk burst out; now I always measure carefully.
Set the Right Frothing Mode
Select the appropriate setting on your super automatic espresso machine or frother—whether for frothing, steaming, or combined. Many machines have different modes; choosing the correct one ensures proper agitation and temperature. I once used the ‘hot milk’ mode for foam—result: flat milk—so I now double-check the function labels before starting.
Master the Technique of Positioning the Frother
Keep the frother tip just below the milk surface during start-up to introduce air efficiently. After initial frothing, sink the tip deeper to continue heating without aerating too much. I initially kept the tip too high, producing overly airy foam that deflated quickly. Practicing positioning improved my foam density and stability.
Adjust the Milk Texture
If your foam is too airy or too dense, tweak the frothing duration or milk temperature. Generally, 20-30 seconds produces a creamy, dense foam suitable for latte art. I experimented with shorter and longer cycles—finding the middle ground offered the best microfoam for pouring latte art.
Clean Your Equipment Promptly
After each use, rinse and dry all parts properly. Residue buildup hampers frothing quality over time. I once ignored cleaning and noticed a decline in foam stability; regular maintenance restored peak performance. For thorough cleaning, run a cleaning cycle if your machine supports it or wipe with a damp cloth.
Practice Consistently and Record Results
Frothing is as much art as science. Keep a log of milk types, temperatures, and settings that yield your best foam. I kept notes and refined my technique, leading to consistently excellent results. Remember, small adjustments can make a huge difference. For more tips on maintaining your super automatic espresso or understanding its quirks, visit our contact page or review these expert tips.Many coffee enthusiasts believe that owning high-end equipment guarantees perfect results every time. However, even seasoned baristas and home users often stumble over hidden nuances that can undermine their efforts. One prevalent myth is that all automatic milk frothers produce the same quality of foam; in reality, the differences in design, temperature control, and aeration methods significantly impact the final texture. According to coffee expert James Hoffmann, understanding these subtle technical variations allows you to optimize your foaming process, yet many overlook this critical aspect. This oversight can lead to dry, thin, or unstable foam, defeating the purpose of investing in premium gear.
Another common mistake involves misusing the espresso grinder. Many assume that grinding finer always yields more concentrated flavor, but excessive fineness can choke your machine’s workflow, causing uneven extraction and bitter taste. For example, a study published in the *Journal of Coffee Science* highlights how grind size consistency directly correlates with shot quality and machine longevity. Ensuring an optimal grind size and proper tamping are advanced steps often neglected by casual users, leading to subpar espresso shots.
But what about super-automatic espresso machines? Many users rely solely on their user manuals and ignore ongoing maintenance that preserves optimal performance. Over time, mineral buildup and residue can impair brewing consistency, producing weak or sour espresso. Regular descaling, as recommended by industry experts, is essential to avoid this trap. For thorough knowledge, consulting expert guides like the one on whether a super automatic is worth it can help refine your maintenance routine.
Finally, there’s a widespread misconception about bean quality. Many believe that select beans automatically translate into better coffee, but freshness, grind uniformity, and roast level are equally critical. An overlooked nuance is that oily beans, while visually appealing, can clog grinders and brewing mechanisms if not managed properly. Preventative measures, such as regular cleaning and selecting appropriate beans for your machine type, are vital. Learn more about maintaining your grinder to prevent choking issues in this detailed fix guide.
Have you ever fallen into any of these traps? Let me know in the comments! Mastering these nuances can take your coffee experience from good to exceptional. For extra insights into optimizing your equipment, check out our comprehensive bean-to-cup and automatic milk frother guide.
Investing in the Right Equipment for Long-Term Success
Owning high-quality espresso gear is only the first step. To ensure consistent, exceptional results over time, you need reliable tools and a solid maintenance routine. I personally swear by a few key items that keep my machine performing flawlessly: a precision grinder like the Baratza Virtuoso+ for its consistency, a calibrated tamper to achieve uniform tamping pressure, and a digital thermometer for accurate brewing temperatures. These tools allow me to fine-tune each shot and troubleshoot issues proactively.
Moreover, regular descaling solutions like Urnex Dezcal prevent mineral buildup that can impair performance, especially in hard water areas. I schedule routine descaling every one to two months depending on usage—trust me, this simple step extends the lifespan of your super automatic espresso machine and preserves its ability to produce rich crema. For detailed maintenance routines, I recommend consulting the ultimate guide to super automatic espresso machines in 2025.
How do I maintain my espresso machine over time?
Seamless maintenance involves more than just cleaning after each use. I also regularly lubricate moving parts, replace water filters, and calibrate certain components if your machine supports it. Maintaining water quality with filtered water reduces mineral deposits and improves taste. Another crucial aspect is inspecting and replacing worn seals and gaskets—worn parts can cause leaks and pressure issues that compromise your brew quality. Developing a maintenance schedule tailored to your specific model ensures longevity and consistent performance. For the most complex issues, reaching out to professional technicians or following manufacturer descaling and maintenance guides can save you troubleshooting headaches. To stay ahead of potential problems, I consult our contact page for expert advice when needed.
Tools That Make Home Barista Life Easier
Beyond basic maintenance, investing in quality tools like a dedicated cleaning brush set for grinder burrs or cleaning tablets designed for espresso machines can simplify routine care. I also rely on a small service kit that includes replacement seals and a torque wrench for reassembly after deep cleaning. These items might seem minor but are indispensable for avoiding downtime and costly repairs.
In the evolving world of coffee technology, smart accessories are becoming increasingly popular. For example, Bluetooth-enabled temperature probes connect to your smartphone, providing real-time brew insights and helping calibrate perfect extraction. With technology advancing rapidly, I predict that integrated diagnostic tools will become standard in more espresso machines, making upkeep more precise and less manual. To get ahead, consider integrating a calibrated digital thermometer like the Inkbird IBT-4XS—I’ve found it invaluable for tweaking brew temps to match the beans’ ideal profile.
Prioritize Consistency and Regular Checks
The key to lasting performance isn’t just quality gear but disciplined routines. Keep a log of maintenance tasks, calibrations, and tweaks to understand what yields the best espresso for your setup. Over time, small adjustments—like enhancing tamping pressure or adjusting grind fineness—will become second nature, resulting in more consistent shots and fewer surprises. Remember, your equipment’s health directly impacts flavor, crema, and overall coffee enjoyment. Take the habit seriously, and your investment will reward you with years of top-tier espresso experiences.
If you’re eager to deepen your understanding or need tailored advice, don’t hesitate to reach out through our contact page. And to automate some of your routine checks, exploring smart accessories like Bluetooth thermometers can elevate your maintenance game—investing in the right tools today ensures delicious coffee tomorrow.
What I Wish I Knew About Automatic Milk Frothers and Espresso Machines When I Started
The journey to consistently great coffee is filled with surprises, and one of the most eye-opening lessons I learned was how minor details drastically impact the final cup. For instance, preheating my equipment wasn’t just a tip—it was transformative, ensuring the microfoam didn’t just look good but maintained its silky texture until pouring. I also discovered that selecting the right milk temperature and being disciplined with cleaning routines prevented the dreaded flat or unstable foam. These real-world insights saved me from frustration and elevated my home barista skills far beyond what I initially thought possible.
My Essential Tools for Espresso and Milk Frothing Success
Over time, I built a toolkit that keeps my coffee at professional quality. The Baratza Virtuoso+ grinder’s consistency means no more excessive bitterness or weak shots, and a calibrated tamper ensures uniform tamping pressure. A digital thermometer like the Inkbird IBT-4XS provides precise temperature control, which is critical for extracting optimal flavors. Regular descaling solutions such as Urnex Dezcal prevent mineral buildup, protecting my investment and maintaining flavor clarity. These tools have become indispensable, and I encourage fellow enthusiasts to explore them to get the most from their equipment.
Believe in the Power of Routine and Small Adjustments
Consistency in coffee brewing hinges on discipline—tracking your grind size, tamping pressure, and milk temperature has made a visible difference in my results. Even minor tweaks, such as adjusting the position of the frother tip or timing the frothing cycle, can lead to foam with the perfect microbubbles that pour beautifully for latte art. By creating a maintenance routine—cleaning after every use, scheduling regular descaling, and calibrating your machine—you protect your investment and ensure each cup is as good as the last. Remember, the path to stellar coffee is paved with mindful habits and attention to detail, not just high-end gear.
Take Action to Elevate Your Coffee Ritual
Now that you’ve absorbed some of my personal lessons and curated tools, it’s your turn to refine your technique and routine. Experiment with small adjustments, invest in quality accessories, and maintain your equipment diligently. Every small step brings you closer to that perfect crema or velvety foam that makes every morning special. If you’re ready to dive deeper or need tailored advice, don’t hesitate to reach out through our contact page. The insightful resources available, like the ultimate guide to super automatic espresso machines, are there to support your journey. Your next best coffee moment is just a few small adjustments away—embrace the process and enjoy every sip!
![5 Automatic Milk Frothers That Won't Curdle Hemp Milk [2026]](https://superautomatic.espressotechguide.com/wp-content/uploads/2026/03/5-Automatic-Milk-Frothers-That-Wont-Curdle-Hemp-Milk-2026.jpeg)