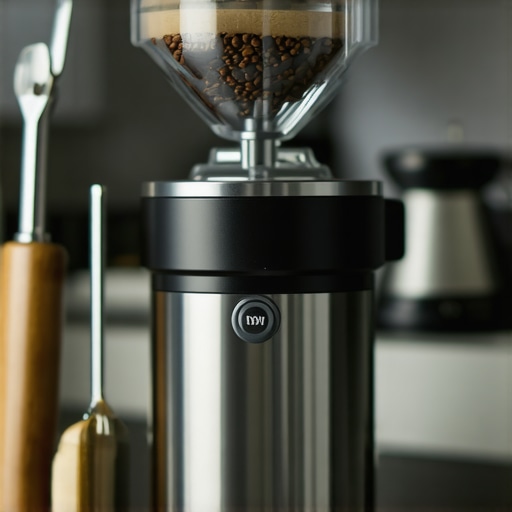
Picture this: you’re eagerly preparing your morning espresso, the aroma fills the kitchen, and then—your grinder suddenly jams, refusing to turn. It’s a frustrating moment that many coffee lovers face, especially when their beloved super automatic espresso machine or bean-to-cup grinder seems to stop working just as you need that perfect shot of coffee. I’ve been there myself, trapped in that pinch between wanting the perfect brew and battling equipment frustrations. That lightbulb moment came when I realized I wasn’t alone, and more importantly, I could fix this problem with some simple tricks.
Tackling the Common Grinder Choke Puzzle
So, why do espresso grinders choke? Often, it’s not a sign that your machine is past its prime but rather a sign that some routine maintenance or a minor tweak can get it running smoothly again. The key is understanding that grinders can clog due to stale coffee residues, oily bean particles, or even minor mechanical misalignments. Luckily, many of these issues are straightforward fixes that you can perform yourself without needing to call in the pros. But before we dive into these solutions, let me share a quick mistake so you can avoid the pitfalls I once stumbled into: I used a harsh cleaning chemical on my grinder, thinking it would do the trick, only to cause more clogs and damage. Trust me, a gentle approach is best when it comes to delicate grinder parts.
Is Fixing a Choked Grinder Really Worth It?
This is one of the biggest doubts I hear from fellow coffee enthusiasts. The answer is a resounding yes. Not only does fixing your grinder save money, but it also guarantees that your machine operates in optimal conditions, delivering the best flavor possible. Plus, understanding these fixes can extend the lifespan of your espresso gear, making every cup a pleasure instead of a chore. Curious to see how easy it can be? We’ll walk through six simple fixes that can solve common choking issues, restoring your coffee experience to its flavorful best. And if you’re interested in sharpening your overall espresso setup, I highly recommend checking out espresso grinder essentials to make sure your grinder stays clear and efficient.
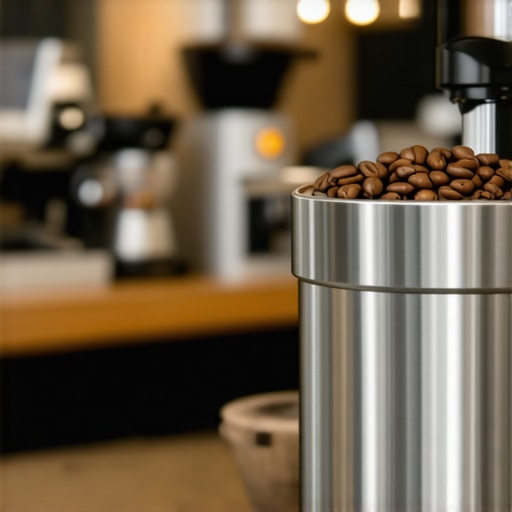
Clear Clogs and Residues First
Begin by unplugging your espresso machine and removing the bean hopper to access the grinding chamber. Use a small brush or a damp cloth to gently remove leftover coffee grounds and oily residues that cause jams. For stubborn buildup, a soft toothbrush dipped in warm water with a mild soap works well. I remember a time when I ignored this step and continued grinding stale beans, which only worsened the clog.
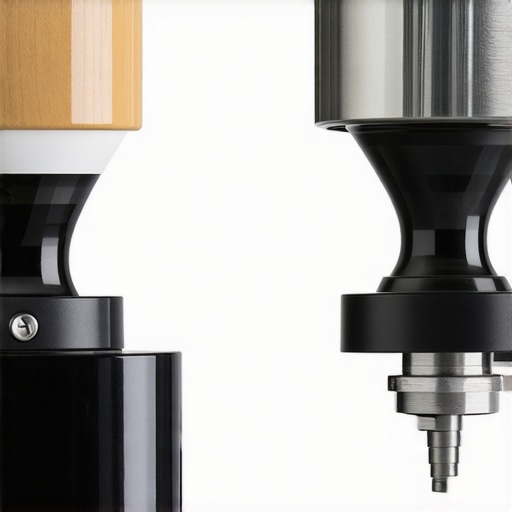
Disassemble with Care to Access Grinding Parts
Carefully unscrew the burr carrier or the grinding mechanism according to your machine’s manual, which you can find on this guide. Use a clean towel to catch small parts. Be cautious to note the orientation of the burrs and the order of parts for reassembly. During my initial attempt, rushing caused me to lose a tiny screw, delaying my fix.
Clean the Burrs and Mechanical Parts
Once disassembled, gently brush off any remaining coffee oils or debris with a dry cloth or soft brush. For oily residues, wipe parts with a damp cloth or use a vinegar solution diluted with water. Avoid harsh chemicals that can damage delicate aluminum or plastic parts—remember, gentle is key. After cleaning, dry all parts thoroughly before reassembling.
Realign and Test the Grinder
Reassemble the components in the reverse order, ensuring all screws are tightened securely but not over-tightened to prevent damage. Before plugging in your machine, manually turn the burrs to check for smooth movement. Power on the machine and run a few test grinds with a small amount of beans, observing for smooth operation. I once reassembled too quickly, which caused the burrs to misalign, leading to inconsistent grinding. Taking your time here pays off.
Adjust Grind Settings for Consistent Performance
If your grinder continues to choke, check if the grind size is too fine. Ultra-fine settings can cause blockages, especially with oily beans. Adjust to a slightly coarser grind and test again. For precise guidance, exploring espresso grinder essentials offers helpful tips. Remember, consistent cleaning and proper grind size are critical for a smooth grinding process and optimal extraction from your espresso machine.
 While many espresso enthusiasts focus on choosing the right machine or grinder, there’s a lesser-known trap: oversimplifying how these systems work. Most people believe that a higher-end bean-to-cup machine guarantees perfect coffee every time, but in reality, understanding the nuances—like grind consistency and maintenance—is crucial for optimal performance. Overlooking these details can lead to persistent issues, even with top-tier equipment. For instance, many assume that automatic milk frothers produce barista-quality foam without proper calibration. In my experience, misadjusted frothing parameters often result in flat or inconsistent crema, contradicting popular myths that all high-end frothers are foolproof. Advanced users know that fine-tuning settings based on milk type and temperature yields vastly better results. Curious about how to refine your setup? Check out espresso grinder essentials for expert tips on maintaining grind consistency. Additionally, many believe that regular cleaning is all that’s needed, but neglecting to inspect and replace worn burrs can drastically reduce extraction quality. Regularly measuring extraction times and analyzing the crema color can reveal hidden inefficiencies that simple cleaning won’t fix. Now, here’s a question for the advanced enthusiast:
How does the burr design influence grind uniformity and shot consistency in high-end grinders?
Studies suggest that conical versus flat burrs impact particle size distribution differently, affecting extraction and flavor. For example, conical burrs tend to produce a wider particle size spread, which can be advantageous for certain brewing profiles. Knowing the detailed specs and adjusting your grinding technique accordingly can elevate your espresso game significantly. Remember, the key isn’t just in owning the best gear but in understanding its nuances—so dive deep, experiment thoughtfully, and enjoy the journey. Have you ever fallen into this trap? Let me know in the comments.Maintaining your espresso setup, from bean-to-cup machines to automatic milk frothers, is essential for consistent performance and longevity. First, invest in high-quality cleaning tools like brushes specifically designed for burr grinders, such as the espresso grinder essentials. These tools help remove stubborn coffee oils and residues that can cause clogs over time. Using a soft-bristled brush ensures you don’t damage delicate parts while effectively clearing out residual oils. Regularly scheduled maintenance—say, monthly deep cleanings—can prevent build-up and mechanical issues, extending the lifespan of your equipment. An effective method I personally recommend involves disassembling the burr chamber, manually cleaning each component, and reassembling carefully, as detailed in this comprehensive guide. For long-term results, consider investing in a burr grinder with ceramic burrs, which resist dulling far longer than metal options, providing consistent grind quality over years. Predicting future trends, I see automation continuing to evolve with smarter maintenance alerts—imagine a machine that warns you when burrs are dull or lubrication is needed, reducing downtime.
What steps can I take to keep my espresso gear running smoothly over time?
Beyond routine cleaning, check detailed extraction tips to optimize grinder settings and avoid issues like channeling. Also, inspecting and replacing worn burrs before they cause uneven grounds is crucial. Experts recommend using tools like calibrated torque wrenches to ensure you tighten parts to manufacturer specifications, preventing misalignments that could reduce performance. In a 2026 technical review, experts highlight that proper calibration directly correlates with shot consistency and flavor stability. Don’t overlook the value of recording maintenance schedules and settings; maintaining detailed logs helps track wear and plan proactive replacements. I encourage you to try setting a quarterly maintenance routine with the right brushes and calibration checks—you’ll notice the difference in your brew quality and machine reliability.
Throughout this journey, it’s become clear that even the most advanced espresso machines rely heavily on the often-overlooked aspect of grinder care. The truth is, a well-maintained grinder is the silent hero behind every perfect shot of espresso. Investing time in proper maintenance not only ensures consistent flavor but also extends the life of your equipment, saving you money and headaches down the line. Remember, small habits like regular cleaning, gentle disassembly, and careful calibration can transform your coffee experience from mediocre to exceptional. So, embrace these insights, stay attentive to your grinder’s needs, and enjoy the rich, complex flavors that a meticulously maintained setup can deliver. Your perfect cup is well within reach—all it takes is a little love for your grinder.
![Why Your 2026 Espresso Grinder Burrs Trap Fine Dust [3 Fixes]](https://superautomatic.espressotechguide.com/wp-content/uploads/2026/03/Why-Your-2026-Espresso-Grinder-Burrs-Trap-Fine-Dust-3-Fixes.jpeg)