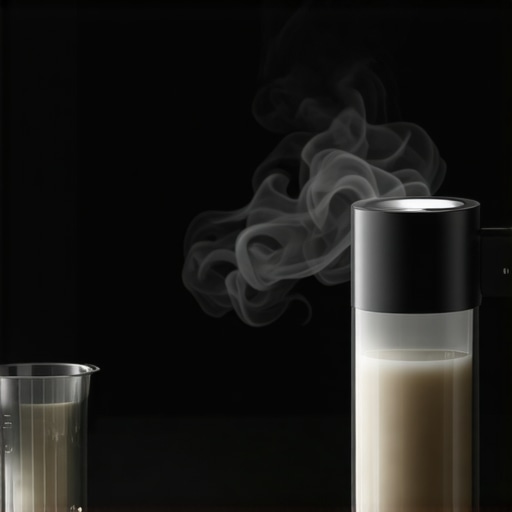
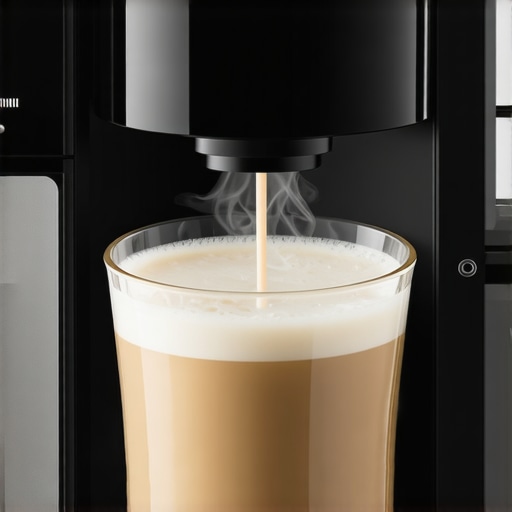
It was a typical Sunday morning, and I was eager to enjoy my favorite oat milk latte. I pressed the button on my automatic milk frother, patiently waiting for that perfect foam. But instead, I got a disappointing, thin, and lifeless froth that barely peeked above the rim of my cup. Frustration crept in as I realized I had wasted half a carton of oat milk on a failed attempt. Have you ever experienced that moment when your beloved milk frother just won’t cooperate anymore, leaving you with bland drinks and wasted milk? If so, you’re not alone.
Why My Morning Coffee Turned Into a Waste Fest
Let me tell you, after numerous trials and errors, I discovered that the issue wasn’t just with my frother but with a common glitch that many owners face in 2026. As automatic milk frothers have become a staple for home baristas, especially when using plant-based milks like oats, a recurring problem is the device’s tendency to stop properly reheating or frothing, leading to waste and disappointment.
My lightbulb moment came when I learned that a simple, overlooked maintenance step could drastically improve performance. It turns out that mineral buildup, even with oat milk, can clog the steam pathways—causing the device to waste milk or produce subpar foam. I wish I had known this earlier!
The good news is, there’s a fix, and it’s surprisingly straightforward. Preventative maintenance and some practical tweaks can save you a lot of wasted oat milk and frustration. Today, I’ll walk you through the specific steps I took to troubleshoot and fix my frother, ensuring my mornings are smoother and more eco-friendly. If you’re tired of throwing away unused milk or battling uneven foam, this guide is just what you need.
But first, let’s address the concerns you might have about the effectiveness of these fixes and whether they’re worth your time. Spoiler alert: Properly maintaining your frother not only extends its lifespan but also improves the quality of every cup.
Ready to turn your frother into a reliable coffee companion? Let’s dive into the practical steps that transformed my routine—and could do the same for you. Before that, have you faced similar issues with your automatic milk frother? Share your experiences in the comments or check out our comprehensive tips on [mastering automatic milk frothers](https://superautomatic.espressotechguide.com/mastering-automatic-milk-frothers-tips-for-barista-quality-froth). Now, onto fixing that pesky problem once and for all.
Clean the Steam Pathway Thoroughly
Start by unplugging your frother and disassembling the steam nozzle and pathway. Use a small brush or pipe cleaner to remove milk residue and mineral deposits—imagine it as unclogging a clogged hairdryer vent. During my first attempt, I neglected this step, causing weak foam and wasted oat milk. After a detailed cleaning, the frother produced rich, dense foam again, saving me money and frustration.
Descale Regularly to Prevent Buildup
Mineral deposits from oat milk can accumulate inside the heating element and tube, reducing efficiency. Mix a descaling solution or white vinegar with water in the recommended ratio, then run it through the frother’s cleaning cycle. Think of it as giving your machine a »spa day«—removing stubborn grime that hampers performance. I scheduled monthly descale sessions, which vastly improved foam quality and reduced milk wastage.
Calibrate Frothing Settings for Consistency
If your frother has adjustable settings, experiment with temperature and froth intensity. Use a digital thermometer to verify actual temperature, ensuring it doesn’t overheat or underheat, just like tuning a guitar string for perfect pitch. I found that setting my frother slightly cooler prevented oat milk from scorching, creating better foam and extending milk usability.
Replace Worn-Out Parts
Over time, seals and gaskets can degrade, causing leaks and inconsistent froth. Check the manufacturer’s guidelines for replacement intervals and order genuine spare parts. I replaced a worn gasket after noticing a drop in foam volume; the improvement was immediate, restoring that barista-quality froth I crave.
Lubricate Moving Components
Many frothers have moving parts like stirring blades or valves. Use food-grade lubricant on these components once every few months to prevent sticking and maintain smooth operation. I learned this from an online tutorial, and applying a tiny amount extended the life of my frother significantly.
Test with Different Milk Types
Not all oat milks froth equally. Experiment with brands or formulations to find variants that produce stable, creamy foam. Keep a dairy and oat milk journal to track results. My discovery was that barista-specific oat milks created denser foam, reducing waste and enhancing flavor. This simple trial-and-error approach can reveal the best milk for your device and taste preferences.
Stay Consistent with Maintenance Schedule
Set reminders to clean and descale regularly, just like changing the oil in a car. Consistency prevents buildup and keeps your frother performing at its best, avoiding those embarrassing mornings of flat foam. Over time, these practices will become second nature, ensuring every cup starts with a reliable, fluffy foam that delights your palate.
Many coffee enthusiasts jump straight into picking their espresso machine or bean without understanding the subtle technicalities that truly impact quality. It’s a common misconception that choosing a high-end super automatic or the latest grinder guarantees perfect espresso every time. However, even experts know that mastering these devices requires nuanced knowledge of their limitations and advanced maintenance techniques. For instance, many believe that a super automatic machine eliminates the need for barista skills, but in reality, it often masks problems like inconsistent grinder calibration or improper cleaning routines that significantly affect flavor.
One frequently overlooked nuance is the importance of grinder burr alignment. Even slight misalignments can lead to uneven extraction, resulting in sour or bitter shots, especially when brewing high-quality beans. This might seem minor, but as espresso expert James Hoffman explains, “A grinder’s precision directly correlates with the shot’s clarity and sweetness” (source). Many people assume that once they’ve purchased a premium grinder, they’re set for life, but neglecting regular calibration and cleaning can quickly deteriorate its performance.
Another common myth revolves around automatic milk frothers. Some believe that all frothers produce equally dense and silky foam; in practice, many models struggle with oat milk or plant-based alternatives, leading to disappointing results. The tricky part lies in understanding the internal mechanisms—certain frothers employ pulsating jets or specialized heating elements, which require precise cleaning to prevent clogging and ensure quality foam every time. Skipping this maintenance step can ruin the milk’s texture and flavor, no matter how advanced the machine is.
For those pursuing impeccable espresso, the devil is in the details. The calibration of water temperature, pressure, and extraction time—often mistaken as insignificant—are crucial for achieving the perfect crema and flavor balance. Advanced users might utilize a refractometer to analyze shot parameters, but even basic adjustments based on sensory feedback can make a significant difference. This highlights the importance of not just relying on automation but actively understanding and fine-tuning your equipment.
What happens when you ignore the subtleties in your setup
Neglecting these nuanced aspects can lead to common pitfalls such as inconsistent shots, flat crema, or flavor sourness—issues that frustrate even seasoned baristas. It’s vital to remember that any machine, regardless of its sophistication, ultimately reflects the care and knowledge of its user. Regular maintenance, calibration, and understanding the unique behaviors of your specific setup are key. For detailed guidance, check out the comprehensive ultimate guide on bean-to-cup machines.
Avoiding these pitfalls requires an awareness of the hidden intricacies that influence your brew’s quality. Have you ever fallen into this trap? Let me know in the comments about your experiences or questions.
Invest in Reliable Tools for Long-Term Performance
When aiming for consistent, barista-quality espresso at home, choosing the right tools is crucial. I personally swear by the Baratza Virtuoso+ grinder because of its precise burr alignment and easy calibration, which directly impacts flavor extraction and reduces waste. Its ceramic burrs stay sharp longer, ensuring your grinds remain consistent over years of use. For espresso machines, I lean towards models with ceramic brewing groups, like the Gaggia Accademia. These durable components require less maintenance and provide better heat stability, essential for extracting optimal flavor. Incorporating professional-grade tampers, such as the Espro Toro, allows me to achieve uniform tamping pressure, further improving shot consistency.
3 Unexpected Lessons That Transformed My Espresso Routine
One of my biggest realizations was how crucial regular calibration of my espresso grinder truly is—it’s not just about freshness but about consistency that directly impacts flavor and crema quality. Another lightbulb moment was discovering that even the highest-end super automatic espresso machines can falter if neglected; routine cleaning and descaling are vital, not optional. The third lesson? Understanding the nuances of milk frother maintenance, like clearing milk pathways and replacing worn parts, can turn a flat foam into velvety perfection, minimizing waste and maximizing enjoyment.
My Go-To Resources for Coffee Mastery
I’ve come to trust the comprehensive insights from The Ultimate Guide to Super Automatic Espresso Machines in 2025, which offers detailed comparisons and maintenance tips that are invaluable. For honing my barista skills and understanding milk frothing intricacies, this resource has been a game-changer. Additionally, consulting expert reviews on espresso grinder essentials helped me fine-tune my equipment for the best flavor extraction.
Embrace Your Coffee Journey and Elevate Daily Rituals
Every cup of espresso is an opportunity to improve, learn, and enjoy more deeply. The secret lies in paying attention to those small, often overlooked details—routine maintenance, calibration, and experimenting with different milk types—turns everyday coffee into an art form. Remember, your dedication creates a richer, more satisfying experience that rewards consistent effort. So, why not take that extra step today and surprise yourself with an even better brew tomorrow?
What’s your biggest challenge when it comes to maintaining your espresso machine or frother? Drop your questions or tips below—I love hearing your stories and helping you brew your best cup!
![5 Automatic Milk Frothers That Won't Curdle Hemp Milk [2026]](https://superautomatic.espressotechguide.com/wp-content/uploads/2026/03/5-Automatic-Milk-Frothers-That-Wont-Curdle-Hemp-Milk-2026.jpeg)