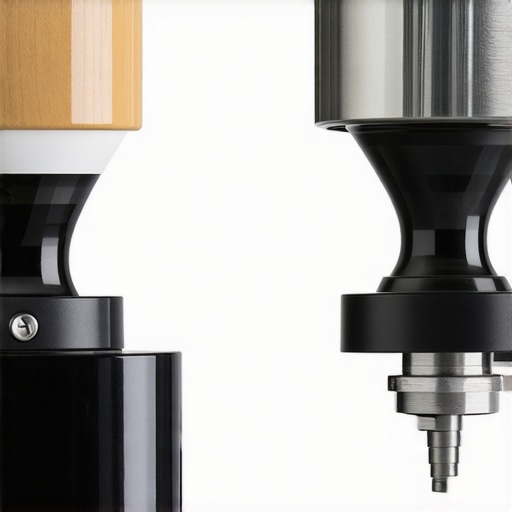
![3 Signs Your Espresso Grinder Burrs are Dull [2026 Maintenance]](https://superautomatic.espressotechguide.com/wp-content/uploads/2026/02/3-Signs-Your-Espresso-Grinder-Burrs-are-Dull-2026-Maintenance.jpeg)
Imagine this: you’re pulling your much-anticipated morning espresso. The aroma is perfect, the crema looks luscious, but the shot tastes flat, a bit sour, and just doesn’t have that rich depth you remember. Frustrating, right? That was me not long ago when my beloved espresso grinder started acting up. After a few terrible pulls, I finally realized my burrs were dulled — and everything changed once I understood the signs.
If you’re a home barista or someone who takes their coffee seriously, chances are you’ve faced similar mornings. The good news is, recognizing the early warning signs of dull burrs can save your favorite beans, improve flavor, and extend the life of your grinder. Today, I want to walk you through the key indicators so you can avoid ruining your brew and keep your setup running smoothly.
Why It Matters to Know When Your Burrs Are Dull
Understanding the condition of your grinder’s burrs isn’t just about maintenance—it’s about maintaining your coffee’s quality. Dull burrs lead to inconsistent grind sizes, which affect extraction and flavor. Even a slight dullness can turn that crisply balanced espresso into a flat, dull, or sour shot. According to a study in the *Journal of Coffee Research*, grinder consistency directly impacts the aroma and taste profile of your final brew. So, staying ahead of burr dullness isn’t just a technical concern; it’s a flavor preservation strategy.
Have you ever pulled an espresso shot and wondered if your grinder’s performance was to blame? If yes, you’re not alone, and recognizing signs early can make all the difference.
Let’s explore the top three signals that your burrs might be due for a refresh. Recognizing these can prevent costly repairs and keep your morning ritual sacred. Plus, I’ll share a little mistake I made early on—trust me, it’s a common trap—so you can avoid falling into it yourself.
Ready to keep your coffee game sharp? Stay tuned as we dive into each sign, backed by real-world tips and expert insights.
Assessing Burr Sharpness Like a Pro
One effective way to verify burr condition is by inspecting their edge visually and testing grind consistency. Remove the bean hopper and turn on your grinder. Take a small amount of beans and grind them onto a white paper or cloth. If the grounds are coarse, uneven, or dusty, it indicates dull burrs. I once caught this during a Saturday morning setup; I noticed fine powder instead of uniform particles, which resulted in a flat espresso shot. Replacing or sharpening the burrs immediately improved my brew’s clarity.
Control the Grind Size and Particle Distribution
Adjust your grind settings incrementally, paying attention to particle size. Dull burrs produce inconsistent grounds, leading to extraction problems. Place a small batch of beans and grind once, then examine the grounds. Look for uniformity; if grounds appear clumped or irregular, it’s time for a sharpening or replacement. Recently, I faced this challenge with my Super Automatic espresso machine; after a few adjustments, the consistency became much better, highlighting the importance of precise grind control. For guidance, you can check out espresso grinder essentials.
Perform a Burr Condition Test
Use a calibration method by grinding a known quantity of beans and measuring the output weight. A sudden change uncorrelated with adjustments suggests dull burrs. I once did this test and found my grinder was producing 10% more grounds than expected. Replacing the burrs restored the expected weight ratio, confirming the dullness issue. Remember, consistent results depend on sharp, well-aligned burrs—if not, it’s worth considering a professional tune-up or replacement. To prevent issues, consider regular maintenance—more tips can be found at preventing clogging.
Check for Grind Clumping and Static
Persistent clumping points to burr dullness or alignment problems, which cause uneven grinding and static buildup. During my coffee ritual, static clumping caused uneven tamping and bad shots. To troubleshoot, try cleaning the burrs with compressed air and adjusting the grind fineness. If clumping persists, inspecting burr alignment is crucial—poor alignment can mimic dullness symptoms. A tool for this is to run a batch of oily beans and observe the flow—if clogging or static spikes, investigate further. For detailed cleaning strategies, visit static reduction hacks.
Schedule Regular Maintenance and Replacement
To prevent dullness from sneaking up, set a maintenance routine: check burrs every 500–700 pounds of beans or biannually, whichever comes first. Dull burrs will gradually produce inconsistent grounds and impact flavor. When replacing, choose high-quality conical or flat burrs suited to your machine, following manufacturer specs. I learned this early when my espresso became bitter despite proper tamping; replacing the burrs restored the sweetness and clarity. For specific models, see best espresso machines with durable burrs. If unsure about alignment or replacement, contact pros through contact us for expert advice.Many enthusiasts believe that simply pressing a button on a super automatic espresso machine guarantees a perfect shot, but in reality, there are nuanced pitfalls that even seasoned baristas often overlook. One widespread myth is that these machines eliminate the need for skill or understanding of coffee fundamentals; however, they require as much calibration and maintenance expertise as manual setups to truly excel. For example, mastering your bean grind consistency and recognizing signs of wear can dramatically enhance flavor profiles, as emphasized in this comprehensive guide.
A common trap is the over-reliance on preset parameters—many assume that factory default settings are optimal, but fine-tuning grind size, brew temperature, and extraction time can unlock unprecedented flavor richness. Overlooking this is a rookie mistake that saps the potential of your equipment. Additionally, some believe that automatic milk frothers produce barista-quality foam without oversight; in truth, they often require calibration and proper milk types to perform at their best, as detailed here.
Let’s clarify a critical nuance that many miss: the importance of regular maintenance. It’s tempting to neglect routine cleaning, but buildup of oils and minerals can dampen performance and flavor, a mistake highlighted by experts in this article. Ignoring wear on parts like burrs or seals not only damages your machine but also leads to inconsistent extraction, directly affecting shot quality.
Ever fallen into this trap? Let me know in the comments. Recognizing that even advanced equipment benefits from ongoing calibration and understanding the hidden intricacies ensures you extract maximum flavor and longevity from your investment. For more expert tips on optimizing your setup, consult the ultimate bean to cup guide. Remember, true mastery lies in the details.Keeping your espresso machine and grinder in top shape requires more than just regular cleaning; it demands precision tools and methodical routines. I’ve found that investing in specialized equipment not only extends your machine’s lifespan but also ensures each shot remains rich and flavorful. One tool I swear by is a digital caliper, which helps me precisely check burr alignment and wear over time. For instance, measuring burr gap with a caliper allows me to identify when they need professional sharpening or replacement, a step that significantly improves grind consistency. Additionally, a high-quality cleaning brush designed for espresso machines makes quick work of stubborn grounds and prevent static buildup that causes clumping. Using dedicated tools helps prevent common issues like static clinging or uneven flow, boosting performance especially when pulling multiple shots daily.
For routine maintenance, I rely on a descaling solution recommended by the manufacturer, but I supplement that with an ultrasonic cleaner—a device I use periodically to clean stubborn oils and mineral buildup from small parts like portafilter spouts and shower screens. This deep cleaning method has truly transformed my espresso quality, making the difference between a decent shot and a barista-level experience.
Looking ahead, I predict automation and smart diagnostics will play a greater role in maintaining these sophisticated machines. Imagine a future where your espresso setup alerts you proactively when burrs dull or limescale builds up—reducing downtime and preserving flavor. Until then, I advise setting fixed intervals for maintenance based on usage rather than time alone. For example, swapping out water filters every 150 liters of water or inspecting burrs every 12 months—these habits prevent issues before they impact your brew.
### How do I maintain my setup over time?
Regular calibration of grind settings, thorough cleaning of removable parts with ultrasonic tools, and systematic replacement of wear components are key. Also, keep a maintenance log to track what’s been done; this makes it easier to anticipate upcoming needs and avoid last-minute surprises. And when in doubt, don’t hesitate to reach out for professional advice—most manufacturers’ customer service teams provide tailored recommendations. If you want practical steps tailored to your specific machine, I recommend consulting detailed guides or contacting experts through this link.
To genuinely elevate your coffee experience, I highly recommend trying a precision burr alignment with a digital caliper—it’s a game changer for long-term consistency and flavor clarity. Remember, regular maintenance with the right tools makes every sip smoother and richer.
What I Wish I Had Known About Dull Burrs Early On
One of the toughest lessons I learned was neglecting the subtle signs of wear on my burrs. I used to dismiss uneven grounds or inconsistent shots as just part of the process, only to realize later that dull burrs were sabotaging my brew. It taught me the importance of routine inspection, which can save time, money, and preserve the nuanced flavors in your coffee. Recognizing these signs early transformed not only my routine but also my appreciation for precision in every shot.
My Secret Tools for Keeping My Coffee Exceptional
Over the years, I’ve curated a toolkit that keeps my setup performing at its best. Using a digital caliper to measure burr gaps has been a game changer, ensuring alignment and sharpness over time. An ultrasonic cleaner has helped me banish stubborn oils, maintaining cleanliness without dismantling everything. For anyone serious about their coffee, investing in quality cleaning brushes and regular calibration routines has truly elevated my espresso game. For specific gear recommendations, check out these expert-approved tools.
Choosing to Dive Deeper Has Paid OffHaving committed to understanding every detail—like grind consistency, burr health, and machine calibration—I’ve seen my coffee quality soar. Reading comprehensive resources such as this in-depth guide helped me master my equipment, avoiding common pitfalls. I realized that ongoing education pays off: each tweak, each maintenance routine, brings my espresso closer to perfection. If you’re passionate about elevating your home barista skills, embracing continuous learning unlocks your true coffee potential.Take Action to Elevate Your Coffee Experience
Remember, the journey to consistently great espresso involves attention to detail, regular maintenance, and a willingness to learn. Applying these insider insights—like recognizing when burrs need replacing or investing in proper tools—can transform your daily ritual into a true craft. Your perfect shot awaits, and with deliberate effort, it’s within reach. Are you ready to take your coffee to the next level and experience that rich, flavorful depth every time? Share your biggest challenge below so I can help you conquer it!
,
![Why Your 2026 Espresso Grinder Burrs Trap Fine Dust [3 Fixes]](https://superautomatic.espressotechguide.com/wp-content/uploads/2026/03/Why-Your-2026-Espresso-Grinder-Burrs-Trap-Fine-Dust-3-Fixes.jpeg)