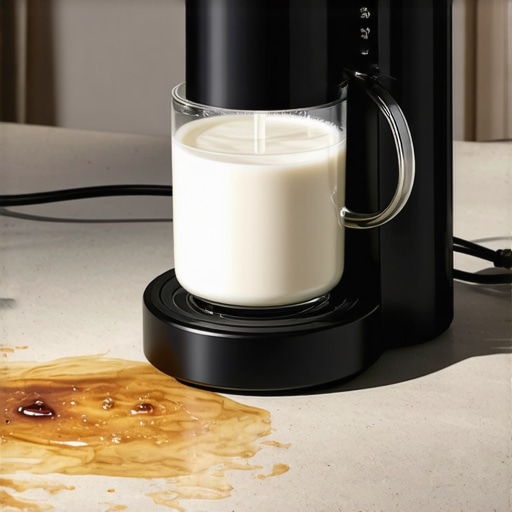
I vividly recall making my morning latte only to be greeted by a thick, sticky, burnt film coating the inside of my milk frother. The smell was overwhelming, and I wondered, “Is this normal? Why does it always happen right when I need my caffeine boost the most?” That frustrating moment was a lightbulb moment for me — I realized I wasn’t alone in facing this issue with my 2026 automatic milk frother. Since then, I’ve delved into the common causes and effective solutions, and I’m here to share what I’ve learned.
How a Simple Morning Mistake Can Lead to That Unwanted Burnt Film
Many automatic milk frothers, especially those from 2026, tend to develop a sticky burnt film over time. This isn’t just a cosmetic nuisance; it can affect the flavor of your coffee and even damage your device if left unaddressed. The primary culprit often isn’t poor quality but rather user habits and maintenance oversights. Early on, I made the mistake of never cleaning the frother thoroughly after each use, assuming a quick rinse was enough. That misstep led to buildup, which then baked onto the surfaces during subsequent heats. Eventually, a stubborn burnt film formed, and my frother’s performance suffered.
Understanding why this buildup occurs is crucial. It turns out that proteins, milk sugars, and minerals in milk can caramelize and create a sticky residue if not properly cleaned. The problem worsens with certain milk types like cashew or almond milk, which tend to scorch more easily. Interestingly, a recent study noted that improper cleaning habits can significantly reduce the lifespan of milk frothers, emphasizing the importance of regular maintenance (source).
If you’re tired of scraping burnt residue or dealing with less-than-perfect foam, don’t worry. Today, I’ll walk you through the best practices to prevent and eliminate that sticky, burnt film, restoring your frother’s pristine performance. But first, let’s address a common concern I hear from many espresso enthusiasts.
Is Cleaning Your Milk Frother Really Worth the Effort?
At first, I thought skipping a proper clean was no big deal, especially on busy mornings. But neglecting this simple step led to persistent issues, costly repairs, and, honestly, ruined coffee experiences. Regular cleaning and maintenance are vital, and I’ll share some quick tips that make the process effortless. Confidence in your equipment directly translates to better coffee — and who doesn’t want that? If cleaning feels like a chore, you might want to check out this guide for expert tips on keeping your frother in top shape.
With that in mind, let’s move forward and explore how to prevent that burnt film from forming in the first place — saving you time, money, and a lot of frustration in the process.
Rinse Immediately After Each Use
Immediately after frothing milk, rinse your frother with warm water to prevent milk residues from baking onto surfaces. I learned this the hard way when I skipped rinsing one morning, and sticky residue hardened overnight, making cleaning a nightmare. By establishing a habit of quick rinsing, I kept buildup at bay, and my frother stayed clean for months.
Use the Right Cleaning Tools and Solutions
Opt for a soft brush or a microfiber cloth combined with a mild, non-abrasive cleaning solution. Avoid harsh chemicals that can damage seals or surfaces. I once tried using abrasive pads, which scratched the interior, leading to more issues. Now, I stick with gentle brushes and natural cleaners, which dissolve milk fats effectively without harming my device.
Perform Regular Deep Cleans
Every two weeks, do a deep clean by disassembling the frother and soaking parts in a vinegar solution (1 part vinegar to 3 parts water) for 15 minutes. Rinse thoroughly afterward. When I first started, I neglected this step, and a stubborn burnt film formed. After adopting regular deep cleans, my frother’s performance improved and maintained a pristine look.
Calibrate and Set Temperatures Correctly
Incorrect temperature settings can cause milk to scorch, promoting residue buildup. Follow your machine’s manual to calibrate the temperature for optimal frothing. I once accidentally set my temperature too high, resulting in burnt milk on the surfaces. Adjusting to the recommended settings solved the problem immediately.
Choose Milk Wisely and Prepare Products Properly
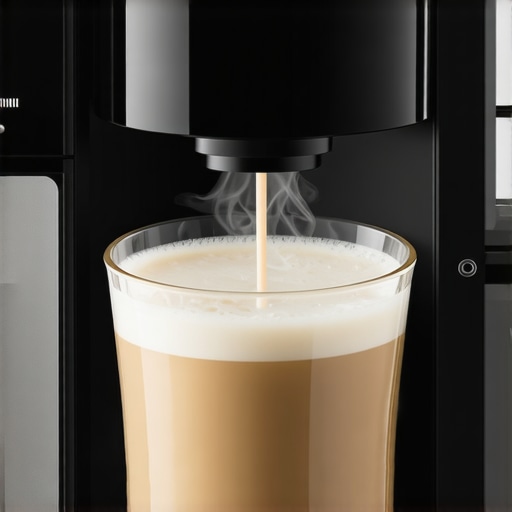
Using milk types like almond or cashew milk can increase the risk of scorching. Opt for whole milk or specially formulated frothing milk if you’re prone to buildup. Additionally, warming the milk slightly before frothing can reduce strain on the device, preventing residues. I found switching to oat milk with the right temperature settings to be a game-changer, reducing burned film formation.
Implement Routine Maintenance Checks
Regularly inspect seals, valves, and the frother’s interior for signs of residue or wear. Immediate intervention prevents larger issues later. Once, I noticed a slight smell of burnt milk, which tipped me off to a clogged valve. Cleaning it promptly avoided costly repairs and kept my frother running smoothly.
Leverage Expert Tips and Resources
If you’re struggling despite these steps, consult specialized guides like these expert tips for tackling specific issues. Implementing each recommended step progressively will ensure your frother remains in optimal condition, avoiding that sticky, burnt film altogether. Remember, consistent maintenance is key to extending the lifespan of your appliance and maintaining perfect foam every morning.Many enthusiasts believe that choosing the latest super automatic espresso machine guarantees perfect coffee every time, but in my experience, that’s a misconception. The truth is, these machines require an understanding of subtle nuances to truly excel. For instance, many assume that high-end features automatically result in better shots, yet neglecting proper grinder calibration or routine maintenance can severely compromise flavor and longevity. This oversight is a common trap, often masked by marketing hype. According to coffee expert James Hoffmann, mastering minor adjustments like grind size and tamping pressure can significantly improve espresso quality, even on sophisticated machines.
One hidden nuance is the importance of precise pre-infusion settings. Many users overlook how a few milliseconds extra or less can change the crema and flavor profile, especially with different bean types. Overlooking this step can lead to bitter or weak shots, defeating the purpose of a super automatic machine. Additionally, there’s a widespread myth that automatic milk frothers are foolproof; however, neglecting to regularly clean and calibrate the frothing system can result in flat foam or, worse, milk scalding. Regular deep cleaning and understanding milk properties are essential—these tips can help.
Are you aware of the advanced calibration options most machines offer? Tuning parameters such as water temperature, shot volume, and flow rate can be the difference between good and exceptional espresso. Yet, many users stick to defaults, missing out on making their machine work optimally based on their specific beans and preferences. Misjudging the roast level is another trap—dark roasts require different grind and extraction settings compared to light roasts, affecting both flavor and machine performance. For detailed guidance, check this comprehensive article.
Finally, understanding the machine’s internal mechanics and staying vigilant for signs of wear can prevent costly repairs down the line. Regularly inspecting seals, valves, and grinders ensures consistent performance. As Hoffmann mentions, engaging with these nuanced details elevates your barista skills at home. Have you ever fallen into this trap? Let me know in the comments.
Maintaining Your Equipment for Long-Term Success
Investing in the right tools is crucial for preserving the performance and longevity of your super automatic espresso machine. Personally, I swear by using a high-quality espresso grinder with ceramic burrs. Not only do they minimize heat transfer during grinding, but they also produce a more consistent grind, which translates into richer, more flavorful shots. Proper calibration, as discussed in this article, is fundamental for maintaining optimal extraction and preventing common issues like channeling or under-extraction.
In addition, a routine descaling kit is indispensable, especially if you live in areas with hard water. Regular descaling prevents mineral buildup that can clog internal sensors and channels, maintaining water flow integrity. I personally prefer using citric acid-based descaling solutions because they’re effective yet gentle on the machine’s components.
For cleaning milk frothing systems, specialized brushes designed for small, intricate parts help dislodge milk residues without damaging seals. This is particularly important for automatic milk frothers, which are prone to buildup and scalding if not properly maintained. As a tip, dedicated cleaning cycles—if your machine offers them—should be performed at least monthly to stave off problems like scalding or microbial growth.
How do I maintain my super automatic espresso machine over time?
Consistent routine checks are the backbone of maintaining your machine long-term. This includes inspecting seals and valves for signs of wear, and replacing parts before they fail. Moreover, keeping your software updated ensures you benefit from manufacturer improvements and bug fixes, which can improve consistency and performance. For instance, many newer models offer diagnostic tools accessible via their control panels or companion apps, making maintenance easier and more proactive.
Furthermore, regularly inspecting and cleaning internal sensors will safeguard against inaccurate readings that may lead to subpar extraction or brewing errors. For guidance tailored to your specific machine, consulting the support resources can provide invaluable advice.
Looking ahead, the trend is moving toward smarter, self-maintaining systems that automatically perform diagnostics and even suggest maintenance schedules. By staying ahead of issues with these advanced tools, you can minimize downtime and keep your brewing experience consistently exceptional.
Try incorporating a comprehensive calibration routine, such as adjusting your bean grinder settings for dark roasts, which can be found here. This small step significantly impacts the flavor profile and machine longevity. Remember, a well-maintained machine isn’t just about clean cups — it’s about saving money and ensuring your daily brew remains perfect for years to come.
< >
>
The Hardest Lesson I Learned About Super Automatic Espresso Machines
It took me countless mornings and many wasted beans to realize that even the most advanced super automatic espresso machines aren’t foolproof without proper maintenance. The biggest mistake I made was neglecting routine cleaning, which led to persistent buildup and disappointing shots. Sometimes, the simplest habits—like rinsing right after use—can dramatically improve flavor and machine longevity. This experience taught me that patience and consistent care are the true baristas behind every perfect cup.
3 Myths About Bean Selection That Held Me Back
I used to believe that expensive, exotic beans automatically resulted in better espresso. Turns out, freshness and proper grind size matter more. Switching to high-quality, freshly roasted beans and calibrating my grinder based on these expert tips made a noticeable difference. The myth that more expensive beans are always best delayed my progress—I learned that smart sourcing and storage are key to unlocking true flavor.
Why Micro-Adjustments Can Transform Your Routine
Small tweaks like adjusting the pre-infusion time or temperature can elevate your espresso from good to exceptional. I once thought I just needed the latest machine, but after experimenting with calibration techniques, I discovered that minor modifications make a profound difference. These insights taught me that mastering the details is where true barista mastery begins, even with advanced equipment.
Where to Go from Here
If you’re serious about elevating your espresso game, investing in quality tools like a precise grinder (these grinder essentials) and maintaining your machine regularly can pay dividends. Remember, the journey isn’t just about owning high-tech gear but understanding and caring for it. Dive into the resources above, experiment patiently, and soon you’ll find that your super automatic becomes a true extension of your barista spirit.
Your Next Espresso Could Be Your Best Yet
Don’t let hidden pitfalls or overlooked details rob you of that perfect shot. Embrace the learning process, and the satisfaction of great espresso will follow. Your super automatic espresso machine isn’t just a gadget; it’s a gateway to daily joy. Are you ready to turn routine into ritual and craft coffee that truly excites? Share your biggest challenge below—I’d love to hear how you’re customizing your brewing experience.
![5 Automatic Milk Frothers That Won't Curdle Hemp Milk [2026]](https://superautomatic.espressotechguide.com/wp-content/uploads/2026/03/5-Automatic-Milk-Frothers-That-Wont-Curdle-Hemp-Milk-2026.jpeg)

Emily Carter
I completely relate to the frustration of dealing with that sticky burnt film in my milk frother. I used to think skipping thorough cleaning was time-saving, but the buildup created not only a burnt residue but also affected the frothing quality. Now, I make it a habit to rinse immediately after each use and do a deep clean monthly with vinegar solutions, which has made a huge difference. It’s interesting how much these small maintenance routines impact the lifespan and performance of the device. Have others found that adjusting the frother’s temperature settings helps prevent scorching? I’ve noticed that maintaining the right temperature is a game changer, especially when working with alternative milks. Would love to hear more tips from fellow coffee enthusiasts on keeping these machines in top shape for that perfect morning brew.