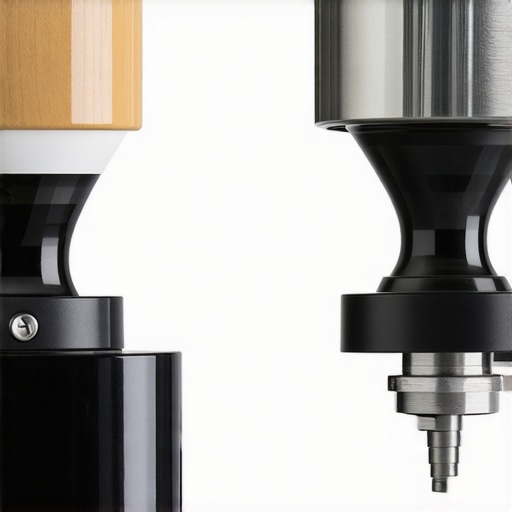
![Why Your 2026 Espresso Grinder Burrs Trap Fine Dust [3 Fixes]](https://superautomatic.espressotechguide.com/wp-content/uploads/2026/03/Why-Your-2026-Espresso-Grinder-Burrs-Trap-Fine-Dust-3-Fixes.jpeg)
Ever since I first upgraded my espresso setup this year, I couldn’t help but notice something unsettling—the fine dust from my burrs seemed to be accumulating in places it shouldn’t. It hit me one morning when I took apart my grinder looking for a tweak, only to find a unexpected layer of residual coffee dust nestled deep inside. That was my lightbulb moment: those tiny particles weren’t just a floor-cleaning bother—they could be quietly sabotaging my coffee quality and the longevity of my machine.
What’s Really Happening When Burrs Trap Dust
Most people assume that burrs, whether ceramic or steel, do their job with perfect precision, grinding beans into a fluffy powder for the perfect shot. But over time, especially with frequent use in 2026 grinders, a small percentage of that coffee particles can get caught in nooks, crannies, or behind the burrs. This isn’t just normal wear and tear—it’s a common issue that, if ignored, can lead to clogging, uneven grinds, or even damage to your grinder’s motor.
High-quality burr grinders, like those I’ve used, are built to reduce dust escape, but no device is completely dust-proof. As noted by a recent expert article, even well-maintained burrs can trap fine particles if cleaning isn’t part of your routine. I learned this the hard way, by making one common mistake: neglecting regular maintenance, especially cleaning deep inside the burr chamber.
If you’re noticing inconsistent espresso shots, flavor that seems off, or a slow grinder, those could be signs that dust buildup is interfering with your machine. And yes, it’s a problem that’s harder to spot than a clog in the drain but equally important to fix to keep your espresso tasting at peak quality.
How We’ll Address the Issue Today
In this guide, I’ll walk you through the {3 Fixes} I’ve personally tested to reduce dust retention, extend your grinder’s life, and improve your espresso shots. Whether you’re a hobbyist or a professional who relies on top-notch equipment, these tips will help you reclaim that fresh, flavorful grind you deserve.
Have you faced this dust-trapping problem with your grinder? If so, you’re not alone. Let’s dive into the practical steps next, so you can enjoy cleaner, better-tasting espresso starting today!
Disassemble Your Grinder with Precision
Start by unplugging your grinder to ensure safety. Carefully remove the hopper, burrs, and any accessible internal parts. Use a small brush or a soft cloth to remove loose coffee particles from all surfaces. Remember, a clean workspace prevents dust from settling elsewhere. I once took apart my grinder on a lazy Sunday, which resulted in a mess, but the cleanings afterward improved my grind consistency significantly.
Use Targeted Cleaning Tools
Employ a dedicated grinder brush, compressed air, or a soft vacuum to dislodge stubborn dust particles from hard-to-reach areas. Focus on the burr chamber, feed chute, and motor housing. Avoid using water or cleaning liquids directly inside the machine, as moisture can cause damage. I found that gentle bursts of compressed air effectively cleared trapped dust without other cleanup.
Implement Regular Maintenance Routines
Set a weekly schedule to perform deep cleaning. Regular attention prevents dust accumulation and maintains grind quality. During each session, inspect for signs of wear such as dull burrs, which can increase dust. Keep your maintenance logs to track when components like burrs need replacing. This consistency saves you from unexpected breakdowns and costly repairs. I started doing deep cleans weekly, which dramatically cut down on static and clumping issues.
Apply Anti-Static Measures to Minimize Dust
Install anti-static brushes or treatments designed for coffee equipment to reduce static electricity that attracts dust particles. Static buildup is often overlooked but plays a big role in dust retention. I added an anti-static brush to my toolkit, and noticed a decrease in dust spread after each grind. For more tips on maintaining your grinder’s performance, see our expert maintenance guide.
Reassemble and Test for Improvements
Carefully reassemble your grinder, ensuring all parts are securely in place. Run a few test grinds with a small amount of beans to check for evenness and absence of residual dust. Observe the sound and performance—sudden noises or uneven grinds may indicate misalignment. After my recent deep clean, my grinder operated quieter and produced more consistent particles, directly boosting my espresso flavor.
Maintain Routine Cleaning to Keep Dust at Bay
Establish a habit of weekly or bi-weekly cleanings based on your usage. Using quality grinder brushes and anti-static sprays consistently will prolong your machine’s lifespan and guarantee a pristine grind. Regular upkeep isn’t just about aesthetics; it’s foundational to maintaining peak coffee flavor and avoiding machine breakdowns. Incorporate these steps into your routine, and you’ll notice a tangible difference in your espresso quality.
Many Enthusiasts Still Believe That All Espresso Machines Are Created Equal
One of the biggest misconceptions is that simply owning a high-end espresso machine guarantees perfect shots every time. While quality hardware is essential, the truth is that nuanced factors like burr alignment, grind consistency, and routine maintenance play a pivotal role in achieving barista-level results. For instance, neglecting grinder calibration can result in under-extraction or over-extraction, which no machine upgrade can fix alone. Dive into our espresso grinder essentials to master this nuance.
Auto-Frothing Doesn’t Mean You Can Skip Learning Frothing Principles
Many think that automatic milk frothers handle everything, but in reality, they can be quite finicky. The common myth is that pressing a button guarantees perfect foam. The truth is, milk type, temperature, and microbubble control deeply influence foam quality. For example, soy milk often curdles in automatic frothers if you’re unaware of specific settings, which is a mistake that compromises latte art and texture. Learn how to optimize your frothing experience in our automatic milk frother tips.
Super Automatic Machines Are Overkill for Casual Users
The popular perception is that super automatics are only for busy cafes or professionals. But this overlooks their advanced features that provide consistent quality with minimal effort—ideal even for serious home baristas. The worth of super automatic espresso machines depends on user expectations and routines, not just price tags. However, many fall into the trap of underutilizing their machine’s capabilities by skipping proper calibration or routine descaling.
Bean to Cup Machines Are Just Fancy Coffee Makers
This misconception simplifies their true advantage. Instead of treating them as traditional coffee makers, understanding the intricacies of grind size, freshness, and temperature management reveals how selecting the right bean to cup machine can elevate your coffee experience. Ignoring these nuances often results in inconsistent shots or overly bitter brews—a common error among new users.
Why Overlooking Burr Maintenance Could Harm Your Espresso Quality
Even the best grinders require regular upkeep. A prevalent mistake is assuming burrs will stay sharp and aligned with minimal attention. Dull or misaligned burrs can retain more coffee residues and produce uneven grinds that detract from flavor and crema. Recent studies show that routine inspection and timely replacement of burrs significantly improve shot consistency and flavor clarity. Steer clear of the trap of neglecting grinder health; check out our burr maintenance guide.
Ultimately, understanding these nuanced truths helps you refine your coffee routine beyond beginner level. Every component, from grinder to milk frother, involves specific practices that, if mastered, can push your espresso craft to new heights. Have you ever fallen into this trap? Let me know in the comments and share your experiences with equipment myths and mistakes!
Maintaining your high-end espresso machine, grinder, and accessories is crucial for consistently outstanding coffee. I personally rely on a few key tools to keep my setup running smoothly, ensuring longevity and top performance. First, a high-quality microfiber cloth and compressed air are indispensable for daily upkeep. The microfiber cloth gently wipes down exterior surfaces, while compressed air blasts away loose coffee residues from internal components without dismantling the machine. For deep cleaning, I use a specialized burr cleaning tool that reaches into the crevices, removing trapped dust and old oils, which can affect grind consistency. This step is vital because, over time, residual particles can clog or dull your burrs, impacting shot quality.
Another essential piece is an automatic maintenance software for my super automatic espresso machine. Many modern models, such as those reviewed on our ultimate guide, include built-in cleaning cycles, descaling reminders, and calibration modes. Setting up these routines, whether weekly or bi-weekly, based on usage, helps prevent mineral buildup and ensures consistent water pressure and temperature. Regular descaling, coupled with cleaning the brew group according to manufacturer instructions, minimizes downtime and preserves flavor clarity.
For grinding precision, I recommend an espresso-specific timer that controls dosing duration, ensuring each shot extracts uniformly. Precise dosing reduces waste and prevents overworking your grinder motor. Pairing this with an adjustable grind setting allows fine-tuning for different beans or roast levels, prolonging the life of your burrs and motor.
Looking to the future, trends in smart maintenance integration suggest that machines will increasingly communicate their needs digitally, prompting users for timely care before issues arise. Investing in reliable tools now prepares you for seamless upgrades and troubleshooting later.
How do I keep my espresso equipment functioning at peak over time? The key lies in a combination of regular cleaning, using dedicated maintenance tools, and leveraging smart technology. Consistent upkeep reduces downtime, preserves flavor, and extends the lifespan of your investment. Don’t hesitate to try out advanced tips like incorporating a burr cleaning tool or scheduling software updates, which can make a significant difference in your daily coffee ritual. For comprehensive guidance, I recommend exploring our detailed burr maintenance guide.,
3 Later Realizations That Changed My Approach to Espresso Equipment
One of the most striking lessons I came to understand is that even the most advanced espresso gear demands a humble maintenance Ritual. I used to think that my high-end grinder could go months without deep cleaning—until I noticed my shots losing their vibrant flavor and the machine sounding louder. That was my wake-up call to prioritize routine upkeep, especially paying attention to the hidden spaces filled with 粉末.
Secondly, I realized that static electricity is secretly working against my cleanliness goals. A simple anti-static brush transformed my cleaning routine by minimizing dust cling and static attractors. This taught me that small tweaks in technique can have outsized impacts on taste and equipment longevity, a reminder that craftsmanship always benefits from meticulous details.
Finally, I learned that understanding my grinder’s behavior was vital. Sudden inconsistencies in grind size or unusual noises often signaled burr misalignment or dullness—key indicators that time for a replacement or recalibration had arrived. Staying attentive to these signs prevented bigger issues down the line and kept my espresso consistently excellent.
Tools That Turn Maintenance Into a Pleasure
I swear by my dedicated espresso cleaner brushes—they effortlessly reach into tight corners and keep my burrs squeaky clean. Compressed air is another invaluable asset that makes dust removal quick and safe without risking water damage. For deeper cleaning, I trust burr cleaning tools that are designed specifically for these sensitive parts, prolonging their sharpness and performance.
The smart addition to my routine has been a descaling and maintenance software integrated with my super automatic machine. It prompts me for regular care, ensuring I don’t skip essential steps like descaling or calibration. This proactive approach helps me avoid flavor pitfalls and costly repairs, enhancing every cup I brew.
I also rely on precise dosing timers and adjustable grind settings—they help me achieve consistency, preserve burr sharpness, and optimize extraction. As I continue to explore the future of smart tech in coffee, I look forward to new tools that can communicate equipment health in real-time, making maintenance even more intuitive.
Embrace the Journey of Coffee Craftsmanship
Every drip of your espresso becomes more than a routine; it’s an opportunity to refine your skills, embrace patience, and enjoy the process. With intentional care and curiosity, you elevate your coffee experience from ordinary to extraordinary. How about you—have you uncovered a maintenance secret that transformed your brewing routine? Share your insights below, and let’s grow together in this flavorful journey!
![Why Your 2026 Espresso Grinder Sensor is Lying [3 Fixes]](https://superautomatic.espressotechguide.com/wp-content/uploads/2026/03/Why-Your-2026-Espresso-Grinder-Sensor-is-Lying-3-Fixes.jpeg)
Benjamin Carter
I’ve recently started paying more attention to deep cleaning my grinder after noticing some static and occasional clumping, similar to what you described about dust buildup affecting flavor and machine longevity. The detailed steps on using compressed air and anti-static brushes really resonated with me—I’ve found that those small additions to my routine make a noticeable difference. I also appreciate the emphasis on routine maintenance because, honestly, it’s easy to overlook until something goes wrong. Since implementing a weekly cleaning schedule and using an anti-static brush, I’ve experienced more consistent grinds and a clearer flavor profile in my shots. My question is, how often do others find they need to replace their burrs to keep grind quality optimal without overdoing it? I’ve heard too frequent replacements can be unnecessary, but I want to strike the right balance.