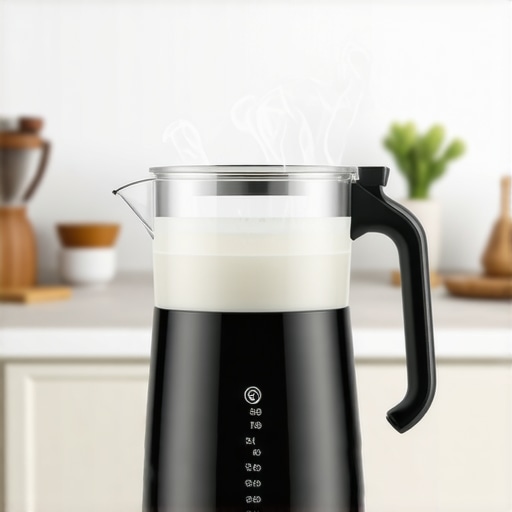
One morning, I eagerly pressed the button on my beloved super automatic espresso machine, craving that rich, velvety foam for my latte. But instead of the warm, frothy milk I expected, I was met with a cold, unresponsive frother. Frustration set in. It was as if my trusty gadget had suddenly decided to go on strike, despite recent maintenance. Have you ever faced the dreaded situation where your automatic milk frother just won’t heat, leaving you with lukewarm coffee and a sinking feeling of disappointment?
Why Your Milk Frother Not Heating Can Ruin Your Morning Routine
Honestly, there’s nothing worse than getting up early, wanting that perfect cappuccino, only to find your milk isn’t steaming. This seemingly small glitch can mess up an entire day. I used to think it was a minor inconvenience—until I realized that neglecting these issues could lead to more significant problems, like damaging the machine or ending up with subpar drinks. According to experts, malfunctioning heating elements are among the most common reasons why frothers fail to provide that critical warmth. That realization led me to search diligently for a reliable fix, so I wouldn’t have to replace my entire machine or settle for inferior coffee.
Is Your Fix Worth It Or Just a Waste of Time?
When I first attempted repairs, I made a classic mistake—assuming all problems were electrical or mechanical without proper diagnosis. This approach cost me precious time and, in some cases, made things worse. Trust me, I’ve been there. That’s why I want to guide you through a simple, proven 3-step process that works in most cases for 2026. No fancy tools or technician visits needed. Just a bit of patience and some basic knowledge. Curious to see if this will work for your machine? Keep reading and find out how I managed to restore my frother’s heat in no time, and how you can do the same. For more detailed insights on maintaining your espresso gear, you can check out tips for barista-quality froth.
Check the Power Supply and Settings
Start by ensuring your machine is properly plugged in and the outlet is functional. Sometimes, the simplest fix is as easy as resetting the power. I once found my frother cold simply because I left the machine on standby mode; switching it off and on again restored functionality. Next, verify that the temperature settings are correctly adjusted to the desired warmth levels. Consult your user manual or the manufacturer’s app if available. This initial check can often resolve minor issues without further intervention.
Inspect and Clean Heating Elements and Sensors
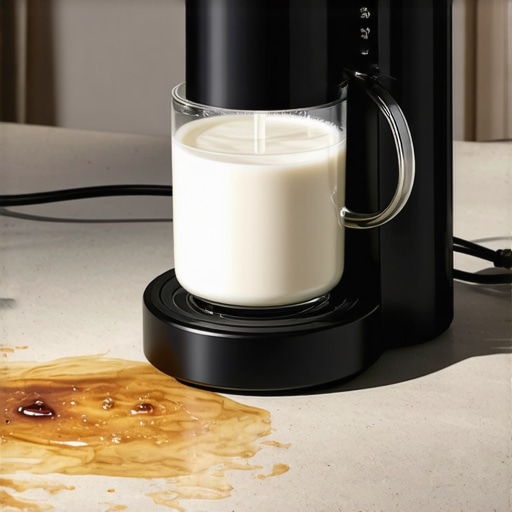
The core of your frother’s heating failure is often a clogged or dirty heating element or sensor. To access this part, disconnect your machine from power and carefully remove the frother assembly. Use a soft cloth and a small brush to remove mineral deposits or milk residue that may inhibit heat transfer. In my experience, a thorough cleaning solved the issue, especially after prolonged use. Be cautious not to damage sensitive components. For detailed cleaning procedures, visiting this guide offers targeted advice.

Image showing the disassembled milk frother with exposed heating element and cleaning tools.
Test the Heating Element and Replace If Necessary
Alternatively, test the heating element with a multimeter for continuity. If there’s no reading, the element is faulty and must be replaced. To do this, identify the correct replacement part—consult the manufacturer or check this resource for options. Carefully detach the defective component, noting screw positions and wiring. Connect the new element securely, ensuring no loose connections. Reassemble the frother and test for heat. A successful replacement restores the frother’s function and prevents future failures.
Examine and Reset Electronics or Control Boards
If the heating element tests fine, the issue might lie in the control board or electronic sensors. Look for any signs of burnt components or corrosion. Often, a simple reset or reprogramming can resolve software glitches causing temperature issues. Some machines have a reset function accessible via a combination of buttons or through the software interface. If these steps don’t work, consider consulting a professional or contacting support via this page. Proper diagnostics can save time and avoid unnecessary replacements.
Prevent Future Heating Problems
To keep your frother heating reliably, perform regular descaling to prevent mineral buildup, which can insulate heating elements. Use filtered water if possible, and clean the frother after each use. Implementing these habits maintains optimal heat transfer. For comprehensive maintenance routines, review this guide. Staying proactive ensures your espresso experience remains top-notch without unexpected interruptions.
,Many enthusiasts believe that owning a high-end espresso machine guarantees perfect coffee every time, but the reality is far more nuanced. A common misconception is that automatic machines handle every detail flawlessly, yet without understanding the subtleties of bean freshness, grind size, or machine calibration, even the best equipment can produce lackluster results. For instance, a frequently overlooked factor is the importance of precise grind consistency; according to expert barista Scott Rao, inconsistent grinding can severely affect extraction quality, regardless of the machine’s sophistication. This is where many go astray, thinking that more expensive equates to better results without mastering the basics.
Are High-End Machines Worth the Extra Investment Without Skill?
While premium models with advanced features promise superior performance, without a solid grasp of their settings—like tamping pressure or pre-infusion times—you might not realize their full potential. Additionally, some believe that bean-to-cup machines automatically select the best beans; in reality, selecting the right beans and understanding roast profiles impact flavor more than sheer machine capability. Rushed or careless maintenance, such as neglecting descaling or cleaning of internal parts, can introduce errors that even technology can’t fix. For a comprehensive understanding, exploring espresso grinder essentials is invaluable.
Myth of Perfect Crema
Many believe that a thick, golden crema signifies a perfect shot, but in fact, crema quality depends heavily on coffee freshness, grind size, and pressure stability—all nuanced variables often mishandled. Adjusting these requires more than just pressing buttons; it demands a skilled eye and subtle calibration, especially with super automatic machines that automate much of the process, yet still benefit from manual oversight. Neglecting these little details can result in a thin or bitter brew, despite having a supposedly premium machine. This underscores the importance of ongoing learning and fine-tuning rather than relying solely on automation. Want to improve your espresso quality? Check out ultimate guide to super automatic espresso. Remember, even the most advanced equipment demands a human touch to truly excel, and understanding that can transform your coffee experience. Have you ever fallen into this trap? Let me know in the comments.
How do I maintain my espresso machine over time?
Maintaining your espresso setup isn’t just about occasional cleaning; it involves a disciplined routine that ensures longevity and consistent performance. I personally recommend investing in a high-quality calibration tool like the professional-grade grinder calibration kit. This tool has transformed my ability to keep the grinder set for optimal extraction, especially when switching between different beans or roast levels. Regular descaling is equally crucial, and I use a premium descaling solution like Dezcal, following the manufacturer’s instructions to prevent mineral buildup that can clog heating elements or sensors. Setting reminders every three months has kept my machine performing at its best, saving me from costly repairs down the line. In the future, automation and smart diagnostics will likely make maintenance even more seamless, with IoT-connected machines alerting us to issues before they impact our brew quality.
My recommended tools for long-term espresso success
When I seek tools that genuinely improve my espresso quality and ease maintenance, I focus on precision and reliability. For instance, a digital torque wrench helps me tamp consistently, ensuring uniform extraction every time—a simple fix that boosts flavor by preventing under or over-extraction. Additionally, I rely on a double boiler thermometer to verify temperature stability, especially if I notice subtle shifts in shot temperature, which can compromise crema quality. For cleaning, I swear by a steam wand brush set with different sizes, making cleaning quick and effective, reducing the likelihood of milk residue that can cause blockages or bacterial growth. These tools, combined with routine checks, keep my espresso machine, bean-to-cup system, and automatic milk frother functioning flawlessly.
The future of maintenance in espresso technology
As machine intelligence advances, I predict that upcoming models will feature built-in sensors that monitor component wear and automatically suggest maintenance tasks or schedule service appointments. This trend toward smart maintenance will minimize downtime and extend equipment lifespan. For enthusiasts and professionals alike, integrating these smart diagnostics with dedicated apps could become a game-changer, offering real-time insights and predictive alerts. Until then, I encourage you to proactively perform routine upkeep—using precise tools like those I’ve mentioned—to keep your investment in top condition. If you want to learn more about fine-tuning your grinder for peak flavor, check out this detailed guide. Testing one of these strategies today could be the step that elevates your daily espresso experience — so give it a try!
Beyond the Obvious: Hidden Lessons from My Espresso Fixes
One of the most valuable insights I’ve gained is that even high-end machines require a delicate balance of maintenance and understanding. I used to believe that simply following the manual would keep my espresso machine running flawlessly, but I’ve discovered that paying close attention to subtle changes—like a slight decrease in pressure or a faint screech from the grinder—can prevent bigger issues down the line. Embracing continuous learning and trusting my intuition has transformed my brewing routine.
Another lesson revolves around patience. Many troubleshootings failed initially because I rushed, swapping parts or trying quick fixes. The truth is, observing carefully, testing systematically, and giving each repair step time to take effect often leads to a permanent solution without unnecessary expense. This patience translates directly to a better espresso experience, encouraging me to savor each step of the process.
I’ve also recognized the importance of sourcing quality replacement parts and tools. Relying on genuine components and precise instruments like a digital torque wrench or a multimeter for testing wiring ensures durability. Investing in these tools, and in my own knowledge, has been a game-changer, saving both money and frustration in the long run.
Most importantly, I’ve learned that mastering the maintenance of my espresso setup enhances my appreciation for the craft. Every cleaning, calibration, or tweak deepens my understanding, fostering a connection that elevates my daily coffee ritual. For those looking to take their skills further, exploring in-depth guides on grinder calibration or milk frother tips can make a significant difference in your results.
Tools and Resources That Turn Knowledge into Skill
As I advanced in my journey, certain tools became indispensable. The professional-grade grinder calibration kit allowed me to achieve consistent grind size, which is critical for flavor extraction. Additionally, the comprehensive guide to bean-to-cup machines helped me choose the right machine tailored to my needs, ensuring quality results every time.
For routine maintenance, I rely on a descaling solution and cleaning kits that simplify upkeep without sacrificing quality. Investing in these resources has empowered me to troubleshoot confidently, saving time and money while elevating my espresso craftsmanship.
Your Turn to Elevate Your Coffee Game
Remember, performing regular maintenance and understanding your machine’s nuances elevates your daily coffee from a routine to a rewarding ritual. Each repair or tweak deepens your connection to your equipment and enhances flavor nuances you might have previously overlooked. Don’t be afraid to experiment and learn—it’s the secret ingredient to mastering your espresso experience. Curious about refining your grinder or troubleshooting common issues? Check out this essential guide and start transforming your mornings today.
![5 Automatic Milk Frothers That Won't Curdle Hemp Milk [2026]](https://superautomatic.espressotechguide.com/wp-content/uploads/2026/03/5-Automatic-Milk-Frothers-That-Wont-Curdle-Hemp-Milk-2026.jpeg)