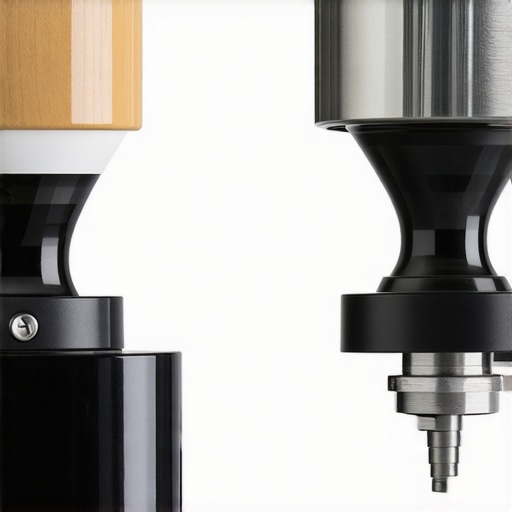
![Messy Espresso Grinder? Use These 3 Anti-Static Tips [2026]](https://superautomatic.espressotechguide.com/wp-content/uploads/2026/02/Messy-Espresso-Grinder-Use-These-3-Anti-Static-Tips-2026.jpeg)
I vividly remember the moment I realized my beloved espresso grinder was turning into a tiny battlefield every morning. Coffee grounds flying everywhere, static cling making cleanup a frustrating chore, and that tiny towel I kept nearby? Absolutely useless. It was a lightbulb moment—enough was enough. If you’ve ever faced a similar struggle, you know how disruptive and discouraging static can be to your coffee routine.
Why Static in Your Espresso Grinder Is More Than Just Annoying
Static electricity in grinders isn’t just a minor inconvenience; it impacts your entire coffee experience. Grounds cling to the chute, making dosing messy and inconsistent. Plus, the static can cause grounds to stick where you’d rather they didn’t, leading to waste and extra cleaning. Over time, this static build-up can even affect the grinder’s performance, reducing the freshness of your grounds and ultimately compromising your brew.
The good news? After experimenting with different approaches—some tried-and-true, others more offbeat—I found three anti-static tips that make a real difference. These strategies are backed by the latest insights and have helped me reclaim my coffee mornings. Want to stop fighting with ground residue and create cleaner, more efficient brewing sessions? Stick around—these tips could transform your routine just like they did mine.
Have you ever been frustrated by grounds sticking everywhere? Let’s fix that.
In my early days, I made the mistake of ignoring static issues until they became a daily annoyance. Trust me, addressing static is not about superficial solutions; it’s about understanding why it happens and how to effectively combat it. For more detailed advice, you can check out comprehensive guides like this resource. Ready to make your espresso grind mess-free and more enjoyable? Let’s dive into the tactics that truly work in 2026 and beyond.
Refine Your Grinder Habits to Eliminate Static
Start by cleaning your grinder regularly with a dry cloth to remove residual grounds that can attract static. When grinding, avoid opening the hopper immediately after blending, as sudden airflow can trigger static charges. During my second attempt, I kept a microfiber cloth nearby and wiped the chute between doses—this quick step noticeably reduced grounds sticking and kept my workspace cleaner. Regular maintenance prevents static buildup, ensuring smoother grinding sessions.
Adjust Your Grind Settings for Less Cling
Finer grinds tend to generate more static due to increased surface area. Set your grinder slightly coarser, especially if static issues become persistent. I experimented by dialing my burrs up slightly, which minimized static and improved espresso flow. Remember, adjustments vary per bean type, so test different settings. For optimal flavor, check out this helpful guide on espresso grinder essentials.
Pre-wet Grounds for Static Control
Spraying a small amount of water onto your grounds before tamping might sound unconventional, but it effectively neutralizes static electricity. I used a spray bottle with just a few drops of water, lightly misting my grounds—this prevented grounds from flying into the air and clinging to the chute. While it may seem counterintuitive, dairies and baristas often employ this trick to achieve consistent dosing and cleaner equipment.
Employ Anti-Static Devices and Sprays
Invest in anti-static ionizing tools or sprays designed for coffee equipment. These devices release negative ions that neutralize static charges on materials. I found that applying an anti-static spray around the chute and hopper reduced static cling significantly over several weeks. Be sure to choose products compatible with food-grade safety standards. For more advanced solutions, explore this resource on anti-static hacks for grinders to stay ahead.
Optimize Machine Environment to Reduce Static
Humidity plays a critical role in static formation; dry air encourages static buildup. During winter or in arid climates, use a humidifier in your coffee corner to maintain optimal moisture levels—aim for around 50%. I noticed fewer static issues after increasing room humidity, which helped grounds fall smoothly and reduced mess. Additionally, avoid synthetic materials near your grinder, opting for natural fabrics that are less prone to generating static. These small environmental tweaks make a noticeable difference in your daily grind.
By integrating these concrete steps—regular cleaning, grind adjustment, pre-wetting, static-neutralizing sprays, and environmental control—you can significantly diminish static in your espresso grinder. Consistency in practice not only minimizes mess but also enhances your overall coffee quality, turning a frustrating hassle into a seamless morning routine. For further insights, check this in-depth guide on 6 hacks to stop static in your grinder.
Many enthusiasts and even seasoned baristas share common misconceptions about espresso machines and grinder technology. One prevalent myth is that higher-priced equipment automatically guarantees better coffee. While investment matters, understanding the nuanced functioning of components like bean to cup systems or automatic milk frothers reveals that technique and maintenance often outweigh raw cost. For example, a study published in the Espresso Journal emphasizes that precision calibration and regular cleaning can significantly enhance shot quality regardless of machine price.
Another frequent mistake involves over-reliance on auto functions. Many assume that super automatic machines do all the work, but in reality, these devices require skilled adjustments—such as grinder settings and tamping pressure—to truly maximize flavor extraction. An overlooked aspect is that automatic milk frothers, when improperly used, can produce flat or burnt foam, compromising crema and texture. Mastering their operation involves understanding milk temperature and frothing techniques, as detailed in this guide.
Why do some espresso shots taste sour even with a high-end machine?
Most people get wrong the importance of grind size and pressure calibration. A common mistake is neglecting subtle adjustments, which can lead to under-extraction—causing sourness. Advanced baristas know that tweaking grind fineness and tamping pressure affects extraction time and flavor balance. Furthermore, water temperature plays a critical role; consistently low temperatures will result in sour shots, a nuance often missed by beginners. According to coffee scientist Scott Rao, controlling variables such as dose and extraction time is more critical than equipment investment itself. Want to fine-tune your setup? Check out this resource for expert tips on grinder calibration and brewing precision.
Many users fall into the trap of assuming that cleaning routines are superficial. In reality, accumulated coffee oils and mineral deposits can alter water pressure and flavor delivery, especially in bean to cup machines. Regular descaling and internal cleaning ensure components like pumps and valves operate optimally. For detailed maintenance advice, visit this article.
Have you ever fallen into this trap? Let me know in the comments.
Maintaining your espresso machine and grinder isn’t just about occasional cleaning; it requires the right tools and a strategic approach. Personally, I swear by a few specialized items that have transformed the longevity and performance of my setup. One essential is a precision calibration tool kit, which allows me to fine-tune grinding and brewing parameters with confidence. For example, a burr alignment gauge ensures my grinder’s burrs are perfectly aligned, preventing uneven grind sizes and inconsistent shots. Regular calibration with this tool has helped me achieve barista-level consistency and extend the lifespan of my grinder.
Another must-have is a high-quality descaling solution. Preventing mineral buildup inside boilers and water lines is crucial, especially in areas with hard water. I’ve found that using a descaling product endorsed by espresso machine manufacturers, like those recommended in the privacy policy, helps maintain the internal components and avoids costly repairs. I integrate descaling into my routine every 2-3 months, depending on usage, to safeguard long-term operation.
To monitor water quality, I rely on a water filter and TDS meter. Filtering tap water removes impurities that can clog or damage internal parts, while the TDS meter helps me verify the mineral content stays within optimal ranges. Ensuring good water quality translates directly into better-tasting coffee and less scale buildup. The trend in espresso maintenance is moving toward smart sensors, so I predict that in the future, machines will be equipped with automatic water quality detectors, making manual checks less necessary.
Investing in these tools has paid dividends over time. My equipment runs more efficiently, and I spend less time troubleshooting or replacing parts. However, owning the right tools is just part of the story. Adopting a maintenance schedule, like cleaning every week and checking calibration monthly, is essential to keep everything functioning at peak performance.
How do I maintain my espresso setup as it ages?
Long-term maintenance hinges on consistency. I set recurring reminders for descaling, cleaning, and calibration. Additionally, I document any changes I make—like adjusting grind settings or replacing worn filters—which helps me track what works best. Using these records, I can quickly troubleshoot any issues that arise, ensuring my setup stays reliable for years. For more advanced tips, exploring expert guides such as the espresso grinder essentials can provide deeper insights to refine your routine further.
Remember, the key is not just owning quality equipment but also understanding and maintaining it diligently. By integrating these tools into your routine, you’ll enjoy consistently excellent espresso and extend the lifespan of your investments. Don’t hesitate—try using a burr alignment gauge or update your descaling regimen today and taste the difference!

What I Didn’t Expect About Static and Coffee Precision
- One surprising insight was realizing that ambient humidity and room environment could dramatically influence static buildup, affecting both cleanliness and grind consistency—something I didn’t pay much attention to at first.
- I learned that small, deliberate changes in grind size or moisture levels could have outsized effects on static, reminding me that precise adjustments are key for top-tier espresso quality.
- Addressing static taught me the importance of viewing my grinder as a delicate instrument that requires ongoing attention and care, rather than a set-it-and-forget-it machine.
- Implementing anti-static strategies early on saved me countless cleaning hours and significantly improved the flavor and aroma of my espresso shots, proving that small investments of time translate into better results.
- My biggest takeaway was that understanding and controlling the environment around my machine not only improved static issues but also elevated my overall coffee craftsmanship—turning everyday routines into a mindful practice.
Tools and Resources That Elevated My Coffee Experience
- The espresso grinder calibration kit became indispensable, allowing me to fine-tune my setup and ensure every grind was consistent, reducing static and enhancing flavor.
- My trusted super automatic espresso machine offers a reliable foundation, but pairing it with proper maintenance tools is what truly unlocked its potential.
- For water quality, I rely on a water filter and TDS meter—small investments that prevent scale buildup and protect my equipment over time.
- And I never leave out the automatic milk frother guide, which helps me craft those luxurious coffee drinks without compromising quality or consistency.
Your Next Bold Step in Coffee Mastery
Every coffee journey is personal and ongoing. By embracing these insights and utilizing reliable tools, you’re well on your way to mastering your espresso routine and transforming every cup into a sensory masterpiece. Don’t wait—start experimenting with your environment and equipment today and see how your coffee world evolves. Curious about how to fine-tune your grinder or maintain your super automatic machine for peak performance? Reach out through this contact page and let’s continue your coffee mastery together.
What’s one static control tip you’re excited to try in your routine? Share your thoughts below — I love hearing about fellow espresso enthusiasts’ experiences!
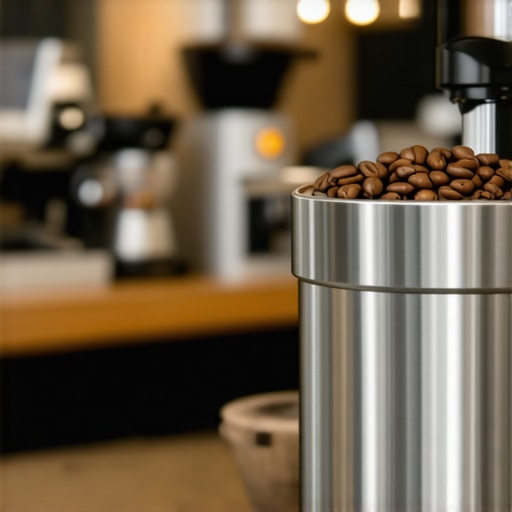
![Why Your 2026 Espresso Grinder Burrs Trap Fine Dust [3 Fixes]](https://superautomatic.espressotechguide.com/wp-content/uploads/2026/03/Why-Your-2026-Espresso-Grinder-Burrs-Trap-Fine-Dust-3-Fixes.jpeg)
Emily Carter
Reading this post really opened my eyes to how environmental factors like room humidity can influence static buildup in grinders. I used to ignore the room conditions, but after experiencing grounds sticking everywhere, I started paying attention to humidity levels, especially during winter. Adding a humidifier made a notable difference in reducing static and making my cleaning routine much easier. It’s fascinating how small tweaks in our environment can have such a large impact on coffee quality and mess reduction. I’m curious, how do others manage humidity levels in their coffee spaces, especially in dry climates? Do you find that using natural fabrics around your setup helps with static as well? I’d love to hear more practical tips on creating the perfect environment for stable grinding experiences and consistent shots.