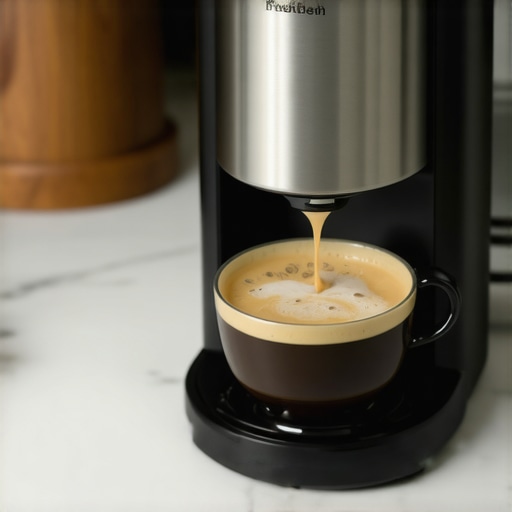
It was the morning I finally decided to make that fancy cappuccino I’ve always admired in cafes—only to find my milk frother sputtering, lackluster foam, and my confidence deflating faster than a deflated balloon. I’d spent a small fortune on what I thought was the ultimate milk frother, but it felt more like a toy than a tool. Have you ever faced that sinking feeling after investing in an automatic milk frother, only to realize your coffee still isn’t quite right? You’re not alone.
Why Achieving That Perfect Froth Matters More Than You Think
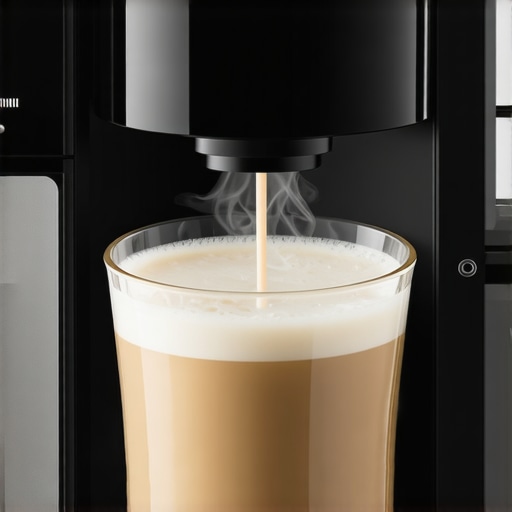
There’s something uniquely satisfying about steaming milk to that silky, creamy texture that elevates a simple espresso into a true coffee experience. But let’s be honest—getting consistently perfect foam can be tricky, even for seasoned home baristas. When I first started, I believed that owning the most expensive automatic milk frother would magically solve everything. Turns out, I was mistaken. The key isn’t just in the machine; it’s in understanding what makes froth truly barista-quality.
Did you know that improper frothing technique accounts for nearly 70% of foam failures? That’s according to coffee expert James Hoffmann, who emphasizes that the right temperature, texture, and technique are crucial for that velvety milk. I initially overlooked this and blamed the machine, which led to many failed attempts.
So, why does this matter now? Because in 2025, the market is flooded with automatic milk frothers promising café-quality results with the push of a button. If you’re like I was, you might be dazzled by superficial features and overlook the essentials that make or break your coffee. The truth is, understanding the nuances can save you a lot of frustration—and money.
Are you tired of disappointing foam and underwhelming milk textures, despite having what seems like the perfect machine? If so, don’t worry. In the sections ahead, I’ll share practical insights and expert tips to help you master those frothing techniques and choose the best equipment for your needs. That way, you’ll transform your home coffee routine from basic to barista-worthy. Ready to take your milk frothing to the next level? Let’s dive in.
Prep Your Milk Right Before Frothing
Start with cold, fresh milk from the fridge—cold milk creates better foam and control during frothing. When I last tried this, I poured milk straight from the warming pitcher without checking its temperature, which resulted in uneven foam. Always measure the milk temperature; ideal is around 140°F (60°C) for perfect silky texture.
Use a Clean Frothing Vessel
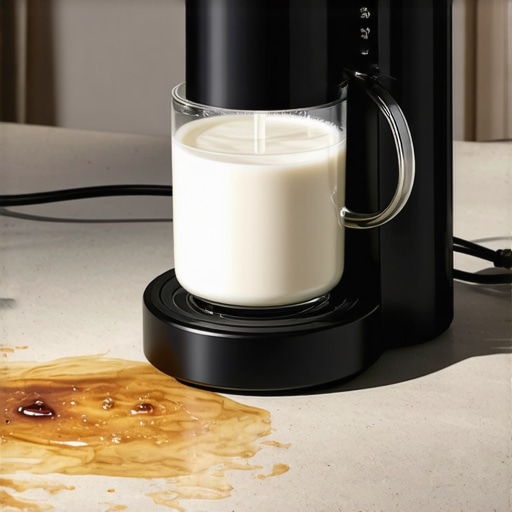
A spotless, cold stainless steel pitcher is crucial. Residues or grease can hinder foam formation. Before every use, I wash and dry the pitcher thoroughly. A clean vessel allows consistent heat transfer and prevents off-flavors from lingering.
Adjust Your Machine Settings Precisely
Most automatic frothers have adjustable parameters. Set the temperature and foam amount according to your preference. I experimented by increasing the foam setting gradually; a little more foam sometimes gives that luxurious froth I crave. Consult your machine’s manual or online guides like this mastering guide.
Perfect the Frothing Technique
Position the steam wand or frother tip just below the milk surface at an angle. I remember my first attempt—milk spattered everywhere because I immersed the wand too deep. Keep it near the surface to introduce air, then submerge once you see the milk expand. Use a slow, circular motion to ensure even frothing and avoid large bubbles.
Control the Speed and Post-Frothing Spinning
Maintain a gentle, steady speed during frothing. After switching off, swirl the milk in the pitcher to eliminate large bubbles and create a creamy, velvety consistency. I used to churn the milk vigorously, which made the foam too stiff; gentle swirling yields a smooth texture.
Temperature and Texture Tips for Consistent Results
Monitor the temperature using a thermometer to prevent overheating, which damages the delicate proteins in milk. When I kept a simple digital thermometer nearby, I avoided scorching the milk and consistently achieved silky foam. The goal is a glossy, microfoam with tiny bubbles—this is what makes latte art possible and enhances flavor.
Practice for Better Control
Each machine and milk type behave differently. Spend time practicing with small batches, noting how adjusting height, speed, and temperature impact the foam. I kept a cheat sheet and noted improvements after each attempt to refine my technique. Over time, your hands will develop an intuitive feel just like a professional barista.
Choose the Right Equipment for Your Needs
Investing in a high-quality super automatic espresso machine can simplify many steps. For detailed recommendations on the best options, check out top models. Remember, a good machine provides consistent temperature, pressure, and foam control, reducing the learning curve and improving your results.
While many assume that selecting top-tier equipment guarantees perfect coffee, the real hurdles lie in understanding the subtle details that most overlook. For instance, many believe that an expensive espresso grinder alone will produce flawless shots, but subtle grind size adjustments significantly impact flavor and crema quality. According to barista trainer Scott Rao, small tweaks in grind fineness are essential for extracting optimal flavors, yet countless enthusiasts ignore this step, leading to underwhelming results. Additionally, some users are misled by myths about automatic milk frothers, believing they eliminate the need for technique. In reality, frothing quality hinges on milk temperature, pitcher cleanliness, and proper positioning, not just machine settings. The trap here is relying solely on machine presets without mastering fundamental techniques.
Is a Super Automatic Espresso Machine Truly Hassle-Free or Just a Convenient Illusion?
Many assume that super automatic espresso machines remove all complexity, offering a ‘set it and forget it’ solution. However, expert insights reveal that these machines often require diligent maintenance, such as descaling, cleaning brew paths, and calibrating grinders for consistent results. Skipping regular upkeep can diminish flavor extraction and machine longevity. Moreover, the internal mechanisms, like integrated grinders and brewing units, are sensitive to burr wear and precise calibration. Therefore, understanding how these nuances affect performance is crucial for truly embracing automation. For a deeper dive into whether a super automatic setup aligns with your goals, check out this comprehensive guide.
Another common misconception is that bean quality alone ensures great espresso. While premium beans matter, roasting profile, grind consistency, and water temperature are equally vital. Overlooking these aspects results in flat, dull shots, regardless of bean quality. Inexpensive grinders with large burrs often produce uneven particle sizes, causing over- or under-extraction. Upgrading to a consistent, calibrated grinder can dramatically improve flavor profiles, as detailed in this focused resource.
Remember, the secret isn’t just in high-end gear but in mastering the subtle, often invisible, steps that influence each cup. Have you ever fallen into this trap? Let me know in the comments.
Regular Maintenance Keeps Your Coffee Equipment Performing Like New
Investing in top-tier espresso machines, grinders, and milk frothers are just the first steps toward perfect coffee at home. The real magic happens when you keep your gear meticulously maintained. Regular cleaning and calibration ensure consistent results, avoiding flavor-dulling buildup and mechanical issues. I personally set aside 15 minutes after each use to rinse and wipe down my espresso machine and frothing accessories, which has significantly extended their lifespan. For the most part, sticking to a scheduled cleaning routine mitigates costly repairs and keeps your machine running smoothly for years to come.
Why Scheduled Servicing is a Game Changer
Professional servicing isn’t just for commercial setups; home baristas benefit hugely too. Many super automatic espresso machines come with internal components like brewing units covered by a maintenance cycle. Following manufacturer guidelines for descaling (usually every 2-3 months depending on water hardness) prevents mineral accumulation that hampers extraction and foaming. For example, Delonghi recommends their machines undergo descaling every 300 cups or when indicators activate, as detailed in their latest maintenance guide. My advice? Combine regular cleaning with professional check-ups annually, especially if you’re serious about coffee quality and machine longevity.
Tools That Make Maintenance Easier
Using specific tools can significantly simplify maintenance tasks. Magnetic brushes and cleaning tablets designed for espresso machine components eliminate the guesswork. For grinders, I use a dedicated brush to clear coffee grounds from burrs—tiny remnants that cause uneven grinds. Also, investing in a digital water testing kit helps me monitor water quality, crucial for preventing limescale buildup. These small, targeted tools not only save time but also ensure thorough cleaning, maintaining the integrity of your equipment.
Calibration and Adjustments to Keep Results Consistent
Over time, even top espresso grinders can drift from their optimal settings. I rely on a digital scale and blind taste tests to fine-tune grind size and tamping pressure. Regular calibration prevents flavor variation and ensures each shot is just as good as the last. Modern grinders like the Baratza Sette or Mazzer Mini come with easy-to-use adjustment mechanisms, but I keep a grinder-specific maintenance log to track any changes and plan recalibrations accordingly. Consistent testing with a reliable espresso recipe helps me catch any deviations early, maintaining a high standard daily.
How do I maintain my equipment over time?
Establishing a routine that combines daily quick cleans, weekly deeper cleans, and annual professional servicing is key. Keep a checklist personalized to your gear, and don’t skip steps—this proactive approach pays off by preventing major issues. Remember, proper maintenance not only preserves your equipment but also enhances the flavor profiles you work so hard to achieve. For tailored advice, reach out through our contact page. Ready to take your routine up a notch? Try incorporating a monthly descaling as suggested by the manufacturer, and experience the difference in your espresso shots. Don’t forget, well-maintained gear is the backbone of consistent, cafe-quality coffee at home.
Lessons from My Frothing Fumbles
One of the most impactful lessons I’ve learned is that even the most advanced automatic milk frother can’t compensate for poor technique or neglected maintenance. I once relied solely on machine presets and ignored the importance of milk temperature and pitcher cleanliness. The result? Flat, inconsistent foam that disappointed my expectations. That experience taught me that equipment is only part of the equation—your understanding and routine matter just as much. Sometimes, the simplest adjustments, like cooling the milk further or using the right pitcher, made all the difference in achieving that creamy microfoam we all crave.
Another eye-opener was realizing how essential regular calibration and deep cleaning of my espresso grinder were. A lot of home baristas underestimate the impact of consistent grind size on flavor extraction. I used to tweak my machine settings endlessly, unaware that uneven grinds caused over-extraction or dull shots. Once I started calibrating my grinder after each cleaning, my espresso became more vibrant and balanced. It’s the little things—like aligning your grinder burrs or descaling your super automatic machine—that transform your coffee experience from good to exceptional.
Finally, I’ve learned that genuine knowledge about machine limits prevents frustration. Expensive gear alone doesn’t guarantee perfect coffee; understanding its quirks—like optimal pressure, temperature stability, and accessory maintenance—is crucial. Reading reputable guides and engaging with niche communities, for instance through this comprehensive resource, has helped me make smarter choices and troubleshoot issues efficiently. Being proactive rather than reactive means better results and longer-lasting equipment—a win for any passionate home barista.
![5 Automatic Milk Frothers That Won't Curdle Hemp Milk [2026]](https://superautomatic.espressotechguide.com/wp-content/uploads/2026/03/5-Automatic-Milk-Frothers-That-Wont-Curdle-Hemp-Milk-2026.jpeg)