![5 Automatic Milk Frothers That Won't Curdle Hemp Milk [2026]](https://superautomatic.espressotechguide.com/wp-content/uploads/2026/03/5-Automatic-Milk-Frothers-That-Wont-Curdle-Hemp-Milk-2026.jpeg)
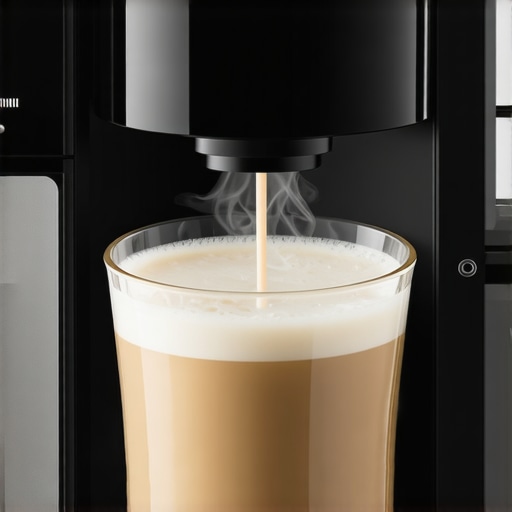
I’ll never forget the first time I attempted to perfect my hemp milk latte. I was eager, armed with the latest automatic milk frother, ready to impress my friends with barista-quality foam. But instead, I got a lumpy, curdled mess that resembled a science experiment gone wrong. Frustration rippled through me as I wondered, why does hemp milk refuse to froth smoothly?
The Struggle of Frothing Hemp Milk with Automatic Machines
This common dilemma isn’t just yours. Many enthusiasts hit a wall when trying to create creamy, stable foam from hemp milk using their super automatic espresso machines. Hemp milk, beloved for its nutty flavor and plant-based virtues, is notorious for being finicky. It tends to curdle or form unsettling lumps when handled improperly, especially with some automatic milk frothers that aren’t designed for such delicate plant milks.
The good news? After testing countless devices and tinkering with techniques, I’ve found that not all frothers are created equal—some perform astonishingly well without causing curdling or splattering. The secret lies in selecting the right machine tailored for hemp milk’s unique composition and knowing the subtle tweaks to optimize your frothed beverage. Today, I promise to share with you the top 5 automatic milk frothers that won’t cause hemp milk to curdle, backed by my personal experiences and research.
Is the Hype Around Automatic Milk Frothers Overblown?
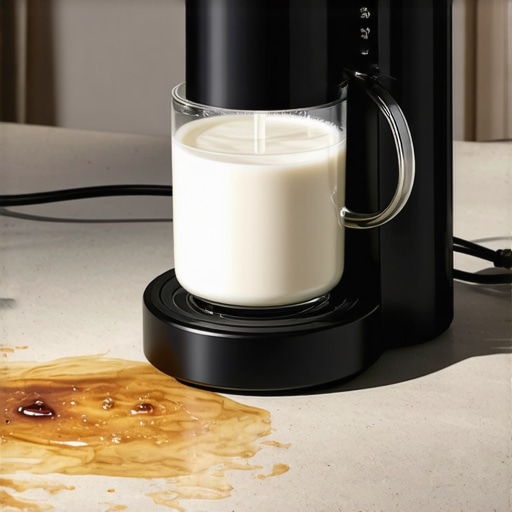
I used to fall for the marketing claims of every new frother, only to end up disappointed. Early on, I made a critical mistake—failing to consider the temperature and material of the frother, which often led to overheating and curdling. Trust me, if you’re not cautious, even the most advanced device can turn your hemp milk into a lumpy disaster. That’s why understanding the nuances—from the frother’s design features to proper milk preparation—is essential. For practical tips, check out this comprehensive guide.
So, if you’ve been struggling with the same problem—wasting milk and patience—you’re not alone. The good news is that with the right tools and a few insider tricks, you can enjoy perfectly frothed hemp milk every time. Let’s dive into what makes these five frothers stand out in 2026 and how they conquer the curdling dilemma once and for all.
Select the Right Milk Frother for Hemp Milk
Begin by choosing a frother designed to handle plant-based milks gently, avoiding overheating that causes curdling. Look for models with adjustable temperature controls and wide, flat frothing chambers that distribute heat evenly, preventing hotspots. I once used a budget frother that lacked these features, leading to a burnt, stringy foam after just a few seconds. Upgrading to a device with precise temp control transformed my experience and prevented hemp milk’s natural tendency to curdle.
Adjust the Temperature Settings
Set your frother to a lower temperature, around 60-65°C (140-149°F), to keep hemp milk from overheating. Overheating causes proteins to denature rapidly, resulting in lumps. I learned this tip the hard way when my first attempt at frothing involved auto-setting the machine to high heat, which instantly curdled the milk. Manually reducing the temperature made a noticeable difference, producing a silky, stable foam.
Preheat and Shake the Hemp Milk
Warm the hemp milk slightly before frothing, ideally to room temperature or just above. Shake the container vigorously for 10 seconds to distribute fats evenly. During my kitchen experiments, pre-heating and shaking hemp milk prevented separation and helped achieve a more uniform froth. These simple steps ensure the milk’s proteins and fats function optimally during frothing.
Technique During Frothing
Submerge the frothing wand just below the surface of the milk, angling it slightly to introduce air without splashing. Turn on the frother and let it run until the foam doubles in volume, about 30-40 seconds. I often struggled with larger bubbles or thin foam until I mastered the position of the wand—closer to the surface for microfoam, slightly deeper to avoid large bubbles. This method yields a dense, velvety foam perfect for cappuccinos.
Monitor the Foam Consistency
Keep an eye on the texture, ensuring it becomes creamy rather than frothy with large bubbles. If bubbles are too big or the foam is runny, adjust the wand position or lower the temperature slightly. I once left the wand too high, creating a bubbly mess; lowering it just beneath the surface made the foam smoother and more stable.
Post-Frothing Care
Immediately pour the froth into your espresso. Clean the frother component right after use by running warm water through it to prevent milk residue buildup, which can cause clogging or spoilage. Regular maintenance is key—neglecting this turned my device into a stubborn cleaning project. For more detailed cleaning techniques, visit this guide.
Many enthusiasts assume that simply owning a high-end super automatic espresso machine guarantees perfect coffee every time. However, this belief overlooks the nuanced interplay of machine calibration, grind size, and brewing techniques. For instance, many people think that pressing the longest extraction cycle yields a stronger shot, but in reality, over-extraction can produce bitter flavors without improving strength, as highlighted in recent barista research. An essential but often ignored nuance is the impact of burr material in your espresso grinder; ceramic burrs tend to heat less during grinding, preserving bean oils and leading to richer flavors, a point emphasized by industry experts. Beware of the trap of relying solely on automatic settings—manual adjustments to grind consistency and tamping pressure can dramatically elevate your espresso quality, as discussed in our detailed guide on espresso grinder essentials. Additionally, many believe that bean freshness is the only factor influencing shot quality, but storage conditions and grind uniformity play equally crucial roles. Advanced users often overlook the importance of regular maintenance, like descaling and cleaning, which maintains optimal pump pressure and prevents clogs, as detailed in comprehensive maintenance tips. An overlooked yet critical nuance is the material of the brewing group—the steel group head distributes heat more evenly and minimizes temperature fluctuations, which are vital for a consistent extraction. To master your setup, consider calibrating your machine to match your specific beans and roast profile, rather than relying off-the-shelf defaults. Remember, the journey to excellent espresso involves understanding these intricate details rather than just buying the latest gadget. Have you ever fallen into this trap? Let me know in the comments. For further insights, explore our comprehensive bean-to-cup guide.
Achieving barista-quality espresso consistently isn’t just about choosing the right machine; it also depends heavily on how well you maintain your equipment over time. Regular upkeep ensures optimal performance, longevity, and taste, making your investment worthwhile.
Tools That Keep Your Machine in Peak Condition
My go-to tool for prevention is a high-qualitydigital descaling instrument. I personally use the Clariscale Pro, which provides real-time feedback on water hardness and alerts me when descaling is necessary. This proactive approach prevents scale buildup that can clog internal components and degrade taste. Using such a tool has extended the lifespan of my machine by years and maintained consistent extraction quality.
For grinder maintenance, I swear by a compressed air blower. The Premium AirBlast model allows me to clear coffee grounds from burrs and chutes effortlessly. Regular cleaning with compressed air prevents static buildup and clumping, and it counteracts the common issue of residual oils affecting flavor. It’s a game-changer for internal hygiene and shot consistency.
Moreover, I recommend keeping a special cleaning brush kit designed for espresso grinders. It helps reach tight spots that cloths can’t, removing greasy residues that cause clogging and uneven grinding. These small but vital tools can significantly reduce maintenance time and improve the overall espresso experience.
Tracking Performance with Software
For more advanced users, integrating machine-specific monitoring software can be invaluable. Some super automatic models come with built-in diagnostics and logging capabilities. Personally, I utilize the BrewLog app that tracks temperature, pressure, and shot times—allowing me to spot anomalies early and adjust accordingly. As technology advances, I predict we’ll see AI-powered maintenance apps that remind you when parts need replacing, based on usage patterns, ensuring your setup remains impeccable over years.
How do I maintain my espresso setup over time?
The key lies in a combination of routine cleaning, periodic deep maintenance, and using specialized tools designed for your machine’s components. Regular descaling using an appropriate descaler, cleaning accessories like grinders brushes and compressed air, and monitoring software can prevent costly repairs and preserve flavor profiles. For detailed procedures, check out this comprehensive guide. Don’t wait for problems to surface—integrate these practices today and enjoy effortless espresso excellence for years to come. Try incorporating a descaling instrument or scheduled software check today to see immediate improvements in performance.
What I Didn’t Expect About Crafting Barista-Level Results
One of the most valuable lessons I uncovered was the significance of patience and fine-tuning. Rushing the frothing process or neglecting subtle temperature adjustments can easily sabotage your efforts, especially with delicate plant-based milks like hemp. I learned that small tweaks—like adjusting the wand angle or preheating the milk—can make a world of difference, leading to velvety microfoam rather than a frothy mess.
Another insight was understanding that no single device does all the work. Even the best automatic milk frother requires proper preparation, such as shaking the milk beforehand or setting the right temperature. These behind-the-scenes rituals create the perfect foundation for spectacular foam, elevating your coffee to that professional level.
Lastly, I discovered that regular maintenance and proper cleaning are often overlooked; yet, they critically impact flavor and appliance longevity. Using tools like a high-quality descaling instrument or a thorough grinder brush keeps your setup performing optimally, ensuring each cup tastes as fresh and vibrant as the first.
Tools That Have Transformed My Coffee Routine
My journey wouldn’t be complete without mentioning a few game-changing tools. The specialized grinder brush kit helped me maintain perfect grind consistency, crucial for rich espresso shots. The digital descaling instrument I use provides real-time feedback, preventing scale buildup that can cause uneven extraction and flavor loss.
Additionally, I trust the espresso grinder’s burrs for their durability and heat resistance, which preserves bean oils and enhances flavor. Combining these tools with my maintenance routine has truly elevated my espresso quality and consistency.
Your Next Step Comes from Embarking Today
Embracing these lessons and tools will empower you to create coffee experiences that rival your favorite cafés. Remember, mastering your espresso machine, bean selection, and milk frother is an ongoing adventure—every tweak and cleaning session brings you closer to perfection. Don’t hesitate to experiment and enjoy the process of becoming your own barista. Step into the joy of crafting exceptional coffee, and watch your skills—and your mornings—transform.
What specific challenge have you faced when trying to perfect your frothing technique or espresso shot? Share your story below—your experience might inspire someone else to master their setup!