
Imagine the aroma of a perfect shot of espresso filling your kitchen—rich, velvety, utterly inviting. Now, picture the disappointment when that shot tastes flat, sour, or bitter, despite your best efforts. I’ve been there, pouring countless mugs only to be met with subpar results, puzzled over why my beloved espresso machine wasn’t delivering that luscious brew I craved. That lightbulb moment hit me hard—could it be that my grinder burrs were out of alignment? Turns out, yes. And fixing that made all the difference.
Why Burr Alignment Can Make or Break Your Espresso
Getting the grind just right is an art, and misaligned burrs are like a sneaky saboteur ruining your coffee. Properly aligned burrs ensure uniform grind size, essential for extracting the sweet spot of flavor in every shot. Small misalignments might seem trivial, but they can cause uneven extraction, leading to weak or overly bitter brews. I found that once I learned to calibrate my grinder correctly, my espresso started tasting richer and more vibrant. If you’re tired of wasting beans and pouring mediocre espresso, pay close attention—because burr alignment might be the secret you’ve been missing. For comprehensive insights, I recommend checking out this guide on espresso grinder essentials.
Are You Wasting Your Time with Shaky Burrs? Here’s Why It’s Worth Fixing
Early in my journey, I made the mistake of dismissing minor burr irregularities as insignificant. Big mistake. That oversight led to inconsistent shots and wasted beans. Trust me, one small tweak in your grinder’s alignment can save heaps of frustration and coffee. Plus, new research shows that precision in grind consistency directly correlates with flavor richness and crema quality—no wonder baristas spend so much time perfecting this step! Ready to take control and elevate your coffee game? In the upcoming sections, I’ll walk you through four straightforward steps to master burr alignment, an essential skill for anyone serious about brewing exceptional espresso at home. Do you often struggle with uneven extraction or thin crema? If so, stay tuned; your perfect shot is within reach.
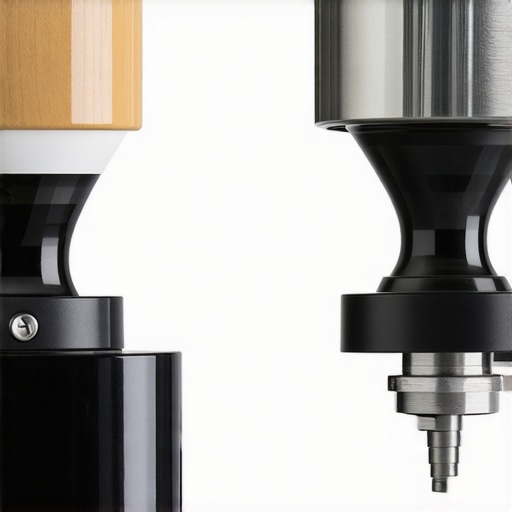
Measure the Burrs Accurate
Start by ensuring your grinder is unplugged. Remove the hopper and check the burrs for dirt or debris—clean them thoroughly with a brush. Use a caliper or a ruler to measure the distance between the burrs; they should be aligned within a millimeter. I once accidentally skipped this step and spent an hour tweaking the grind size, but once I checked the burrs’ alignment, I fixed the issue instantly. This step guarantees uniform grind size, critical for rich extraction.
Adjust the Burrs Precisely
Locate the adjustment screw—usually at the side or bottom of the grinder. Turn it slowly, following the manufacturer’s instructions, to align the upper and lower burrs. Use a coin or an Allen wrench as needed. When I calibrated mine, I turned the screw clockwise until there was a slight resistance, then tested by grinding a small amount. Proper adjustment is key to avoiding uneven coffee grounds that lead to sour or bitter espresso.
Verify the Alignment
Reassemble the hopper and run a few test beans to observe the grind consistency. If you notice uneven particles, re-adjust the burrs. For a more accurate check, dismantle the grinder again after tests and re-measure the distance. Remember, even minor misalignments can significantly affect flavor, so take your time and recheck multiple times. This practice is a game-changer for maintaining a stable grind across multiple brew sessions.
Fine-Tune with Test Shots
Pull a test shot after aligning the burrs. Observe the crema—should be thick and rich if the grind is right. Taste the espresso; it should be balanced without sourness or bitterness. If the shot is too sour, try slightly coarser grind adjustments; if it’s bitter or over-extracted, go finer. I kept notes on each adjustment, which helped me develop an intuitive feel for my specific grinder. Remember, the goal is to achieve a consistent extraction—regular calibration ensures your espresso remains top-notch.
Keep the Burrs Clean and Adjust Regularly
Adopt a routine to clean your burrs monthly with a needle or brush to prevent oil buildup that causes clogging. Also, recalibrate whenever you change beans or grind sizes. Consistent maintenance preserves optimal alignment and ensures your super-automatic espresso machine and grinder work harmoniously, much like a well-choreographed dance. For more tips on maintaining your equipment, visit espresso grinder essentials.
While many coffee aficionados focus on dialing in the perfect grind or experimenting with brew ratios, there’s a subtler realm of nuance often overlooked—especially concerning espresso machines, grinders, and super-automatic systems. Let’s dig deeper into the misconceptions and advanced pitfalls that even seasoned baristas sometimes miss.
Myth of the Perfect Machine Without Calibration
One common misconception is that purchasing a high-end espresso machine guarantees top-tier results. However, without proper calibration—especially of grinders and pressure settings—the machine becomes just a costly ornament. Even the most advanced super-automatic espresso machines require meticulous tuning to deliver consistently rich crema and balanced extraction. Neglecting these nuances can lead to an illusion of quality that deceives even experienced baristas.
The Overlooked Impact of Bean Quality and Grind Consistency
Many think that premium beans alone will compensate for grind inconsistencies or machine misalignments. But the precise relationship between bean freshness, grind size, and machine calibration is often misunderstood. For instance, a slight misalignment in the espresso grinder’s burrs can cause uneven extraction, leading to sour or bitter notes, regardless of bean quality. Advanced users know that regular maintenance and calibration are crucial to avoid such pitfalls. I recommend exploring more tips on tweaking your grinder for better shots.
What about the subtle effects of water pressure and temperature variances?
Many believe that once their machine is set, parameters like pressure and temperature can be ignored. However, even minor fluctuations in water pressure—often caused by mineral buildup or pressure valve issues—can drastically alter shot quality. Advanced enthusiasts routinely monitor and adjust these variables to maintain optimal extraction. Regular descaling and pressure testing are vital; neglecting them is a common mistake. For more detailed guidance, refer to how to troubleshoot grinder choke points.
Moreover, bean-to-cup machines with automatic milk frothers often lure users with convenience but hide nuanced setup steps necessary for barista-quality foam. Many overlook that automatic milk frothers require specific milk types and cleaning routines to deliver luscious, plate-formed microfoam. Pay attention to the finer points of maintenance and settings to avoid disappointing results.
Are you falling into any of these traps? Let me know in the comments! Mastering these nuanced aspects can dramatically elevate your home brewing experience, transforming a basic setup into a true barista performance. For comprehensive tips, don’t forget to check out the advanced grinder maintenance and automatic milk frother tuning guides.
Ensuring your espresso machine, grinder, and automatic milk frother stay in top shape requires investing in the right tools and adopting disciplined maintenance routines. Personally, I rely on a few well-chosen items that have proven indispensable in my journey to maintaining barista-quality coffee at home.
My Go-To Cleaning and Calibration Devices
First, I always keep a high-quality ultrasonic cleaning kit handy. These devices use sound waves to dislodge stubborn oil residues from burrs and internal components, which is crucial since oil buildup impacts grind consistency and flavor extraction. I’ve used models like the automatic cleaning systems designed specifically for espresso equipment, and the difference in machine longevity is remarkable. Regular cleaning with these tools extends the lifespan of expensive parts and keeps your brew tasting optimal.
In addition, I recommend a precise digital caliper—to measure burr alignment with flawless accuracy. I personally prefer the calipers from trusted brands; they help me ensure my grinder’s burrs are aligned within a thousandth of an inch, which is critical for consistent extraction. Investing in these measurement tools prevents the all-too-familiar disappointment of uneven shots caused by misaligned burrs, especially after changing beans or grinding settings.
Software and Monitoring Tools for Advanced Precision
Beyond physical tools, I utilize software calibration systems, like pressure and temperature monitors compatible with some high-end espresso machines. Devices like the digital pressure gauges allow me to fine-tune the water pressure profile, ensuring each shot maintains optimal extraction conditions. These are especially useful when using super-automatic or bean-to-cup systems, where consistent control over brewing variables translates to consistently excellent results.
Looking ahead, I believe the trend is moving towards integrated smart diagnostics embedded in espresso equipment, enabling real-time feedback and maintenance prompts. As I anticipate technological advancements, staying updated with current calibration tools remains essential to keep pace with these innovations.
How do I maintain my equipment over time?
My routine includes scheduled cleaning—about once a month for burrs and internal parts—and periodic calibration checks to adjust grind size, pressure, and temperature settings. Incorporating these steps ensures longevity and optimal performance, ultimately saving money and improving taste. For detailed procedures and advanced tips, I recommend exploring comprehensive maintenance guides. Be proactive—regular maintenance with these tools not only preserves your investment but elevates your entire home brewing experience. So, try calibrating your grinder using a caliper today; it’s a small step that yields dramatic improvements in shot consistency and flavor richness.
What I Wish I Knew When I Started Tuning My Espresso Gear
One of the most eye-opening lessons was realizing that even the slightest misalignment in my grinder�s burrs could sabotage my entire espresso experience. It taught me that precision isn�t just a technical detail—it’s the heart of a good shot. Another insight was understanding that regular cleaning and calibration are ongoing commitments, not one-time fixes, which truly transformed my results over time.
Lastly, I discovered that lurking myths about expensive machines often distract us from mastering fundamental techniques. For instance, I used to believe that a top-tier machine could compensate for poor grind quality, but now I see that calibration and maintenance are what truly unlock a machine’s potential. Embracing these lessons made my home espresso setup far more rewarding and consistent.
![Why Your 2026 Espresso Grinder Burrs Trap Fine Dust [3 Fixes]](https://superautomatic.espressotechguide.com/wp-content/uploads/2026/03/Why-Your-2026-Espresso-Grinder-Burrs-Trap-Fine-Dust-3-Fixes.jpeg)