Ever poured your morning coffee only to find your automatic milk frother stubbornly refusing to spin? I’ve been there, feeling that rush of disappointment when your fancy espresso machine doesn’t perform as expected just when you need it most. I remember the first time my milk frother jammed in the middle of making a Latte art-worthy foam — talk about a buzzkill! That lightbulb moment made me realize how frustrating it can be when one tiny component stops working, especially after investing so much into a high-end machine.
Today, I want to share how I cracked the code on fixing those annoying milk frother glitches. If you’re tired of battling with a frother that won’t spin, stick around. We’ll explore four quick and effective fixes you can try in 2026—yes, the latest tips based on real-world experience and updates in technology. Whether it’s a simple clog, a motor issue, or something more obscure, these tips will help restore your machine’s frothing magic.
Get Your Frother Spinning Again: Quick Fixes for 2026
Before we dive into solutions, I should confess: early on, I made a classic mistake—ignoring the basic cleaning routine. That oversight cost me precious time troubleshooting when the fix was as simple as descaling or removing minor blockages. Building trust in your machine’s maintenance can save hours of frustration. Did you fall into the trap of neglecting regular cleaning? If so, you’re not alone. For more detailed guidance on maintaining your automatic milk frother, check out [Mastering Automatic Milk Frothers](https://superautomatic.espressotechguide.com/mastering-automatic-milk-frothers-tips-for-barista-quality-froth).
Now, let’s unravel why your frother might be playing hard to get and how to fix it quickly in 2026.
Inspect and Clean the Frother Components
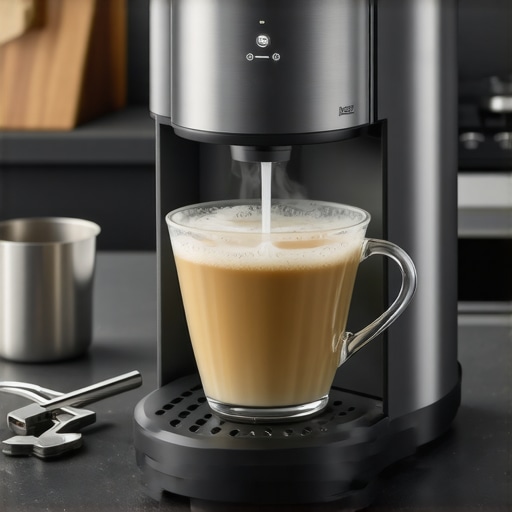
Begin by unplugging your machine to ensure safety. Remove the milk frother nozzle and internal parts, then soak them in warm, soapy water for at least 10 minutes. Use a soft brush to dislodge any milk residue or mineral buildup. This simple step often solves clogs caused by dried milk or limescale, which can jam the motor. I once had a stubborn frother that refused to spin because of hardened milk, but after thorough cleaning, it spun like new. For detailed cleaning techniques, visit this guide.
Check the Motor and Connections
After cleaning, examine the motor and wiring for visible damage or disconnection. Use a multimeter to test the motor’s functionality if you’re comfortable with electronics. Often, a loose wire or a burned-out motor is the culprit behind the frother not spinning. I once replaced a faulty motor with a compatible one, and my frother was back in action within minutes. Replace or repair damaged parts as needed to restore functionality.
Unclog the Pump and Inlet Valves
Next, focus on the pump assembly. Remove any blockages by flushing the system with warm water via the water inlet. To do this, disconnect the water line, then run water through the inlet and outlet to dislodge debris. In my experience, mineral deposits can settle in the pump, leading to a blockage that prevents milk frothing. Using descaling solutions periodically can prevent this issue. For more tips on descaling, check this article.
Calibrate and Test the Frother
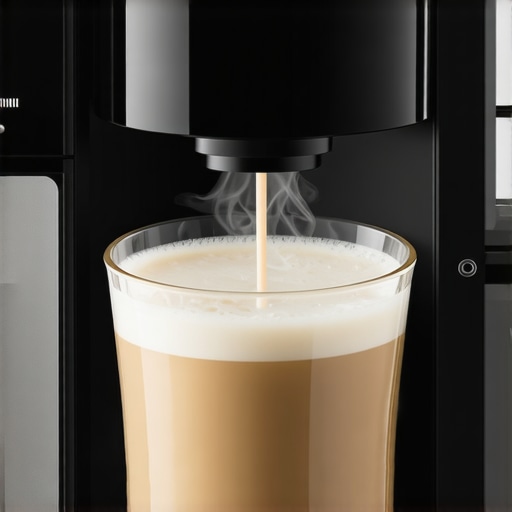
Once all components are cleaned and checked, reassemble the frother and run a test cycle with plain milk. Observe if the motor spins freely and produces foam. If it still stalls, consider calibration: adjust the positioning of the nozzle or internal parts to ensure proper alignment. I once fine-tuned my frother’s height using a small spacer, which instantly improved frothing consistency. Precise calibration can make a significant difference in performance.
Replace Worn-Out Parts for Long-Term Reliability
If after all these steps the frother remains unresponsive, it might be time to replace worn parts such as the motor, seals, or the entire frothing unit. Consult your machine’s manual or contact support for compatible replacements. Upgrading to newer components or considering a model with integrated self-cleaning features can save time and effort in the future. For a comprehensive review of the best machines for 2026, explore this roundup.
Maintain Regular Cleaning and Upkeep
Prevent future jams by establishing a weekly cleaning routine. Use descaling agents and run rinse cycles with plain water to prevent mineral buildup. Pay attention to your machine’s specific maintenance intervals in the user manual, and avoid Oily beans or hard water that can accelerate clogging. Regular upkeep ensures smooth operation and extends the lifespan of your milk frother and entire espresso setup. For more maintenance tips, see this guide.
When it comes to automatic coffee machines, many enthusiasts believe that hardware quality alone determines taste and performance. Yet, even high-end machines often underperform due to nuanced user errors or overlooked maintenance details. For example, a common misconception is that a powerful grinder directly translates to perfect espresso. But in reality, grinder calibration and grind size consistency—often neglected—are critical for extracting optimal flavor, as highlighted in espresso expert Scott Rao’s research.
Does Your Grinder Need Fine-Tuning for Better Flavors?
Contrary to popular belief, grinding beans fine enough isn’t always better. Overly fine grounds can clog the espresso path, leading to bitter or under-extracted shots. The secret lies in precise, consistent grind size tailored to your specific machine and beans. Regularly calibrating your grinder ensures that you’re not just producing fine coffee but optimizing extraction. For detailed grinder setup guidance, visit this resource.
Another widespread myth is that bean freshness guarantees flavor. While freshness matters, beans stored improperly or roasted unevenly can lead to flat or sour tastes, diminishing your coffee’s quality despite excellent equipment. Proper storage in a cool, airtight container and choosing freshly roasted beans from reputable sources is pivotal. Don’t overlook the importance of matching beans to your brewing method; darker roasts often require different grind settings than light roasts to achieve balanced flavor. Learn more about selecting the perfect beans here.
Many users assume that super-automatic espresso machines operate perfectly with minimal intervention. However, these systems are complex and sensitive to minor issues like water hardness or cleaning frequency. Skipping routine descaling or neglecting regular cleaning can cause internal clogs, pump noise, or poor extraction, which some might interpret as machine failure. In fact, proper maintenance, including using filtered water and adhering to manufacturer cleaning schedules, is essential for longevity and optimal performance. For maintenance tips, check this comprehensive guide.
Avoid falling into the trap of equating equipment cost with skill; even the most advanced machines require knowledge and care. Recognizing the importance of subtle nuances, like grind calibration and maintenance routines, distinguishes a true coffee connoisseur from an average user. Let’s dig deeper into how these hidden factors can elevate your coffee experience. Have you ever fallen into this trap? Let me know in the comments.
Investing in Reliable Maintenance Tools for Long-Term Performance
Keeping your automatic milk frother, espresso machine, and grinder in top shape requires more than just routine cleaning; it demands the right tools. I personally rely on a high-quality digital multimeter to diagnose electrical issues in my espresso machine. It’s an affordable yet invaluable asset that helps me identify motor or wiring problems without guessing. For example, when faced with a non-spinning frother, I use the multimeter to check continuity and ensure the motor is functioning properly, saving me costly repairs or replacements. Contact support if you suspect internal component failure beyond simple diagnostics.
Why You Need a Precision Grinder Calibration Tool
Calibration is crucial for consistent extraction, and I recommend a grind size gauge to fine-tune your burr grinder. This tool allows you to set and verify the exact grind size, especially when switching beans or adjusting for different roast profiles. A well-calibrated grinder ensures your espresso isn’t under- or over-extracted, which directly affects flavor and crema. Regularly using a calibration tool has significantly improved the performance of my bean-to-cup machine, making my coffee richer and more balanced.
Tools as the Future of Coffee Maintenance
Technology is rapidly evolving, and I predict that in the next few years, smart diagnostic devices integrated with apps will become standard. Imagine a device that connects via Bluetooth to your espresso machine, automatically alerts you to potential issues, and even guides you through repairs. This level of automation will make maintenance more accessible for home baristas. If you haven’t optimized your toolkit yet, start with a digital multimeter and a precise grinder calibration tool; these are fundamental to sustainable, high-quality coffee brewing.
How do I maintain my coffee equipment over time?
Developing a routine with high-quality, specific tools will extend the lifespan of your espresso setup. For instance, regularly checking electrical connections with a multimeter can prevent unexpected breakdowns, while precise grinder calibration ensures consistent flavor. Additionally, keeping a set of cleaning brushes and descaling agents on hand prevents mineral buildup and clogging, which are common issues in super-automatic systems. These proactive practices form the backbone of a long-lasting, reliable coffee experience. For detailed guidance on maintenance routines, visit this comprehensive guide. Try incorporating a calibration check tonight to see immediate improvements in your espresso quality. Remember, the key is consistency and attention to detail—your taste buds will thank you.
What I Wish I Knew Before Fixing My Frother
The biggest lesson I learned is that minor maintenance, like regular descaling and cleaning, can save you hours of troubleshooting. Ignoring these simple steps initially led me down a rabbit hole of disassembly and guesswork. It’s humbling to realize that your investment in quality equipment is matched by your investment in proper upkeep. These small details often make the difference between a frother that spins effortlessly and one that refuses to cooperate.
Curated Tools That Transformed My Coffee Routine
Having a reliable digital multimeter has been invaluable for diagnosing electrical issues in my espresso machine. It helped me identify faulty wiring without guessing, saving money and frustration. A precise grinder calibration tool is also a game-changer; it ensures consistency and perfect extraction. Additionally, a good brush for cleaning nozzles and internals keeps mineral buildup at bay. These tools are the foundation of sustainable coffee enjoyment and can elevate your setup beyond basic maintenance.
Embracing the Journey of Better Coffee
Taking ownership of my equipment through proper maintenance has rekindled my passion for crafting espresso and milk foam. I’ve learned that small adjustments, like calibrating my grinder or checking connections, lead to remarkable improvements in flavor and texture. Remember, your equipment isn’t just a machine—it’s an extension of your skill and care. The more you learn, the more delicious your coffee becomes. So, take that leap, tinker with your setup, and enjoy each cup as a testament to your dedication.
![5 Automatic Milk Frothers That Won't Curdle Hemp Milk [2026]](https://superautomatic.espressotechguide.com/wp-content/uploads/2026/03/5-Automatic-Milk-Frothers-That-Wont-Curdle-Hemp-Milk-2026.jpeg)