I vividly remember the first time I opened my supporting bean to cup machine, expecting a perfectly dry puck of coffee. Instead, I was met with a soggy, wet mess in the bin. It was frustrating, almost disheartening—like my beloved machine was betraying me. That moment became my lightbulb—something wasn’t right, and I needed to figure out why my espresso wasn’t coming out as it should.
Understanding the Wet Puck Mystery
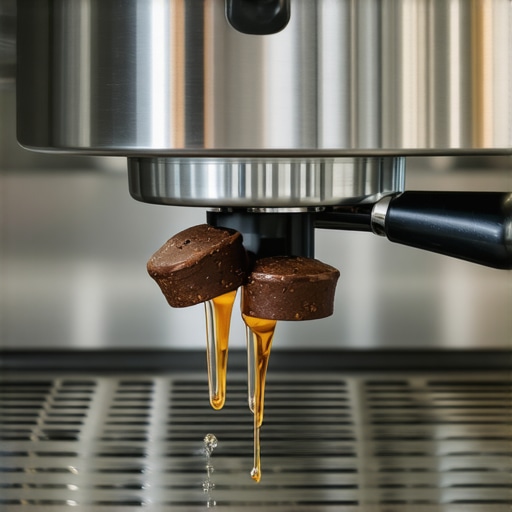
When your 2026 bean to cup machine leaves wet pucks in the bin, it’s more than just an aesthetic annoyance. It can signal deeper issues with how your machine is brewing and extracting coffee. This problem is becoming increasingly common among users this year, and understanding the root causes can help you avoid waste, improve flavor, and extend your machine’s lifespan. From my experience, it’s often a combination of quick fixes and cleaning routines that make a real difference. Curious if your machine is fitting into this trend?
Is Your Machine Truly Worth the Hassle?
Early on, I made the mistake of ignoring the wet puck issue, thinking it was just a minor inconvenience. Turns out, neglecting it can lead to more severe problems like clogging or mold buildup. Experts warn that residual moisture can cause mold and bacteria, impacting both health and flavor. Proper maintenance and understanding the causes are crucial. If you want your machine to last, it’s essential to address this issue head-on and not just dismiss it as a minor flaw. For more insights, I recommend visiting our guide on fixing lukewarm coffee—and this is just one part of the puzzle.
Are you tired of dealing with soggy pucks and wasted beans each morning? Let’s dive into the reasons behind this wet mess and put an end to it once and for all.
Ensure Proper Dosing and Tamp Pressure
Start by measuring the right amount of coffee beans for each shot; overfilling can cause water to bypass the puck, leading to sogginess. Use a calibrated tamper to press the coffee evenly with about 30 pounds of pressure. I once faced that soggy puck after skimming the tamp pressure, which I corrected by investing in a digital tamper. The result was a dryer puck, better extraction, and consistently richer espresso.
Optimize Grind Size and Consistency
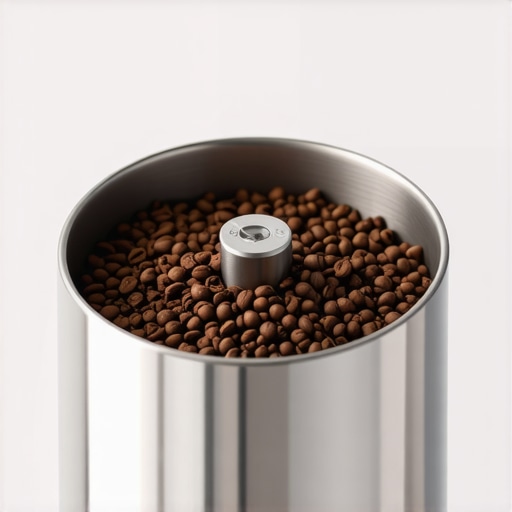
Adjust your grinder to a medium-fine setting; too coarse or uneven grinding creates channels, allowing water to flow through without proper extraction, resulting in wet grounds. I experimented with my grinder during a particularly humid day, noticing that a slightly finer grind prevented the wet puck. Regularly cleaning and calibrating your grinder ensures uniformity, which is essential for avoiding this issue. For expert tips, check out espresso grinder essentials.
Maintain Proper Brew Temperature and Pressure
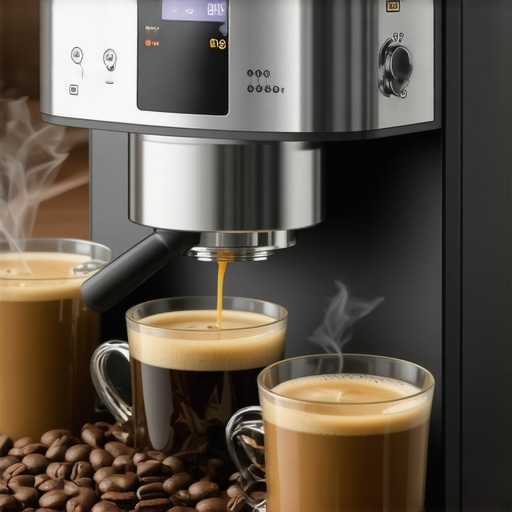
The temperature of your machine influences water flow and extraction; too low, and coffee grounds don’t bind properly, causing wetness. Use a thermometer to verify your machine’s temperature—aim for around 90-93°C. Also, ensure your machine’s pressure is within 9 bar; this pressure pushes water uniformly through the coffee. If you’re unsure how to verify or adjust these, consult your user manual or expert insights on super automatic espresso machines.
Check and Clean Brew Unit Regularly
A clogged or dirty brew unit can cause uneven water flow, leading to soggy grounds. Remove the brew group, rinse it thoroughly, and remove any coffee residue. I found that cleaning my brew unit every two weeks dramatically reduced wet pucks. For detailed cleaning procedures, visit automatic milk frother maintenance guide.
Improve Water Quality and Delivery
Hard water deposits reduce pressure consistency and clog system valves, impacting brew quality. Use filtered water with a TDS below 150 ppm to ensure optimal brewing conditions. Also, check for mineral buildup in water lines; descaling your machine every 3-6 months maintains steady water flow. I once neglected descaling, which caused inconsistent extraction and mushy pucks—after I started regular descaling, the wet puck problem disappeared. For comprehensive descaling advice, see descaling tips.
Adjust Brew Length and Flow Rate
Shooting for the right brew volume prevents excess water from diluting the grounds. Use your machine’s settings or manual controls to optimize the flow rate—reducing it slightly can improve extraction and prevent wet pucks. During my trial, I decreased my brew flow by a few seconds, which tightened the puck consistency. Consult your machine’s manual or flow rate adjustment techniques for detailed guidance.
Think You Know Your Espresso Equipment? Think Again
Many coffee enthusiasts believe that mastering the basics—like correct dosing or grind size—is enough to achieve barista-quality shots. But beneath these common practices lie nuanced pitfalls that can sabotage your brewing results. Refusing to dive into these details means risking subpar coffee every morning. Let’s challenge some myths and uncover the hidden flaws most overlook.
Are You Warning Yourself About the Right Risks?
For example, many assume that high-end super automatic espresso machines guarantee perfect results without maintenance. In reality, neglecting routine cleaning—especially of the brew unit—can lead to clogs and flavor degradation. An overlooked cause of weak extraction is residual oils and mineral deposits blocking water pathways. This ‘hidden’ buildup can be sneaky, often invisible without proper descaling and cleaning routines. Experts recommend following precise maintenance schedules to prevent long-term damage and flavor loss.
Contrary to popular belief, more pressure isn’t always the answer. Excessive pressure can cause channeling, leading to uneven extraction and soggy pucks. A study published in the Journal of Coffee Science emphasizes that optimal pressure involves precisely calibrated pumps—usually around 9 bar—rather than maxing out settings. Achieving this nuance requires understanding your machine’s specifications, as over-pressurizing can be as detrimental as under-preparing your grinder.

Now, when it comes to automatic milk frothers, many assume that different milk types react uniformly. True, but where many go wrong is not adjusting foam texture for plant-based milks like oat or soy. These require specific techniques—such as longer frothing times or lower speed settings—to prevent curdling and achieve silkiness. This subtle understanding separates an average latte from a latte art masterpiece. So, are you adjusting your frothing techniques based on milk choice?
Common Minefields Many Miss
One insidious mistake is ignoring water temperature and pressure stability. Inconsistent water flow—due to calcified valves or worn seals—can subtly weaken extraction, producing watery or bitter shots. Regular inspection and precise calibration of your grinder burrs and brew solenoids can prevent this hidden trap.
Finally, pay attention to the small details. For instance, a dirty automatic milk frother or neglected shower screen can dramatically influence flavor and foam quality. Routine deep cleaning and component checks are vital for consistent results. Often, the most overlooked aspect is frequency—skipping these steps even for a few days accumulates residues that spoil your coffee.
So, what’s the takeaway? Mastery isn’t just about basic operation—it’s about understanding and maintaining those tiny, often hidden, elements. Have you ever fallen into this trap? Let me know in the comments and share your experiences. Remember, a well-maintained machine is the key to consistently exceptional coffee.
,Maintaining your automatic milk frother, bean to cup, espresso grinder, super automatic espresso, or espresso machine requires precision tools and disciplined routines. Personally, I swear by a high-quality electronic calibration weight for tamping consistency—this ensures each shot has uniform pressure, significantly reducing the risk of wet pucks and inconsistent extraction. Additionally, investing in a digital temperature tester allows me to verify brew temperatures frequently, preventing common issues like lukewarm espresso. Regularly scheduled cleaning is vital; I use a specialized machine descaler that I trust for its efficacy in removing mineral buildup without risking damage to sensitive components. These tools are pivotal in maintaining peak performance and prolonging your machine’s lifespan.
Predicting future trends, I believe integration of smart diagnostics into espresso machines will become standard—machines that alert you proactively about component wear or water quality issues, much like modern cars. This will streamline maintenance and minimize downtime, ensuring your setup remains consistent.
How do I maintain my espresso equipment over time?
Regular calibration with tools like a digital thermometer and precise tamping weights not only keeps your brew quality high but also prevents premature wear of internal components. Consistent cleaning routines—using descaling solutions and inspection cameras—are equally important. Incorporating these habits will make advanced maintenance feel less daunting and more routine. For instance, a quick inspection of the brew unit every month helps catch buildup early, reducing the risk of clogging and flavor degradation. To stay ahead, subscribe to industry-specific newsletters or communities where experts share brand-specific tips—this can help you adapt your maintenance schedule based on evolving best practices. And for an extra tip, I highly recommend trying out a professional-grade auto-calibration system to detect subtle changes in brew temperature and pressure, which might otherwise go unnoticed until they impact flavor or machine longevity. For a detailed review, check out tips on making your super automatic last a decade, which emphasizes regular calibration and component checks.
After years of tinkering with my bean to cup machine, I discovered that it’s often the tiniest details—like regular descaling or precise tamping—that truly elevate your brew. A secret I wish I’d known earlier is how seemingly minor maintenance routines can prevent soggy pucks and disappointing shots. Sharing these personal lessons might save you from unnecessary frustration and help you enjoy barista-quality espresso every morning.
The Hard-Won Wisdom I Can’t Keep to Myself
- Consistency Is Key: Using a digital tamping weight and thermometer transformed my routine. It’s incredible how small adjustments can lead to much richer, more balanced espresso. Don’t underestimate the power of precision tools—they’re game-changers.
- Cleanliness Over Everything: Regular deep cleans of the brew unit and shower screen prevented mineral buildup and flavor degradation. My secret weapon is a reliable descaling solution that’s gentle yet effective—trust me, your taste buds will thank you.
- Water Quality Matters: Switching to filtered water with a TDS below 150 ppm drastically reduced channeling and wet pucks. It’s one of those investments that pays dividends in flavor and machine longevity.
- Recognize Your Machine’s Signals: Unusual noises or pressure drops are often warning signs of clogs or wear. Addressing these early saved me from costly repairs and rushed fixes. Becoming attuned to your machine’s behaviors is essential for consistent performance.
- Experiment and Learn: Adjusting grind size and brew flow taught me that perfect espresso isn’t static—it’s a balance. Every machine and environment call for tweaks; stay curious and attentive.
Tools That Become Your Coffee Allies
- Digital Thermometer: Verifying your brew temperature keeps shots from lukewarm disappointments. I use a trusted model to ensure stability and guide adjustments.
- Calibration Weights: They ensure uniform tamp pressure, reducing variability in pucks and extraction. A small investment that dramatically improves results.
- Quality Descaler: Regular descaling prevents internal buildup. I choose one known for compatibility and efficacy—it’s essential for maintaining flavor clarity.
- Water Filter: Investing in a good filter helps prolong your machine’s life and keeps water consistency high—a simple step with profound impacts.
Your Coffee Future Starts Today
Mastering these subtle yet impactful aspects of your automatic milk frother, bean to cup, espresso grinder, super automatic espresso, or espresso machine can transform your daily coffee ritual into a satisfying craft. Remember, it’s the attention to detail and willingness to learn that unlocks the full potential of your equipment. Don’t wait for problems to appear—invest in routine maintenance now and savor every cup like a seasoned barista.
What’s one small change you’re planning to try with your coffee machine this week? Share your plans below—I’d love to hear how you’re taking your espresso game to the next level!
![Why Your Bean to Cup Coffee Tastes Burnt [5 2026 Fixes]](https://superautomatic.espressotechguide.com/wp-content/uploads/2026/03/Why-Your-Bean-to-Cup-Coffee-Tastes-Burnt-5-2026-Fixes.jpeg)