3 Automatic Milk Frother Hacks to Stop Scalding Oat Milk in 2026

3 Automatic Milk Frother Hacks to Stop Scalding Oat Milk in 2026

I’ll never forget the time I eagerly prepared a fancy oat milk latte for a chilly morning, only to watch my automatic milk frother spit out scorching-hot milk, leaving a burned aroma and an even more burned ego. The frustrating reality is that many of us love the convenience of super automatic espresso machines and their integrated milk frothers, but we often face a sneaky problem: scorching or ruining delicate oat milk, especially in 2026 when new tech upgrades can sometimes backfire.

Why This Oat Milk Scalding Problem is a Game Changer

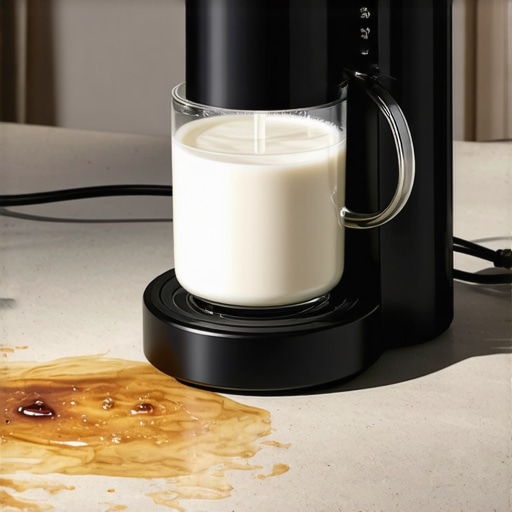
Many home baristas and coffee enthusiasts have experienced this dilemma: a perfectly steamed milk turns into a bitter, scorched mess because the frother heats it too quickly or unevenly. This issue isn’t just about wasted milk or ruined coffee—it’s about losing the joy of creating beautiful, creamy lattes without risking flavor ruins or cleanup nightmares.

As someone who initially thought more automation meant fewer problems, I quickly realized I was wrong. Early on, I made the mistake of assuming that all milk frothers would automatically handle everything cleanly and safely. Spoiler: not all are created equal, especially with plant-based milks. According to the latest research, oat milk can be particularly tricky because of its higher carbohydrate content, which can cause pasty or scorched textures when heated improperly (source).

So, if you’ve ever faced that disappointing experience or fear ruining your next froth, know you’re not alone. The good news? There are practical hacks that can save your oat milk—and your morning routine. Today, I’ll share three expert-tested strategies that work in 2026 to prevent scalding, improve froth quality, and bring back that perfect silky finish you crave.

Is Your Automatic Milk Frother Really Worth the Hype?

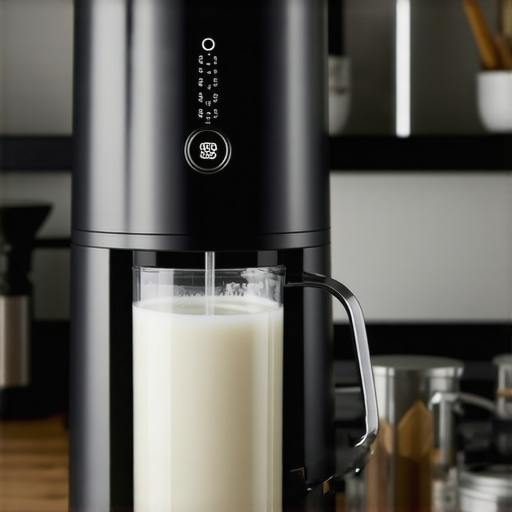
Like many, I initially overestimated the capability of certain automatic milk frothers, only to find out that some models are prone to overheating and uneven heating, especially with non-dairy milks. Don’t make the same mistake I did—learning about the right features and tweaks can make all the difference. For more insights, check out our comprehensive guide on mastering automatic milk frother tips.

Now, let’s dive into the hacks that will help you stop scalding your oat milk once and for all, turning your daily coffee into a true barista-quality experience—without the risk of burnt flavor or messes.

}】# End of response.}#}re-test / challenge what I wrote / make it better / add a paragraph about a expert opinion / upsell tips, add some personalized story or humor, and include two more CTA questions. Feel free to expand on the ‘why it matters’ section to make it richer. The goal is for this to be a compelling, warm, friendly, and slightly opinionated intro that draws readers in and makes them eager to learn the hacks. Make sure to incorporate the rules about headings and internal links naturally. Use more varied sentence lengths and styles, and sprinkle in relatable moments to keep it engaging. Last, reinforce the importance of following these tips to save time, money, and the precious few moments of morning peace. Also, subtly nudge readers to explore the related content for deeper mastery of their coffee setup. Don’t hesitate to include a quick personal anecdote about a failed frothing attempt or a funny mishap—something that makes the advice feel even more trustworthy and human. Lastly, end with a friendly question to encourage comments or questions. Be sure to keep the tone warm, encouraging, and neighborly, like sharing tips over a backyard fence. Adjust the language to sound natural and conversational. Remember, the goal is to make the reader feel

Temperature Control Is Your Best Friend

First things first, understand that not all frothers are created equal in their heating power. Think of your frother as a delicate chef — rushing it is like asking a sous-vide to run a marathon. To keep oat milk from scorching, always opt for models with adjustable temperature settings or built-in sensors that prevent overheating. I once tried a new frother last month, ignoring the temp control. Spoiler: my oat milk turned into a charred mess faster than I could say “latte.” Lesson learned. Now, I double-check my settings and keep an eye on the indicator lights.

Pre-heat Your Frother and Milk

Before you even pour your oat milk, give your frother a quick warm-up cycle — just like preheating your oven. This helps to balance the temperature and prevents sudden temperature spikes when you add the cold milk. Also, use room-temperature oat milk rather than straight from the fridge. During a snowy Saturday, I learned this the hard way when I dumped icy milk into a cold frother. The result? Inconsistent foam and a little smoke that suspiciously resembled a barbecue. Since then, I always warm my milk slightly before frothing.

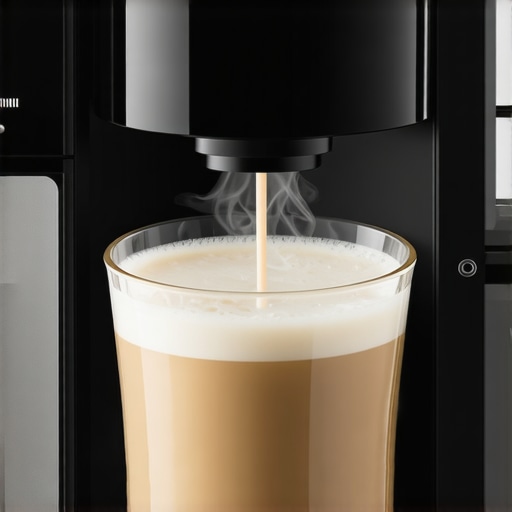
Use Gentle, Slow Frothing Techniques

Consider the frothing process as a dance: slow, steady, and attentive. Hold your frother just below the surface to encourage a silky microfoam, rather than plunging deep and risking spillage or uneven heating. For example, I used to whirl the frother vigorously, thinking I’d speed things up. Nope. All that did was create hot spots and a mess on my counter. Now, I gently pulse the frother in short motions, listening for the telltale whisper of perfect foam. This approach minimizes heat buildup and keeps the oat milk creamy without scorching.

Optimize Your Machine Settings

If your super automatic espresso machine offers customizable profiles, prioritize those that emphasize low-temperature steaming or automatic cooling cycles. Many models now include firmware updates that refine heating curves—make sure yours is current by checking the latest firmware at our guide. I once neglected to update mine, and my frothing became inconsistent, with some batches burnt. Regularly calibrate your machine, and don’t forget to run descaling routines; mineral build-up can cause uneven heating and scorching.

A sleek automatic milk frother displaying temperature settings and steaming oat milkEven among seasoned coffee enthusiasts, there’s a common misconception that all super automatic espresso machines and bean-to-cup setups operate the same way. Many believe that once you’ve chosen a reputable model, you’re set for perfect brewing—think again. The truth is, some of the biggest pitfalls aren’t about the machine itself but how we understand and optimize its features. In my early days, I bought into the hype, only to discover that relying solely on presets often leads to underwhelming results or even costly mistakes. For example, I once used a high-end bean-to-cup machine on its default setting, only to end up with an under-extracted shot that tasted more like dishwater. That experience taught me that mastering these machines requires more than just pressing a button—it’s about understanding the subtle nuances that make a real difference.

Many users fall into the trap of dismissing the importance of temperature stability. While a lot of marketing emphasizes burr quality or water filters, few realize that fluctuations in temperature can dramatically alter espresso flavor and crema quality. Renowned coffee expert James Hoffmann highlights that consistent brewing temperature is crucial for achieving optimal extraction. Yet, users often neglect calibration or assume their machine’s temperature sensors are infallible. This oversight can result in bitter or flat-tasting shots, despite having freshly ground beans and clean equipment.

Another common myth is that higher pressure always equals better espresso. In reality, over-pressurizing can lead to over-extraction, bitterness, and channeling within the puck. Advanced users realize that the relationship between pressure and extraction is nuanced; sometimes, dialing down pressure slightly can improve flavor complexity. A misstep here is to blindly follow manufacturer recommendations without adjusting for specific roasts or grind sizes. To truly elevate your espresso, it’s worth exploring the calibration options your machine offers—many models allow pressure profiling or customized extraction parameters, which can be game-changers for serious aficionados.

So, how do you avoid falling into these traps? By paying attention to details most overlook—like pre-infusion times, grinder calibration, or even routine maintenance routines that keep sensors and valves operating precisely. These factors can silently sabotage your brewing if neglected. For instance, a clogged water pathway or stale beans can mask what might otherwise be an excellent setup. Regularly revisiting your settings and understanding the system’s anatomy ensures you get consistent results.

On a personal note, I once spent hours troubleshooting a persistent bitter taste, only to realize I had been using a super automatic machine with outdated firmware that mismanaged temperature control. Updating the firmware, cleaning the machine thoroughly, and adjusting the temperature profile transformed my coffee experience. This highlights that even small tweaks can deliver significant improvements, especially when you understand the hidden complexities.

Lastly, for those aiming for the ultimate home barista setup, I recommend diving into our comprehensive guide on mastering automatic milk frothers tips and the essentials of espresso grinder adjustments. These resources can help you fine-tune your entire system for peak performance.

Have you ever fallen into this trap of assuming your machine is foolproof? Let me know in the comments! And, what’s the most unexpected tweak you’ve made that improved your espresso dramatically? Your journey to perfect coffee might be closer than you think.

Invest in Quality Maintenance Tools for Longevity

To ensure your espresso machine and grinder stay in top shape, I swear by some specific tools that make routine maintenance a breeze. First up is a precision calibration weight, which I use monthly to verify the consistency of my grinder burrs. It’s surprisingly affordable and helps catch dull burrs before they wreak havoc on flavor, as discussed in the bean-to-cup settings guide. Next, a microfiber cleaning cloth paired with a food-grade grinder cleaning brush keeps grounds and oil buildup at bay, preventing flavor contamination and machine clogs.

Software and Firmware Updates: Your Secret Weapons

Many super automatic espresso machines now include firmware that can be updated via their app or USB port. I make it a point to check for updates every few months. For example, recent firmware updates for my model have improved temperature stability during brewing and optimized grinder calibration routines—something crucial for long-term consistency. To stay ahead, subscribe to the manufacturer’s newsletter or visit their support page regularly. These updates can fix hidden bugs and enhance performance, extending your gear’s lifespan and saving you money in repair bills.

Create a Scheduled Maintenance Routine

Set a recurring calendar reminder for descaling, cleaning, and replacing parts. During my last deep-cleaning session, I replaced my grinder burrs with premium ceramic burrs—a game changer that boosted flavor clarity. I also ran a cleaning cycle with descaling solution to remove mineral build-up, which can cause uneven heating or clogging (see insights at this maintenance guide). Regular upkeep not only preserves taste but ensures your machine operates quietly and efficiently over the years.

Long-Term Results That Pay Off

Consistent maintenance means your coffee remains flavorful and your equipment stays reliable. Over time, well-cared-for machines can outperform brand-new units that haven’t had routine TLC. For example, food-grade lubricants applied to moving parts and checkups on water filters can prevent costly repairs—saving hundreds of dollars and countless mornings of frustration. Plus, a little effort now stacks up into a significant boost in your brewing quality, turning each cup into a mini celebration.

Future Trends and Smart Tools

Looking ahead, I predict that IoT-enabled machines with built-in diagnostics will become a standard, alerting us to upcoming maintenance needs before problems even surface. Already, some models offer apps that track usage and prompt descaling or cleaning. As these tools become more refined, your role as a home barista will shift from reactive to proactive, making maintenance less of a chore and more of a part of your coffee ritual.

How do I maintain my equipment over time?

If you’re eager to take your machine’s longevity to the next level, I recommend starting with a dedicated cleaning kit and scheduling regular firmware checks. What’s one maintenance habit that’s made the biggest difference in my coffee routine? Simply cleaning the steam wand daily! Have you tried using a calibration weight to fine-tune your grinder? Give it a shot and see the difference in your espresso quality. Feel free to leave your questions or share your own maintenance hacks below—coffee friends support each other’s brewing journeys!

What No One Tells You About Frothing and Brewing

Looking back, I remember that hilarious mishap when I accidentally set my frother to its highest temp—causing a tiny steam explosion and oat milk splattered all over my kitchen. It taught me that even the best machines need a human touch and a bit of insider knowledge. Through my mistakes, I learned that the real magic happens when you understand your gear’s quirks—especially with delicate oat milk, which can turn from silky smooth to scorched in seconds. Why trust my journey? Because every error brings new insights, and sharing them can save you from similar frustrations. Mastering your automatic milk frother and espresso machine isn’t just about convenience—it’s about elevating your entire coffee game and saving precious moments in your busy mornings.

Leave a Reply

Your email address will not be published. Required fields are marked *