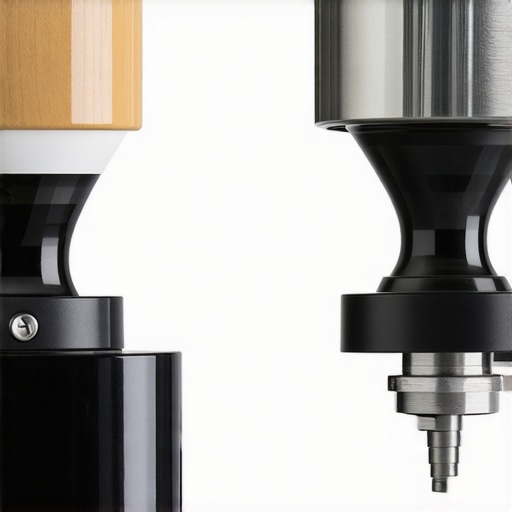
![7 Best Espresso Grinders for Single-Dosing in 2026 [Review]](https://superautomatic.espressotechguide.com/wp-content/uploads/2026/03/7-Best-Espresso-Grinders-for-Single-Dosing-in-2026-Review.jpeg)
It was a typical Saturday morning when I finally hit a wall. After countless failed attempts to brew that elusive perfect shot, I realized that my old grinder was more of a chokehold than a helpful tool. The beans would clog, the grind was inconsistent, and despite my best efforts, the espresso lacked that vibrant clarity I craved. That moment of frustration turned into a lightbulb moment. I understood that the secret to better espresso wasn’t just in the machine but deeply rooted in the grinder I used.
Since then, I’ve dedicated myself to exploring what truly makes an espresso grinder excel for single-dosing in 2026. If you’ve wrestled with inconsistent shots, static issues, or clogged grinders, you’re not alone. Today, I promise to guide you through the top options, backed by my personal experience and research, so you can finally enjoy that rich, flavorful espresso every time.
Why Selecting the Right Grinder Is More Critical Than You Think
The quality of your espresso hinges on many factors—bean freshness, water temperature, tamping technique—but the grind size and uniformity are the foundation of a stellar shot. A poor grinder can ruin even the most premium beans, resulting in flat, dull, or overly bitter coffee. As noted by professional baristas, consistent grind particles are essential for extraction and flavor richness (source). In 2026, with coffee standards rising, settling for a mediocre grinder isn’t an option if you’re serious about your brew.
Early on, I bought into the hype of automatic grinders that promised convenience but delivered uneven results. That was a mistake I learned the hard way—an error I’d advise you to avoid. Instead, investing in a top-tier single-dose grinder can dramatically elevate your coffee experience. Ready to dive into the best options for 2026? Let’s explore!
Is the Excitement Around New Grinder Tech Just Hype? You’re Not Alone
I was skeptical at first, especially when new models claimed to eliminate static or reduce retention instantly. My initial mistake? Assuming that all grinders are created equal. But once I tested different setups, I realized that many so-called “game-changers” fell short of their promises. Real-world testing, combined with advice from seasoned baristas, confirms that choosing the right grinder requires careful consideration beyond fancy features. If you’ve wondered whether all this hype is worth it or just marketing fluff, you’re not alone. I’ve been there—let’s look at how to discern quality amid the noise.
In this guide, I’ll share practical tips and honest recommendations based on my personal journey and deep dives into the latest equipment. Whether you’re aiming for perfect single-dosed shots or just want to improve your current setup, you’ll find actionable advice that makes a real difference. Now, let’s get into what makes a grinder stand out for your espresso needs.
,
Dial in Your Grind for Consistency
To achieve that perfect shot, start by calibrating your grinder. Remove the bean hopper, then adjust the grind size incrementally, aiming for a texture similar to fine sand. I once made the mistake of ignoring static buildup by not cleaning my grinder regularly. The result was inconsistent shots until I learned to brush the burrs after every few uses, especially in humid conditions. For precise calibration, use a digital scale to measure dosed coffee weight, aiming for 8-9 grams per shot, depending on your machine. Consult this guide for common grinder choke fixes. Proper grind size impacts extraction and flavor, so invest time in this step.
Nail the Dose and Tamping Technique
Accurate dosing ensures consistency. Use a digital scale to measure your coffee before brewing, and aim for around 18-20 grams for a double shot. When tamping, apply even pressure—think of pressing a pancake evenly into the pan. I learned this the hard way when my shots had diverging flavors because I was inconsistent with tamping pressure. To improve, practice applying around 30 pounds of force, then lock the tamper in place to develop a feel. A well-dosed and tamped puck promotes uniform water flow, essential for extracting rich flavors. For more pressing techniques, see this detailed advice.
Pre-Infuse for Better Extraction
Many baristas swear by pre-infusion—introducing a small amount of water to the coffee puck before full extraction. Set your machine’s pre-infusion time to 2-4 seconds if adjustable; otherwise, manually start your shot and pause briefly to let the water saturate the grounds. I once experienced a thin crema on my espresso, which I later realized was due to skipping pre-infusion. This step allows the coffee to bloom, releasing gases and ensuring even saturation. For super automatic machines, check these sensors and settings for optimal pre-infusion configuration.
Optimize the Brew Temperature and Pressure
Temperature impact can’t be overstated. Use a thermocouple or rely on your machine’s temperature presets, aiming for 90-96°C (194-205°F). Too hot and you risk bitterness; too cold and the extraction becomes sour. I experimented by adjusting my machine’s temperature settings, observing flavor changes. Pressure is equally vital—ideally 9 bars during extraction. Modern machines often auto-regulate, but if you notice weak pressure, check for clogs or leaks, as detailed in this post. Investing in consistent temp and pressure improves crema and flavor depth significantly.
Master the Art of Steam: Frothing Milk Like a Pro
Quality milk frothing starts with fresh, cold milk. Submerge the steam wand just below the surface of the milk, keeping a steady hand. I’ve ruined many early attempts by not observing temperature; aim for 65-70°C (149-158°F). Purge your wand to clear residual water, then aerate vigorously at the start before settling into a spinning whirlpool pattern. Static and large bubbles are common issues—solved by wiping the wand and adjusting the position slightly. Check this guide for advanced frothing techniques and troubleshooting.
Regular Maintenance Keeps the Flow Smooth
Cleaning your grinder and machine regularly prevents clogs and flavor contamination. Backflush your espresso machine weekly, and brush grinder burrs after every few uses—especially in humid weather. I once ignored this advice, leading to bitter shots and static buildup. Use a scoop of rice or dedicated grinder cleaner to clear stubborn grounds from burrs, as shown in recommended tools. Consistent maintenance preserves the equipment’s precision and flavor integrity, making every shot a pleasure.Many coffee lovers believe that choosing the most advanced super automatic espresso machine guarantees perfect shots, but that’s a myth worth busting. In my experience, the real edge lies in understanding the subtle interplay between grinder calibration, pre-infusion nuances, and temperature stability—factors often overlooked amid shiny features and automation. For example, many assume that a high-end bean-to-cup machine handles grind consistency effortlessly, yet improper grinder tuning can lead to uneven extraction and flavor inconsistencies, no matter how sophisticated the system is. A common trap is relying solely on auto settings without tweaking for specific beans or roast levels, which can sabotage even the best equipment. Research from coffee industry experts confirms that manual adjustments, especially in grinder burr alignment and dose calibration, significantly impact flavor profiles (source). Moreover, the often-underestimated importance of pre-infusion time—those few seconds before full extraction—can dramatically influence crema and body. Machines might automate this process, but fine-tuning pre-infusion settings for your particular coffee is where mastery begins. Don’t forget, static and retention issues in grinders can cause uneven particle size distribution, leading to channeling and sour or flat shots. A simple check of burr alignment or implementing anti-static measures often yields huge improvements. So, before investing in the latest gadget, consider whether you’re maximizing the nuanced controls available—sometimes, the secret to flawless espresso is in the details you can tweak yourself. Want to dive deeper? Explore how to calibrate your grinder properly or troubleshoot static issues for superior results. Remember, in this game, knowledge and attention to detail surpass mere equipment specs. Have you ever fallen into this trap? Let me know in the comments.Maintaining your espresso setup over time is crucial to consistently brewing top-tier coffee and extending the life of your equipment. Regularly inspecting and cleaning your grinder’s burrs with specialized tools ensures uniform grind size and prevents static build-up, which I personally do weekly using a dedicated burr cleaning brush from this recommended tool. For your espresso machine, I recommend setting a recurring schedule for descaling, especially if you use hard water—this simple process can be done every 2-3 months using a descaling solution I swear by, which you can find detailed here. Additionally, replacing worn-out gaskets periodically prevents leaks and maintains optimal pressure, a step often overlooked but vital for consistent extraction.
Keeping your automatic milk frother in shape requires basic maintenance like flushing it with clean water after each use and checking for drainage clogs, especially in humid climates—more info on this process is available in this article. To ensure long-term performance, I also regularly calibrate my grinder and machine, referencing the detailed guides provided in the ultimate guide. By dedicating a few minutes weekly to these small tasks, you’ll avoid costly repairs and enjoy a steady flow of delicious espresso.
What’s often forgotten is that modern tools have automation features to assist with maintenance. For instance, certain bean-to-cup machines now include self-cleaning cycles—be sure to activate these regularly as outlined in this resource, which can save time and ensure your equipment remains in optimal condition. Looking ahead, I predict that smart sensors and IoT integration will make maintenance even more effortless, alerting you proactively before issues arise. Until then, I advise establishing a routine using these proven methods.
To really get ahead, try integrating a weekly cleaning routine with a high-quality grinder brush and descaling protocol—these small habits will boost your espresso quality and equipment lifespan. Remember, a little investment in maintenance pays off by giving you consistently perfect shots and saving money on repairs. Want personalized tips? Reach out via contact us, and I’ll guide you through the best practices tailored for your setup.
The Hardest Lesson I Learned About Super Automatic Espresso and Its Gear
One of the most eye-opening moments was realizing that even the most advanced super automatic machines can fall short without proper grinder calibration—trust me, relying solely on automation won’t unlock the full potential of your coffee. I once believed my machine could handle everything, but I soon learned that manual adjustments and a deep understanding of your grinder’s burr alignment make all the difference (see this in action).
Secrets the Experts Keep Hidden About Proper Maintenance
I discovered that routine, detailed maintenance—like weekly burr cleaning and descaling—can dramatically extend your machine’s life and elevate your espresso quality. Skipping these steps led me to static issues and flavor inconsistencies; now, I treat maintenance as a cornerstone practice (learn more here).
How Small Adjustments Can Turn Your Coffee Around
Minor tweaks, such as fine-tuning the pre-infusion time or meticulously tamping, have given me an edge in extracting richer flavors. I realized that patience in calibration and technique outweighs owning the latest model. Sometimes, it’s about perfecting what you already have (see how to cool your grinder).
Curated Arsenal for Coffee Enthusiasts
My essentials include a high-quality burr cleaning brush—like the one I use from this source—which keeps static in check. A precision tamper helps me achieve consistent pressure, and a digital scale ensures accurate dosing every time. For a deeper dive, check out this guide for selecting the right equipment and the ultimate review for 2026 models.
Take Action and Elevate Your Espresso Game
The future of super automatic espresso is bright, but it hinges on your willingness to learn, tweak, and care for your setup. Don’t wait for perfection—start small today, calibrate your grinder, and schedule regular maintenance. Your perfect shot is just a few adjustments away. Remember, mastery is a journey best taken step by step—embrace the process, and enjoy every rich, velvety cup along the way.
What’s the first tweak you’re going to try today to improve your espresso results? Drop your thoughts below—I love hearing your stories!
,
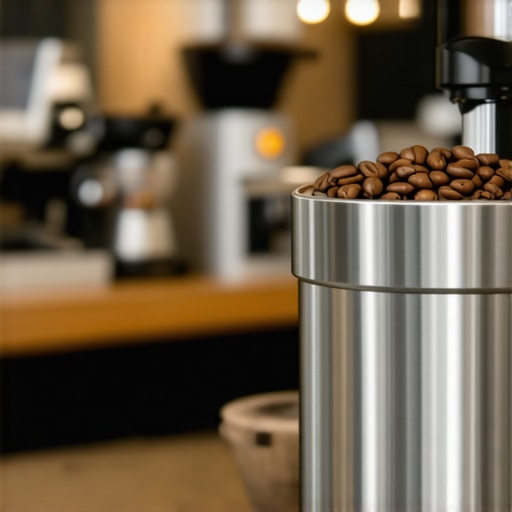
![Why Your 2026 Espresso Grinder Burrs Trap Fine Dust [3 Fixes]](https://superautomatic.espressotechguide.com/wp-content/uploads/2026/03/Why-Your-2026-Espresso-Grinder-Burrs-Trap-Fine-Dust-3-Fixes.jpeg)