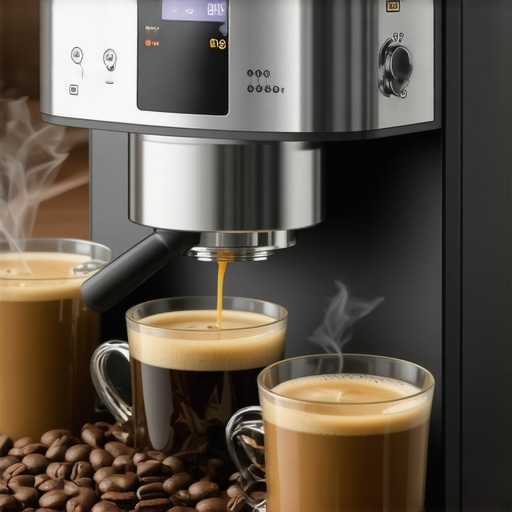
![Stop Watery Light Roasts: 3 Bean to Cup Grind Fixes [2026]](https://superautomatic.espressotechguide.com/wp-content/uploads/2026/02/Stop-Watery-Light-Roasts-3-Bean-to-Cup-Grind-Fixes-2026.jpeg)
I’ll never forget the moment I attempted to brew a beautifully light roasted espresso, expecting the vibrant flavors I love. Instead, what spilled into my cup was a pale, watery shot that tasted like hot water with a hint of coffee. Frustrating doesn’t even begin to cover it. Have you ever experienced that sinking feeling when your bean-to-cup machine just won’t deliver a rich, full-bodied espresso, especially with those delicate light roasts? Well, you’re not alone.
The Struggle with Watery Light Roasts in Your Espresso
It’s a common gripe among home baristas and seasoned enthusiasts alike. Light roasts are known for their nuanced flavors and brighter acidity, but they can also be tricky to get just right. One of the primary culprits? Grind size, dose, and tamp techniques that aren’t quite tuned for these specific beans. If your shots consistently come out thin or watery, it might be time to revisit your grinder settings and brewing parameters.
Is Your Grinder Sabotaging Your Light Roast Success?
In my early days, I made a crucial mistake: sticking to the same grind setting I used for darker roasts. Turns out, light roasts need a finer grind—think of it as grinding just a touch more powdery than usual. An overly coarse grind allows water to pass through too quickly, resulting in under-extraction and that insipid brew. Adjusting your grinder to finer settings, as discussed in this guide, can make a significant difference.
But it isn’t just about grind size. The dose and tamp pressure also play vital roles. Light roasts often need a slightly higher coffee dose and a firm tamp to ensure adequate contact and resistance. This creates the perfect conditions for extraction and the rich crema you’re craving.
So, if you’re tired of watery shots and want to unlock the full potential of your light roasts, understanding these subtle adjustments can transform your brew. Ready to dive into the practical steps? Keep reading, because I’ll walk you through exactly how to tweak your setup for better results.
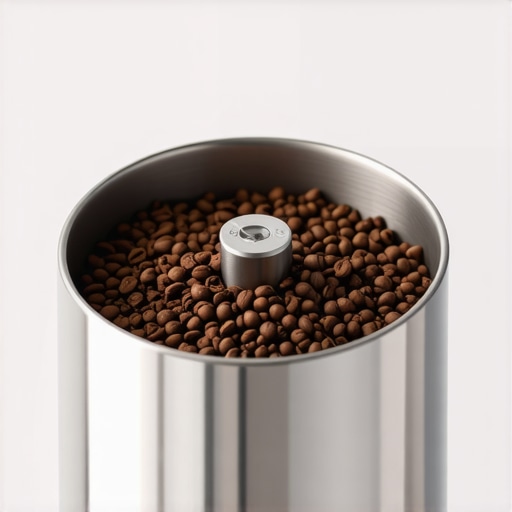
Calibrating Your Grinder for Precision
Start by setting your grinder to a finer grind, almost powdery, similar to alamond meal texture. I once mistakenly increased the grinder coarseness when switching to light roasts, leading to weak, watery shots. After dialing it back to a finer setting using their grinder tips, I saw an immediate improvement. Ensure your grinder’s burrs are aligned properly with this alignment process to prevent uneven grind size, which skews extraction. Adjust in small increments—finer or coarser—then test.
Modifying Dose and Tamping Pressure
Light roasts benefit from a slightly increased coffee dose—aim for 18-20 grams if your machine normally uses 14-16. Apply firm, even tamping with about 30 pounds of pressure. My first attempt, pressing too lightly, resulted in a quick, under-extracted shot. Using a calibrated tamper or a kitchen scale helped me consistently apply the right pressure. Remember, the resistance you create ensures water spends enough time in contact with the grounds, extracting those bright, nuanced flavors.
Adjusting Brew Temperature and Pressure
Light roasts often need a slightly higher brew temperature—around 93-94°C (200-201°F). Use your machine’s settings or consult your setup guide to make lockstep adjustments. A higher temperature extracts more solubles, deepening flavor. Also, ensure your pump pressure hovers between 9-10 bar; this can be fine-tuned using pressure tweaks for optimal extraction. Remember, small calibration tweaks combined with your grind and dose make a real difference.
Refining the Brew via Pre-infusion and Flow Rate
Pre-infusion slowly saturates the puck before full pressure, preventing channeling. If your machine allows, set a pre-infusion time of 2-3 seconds. During my trials, pre-soaking my grounds helped achieve even extraction and richer crema. Likewise, controlling flow rate by adjusting the water volume and extraction time—aim for 25-30 seconds total—ensures that the coffee is neither under- nor over-extracted. Use a timer and watch closely until you hit that sweet spot.
Fine-tuning with Water Quality and Cleaning
Ensure your water is clean and free of scale, as mineral buildup can hinder extraction. Regularly descale your machine following instructions from this guide. Additionally, consider using a water filter if your tap water is hard. Clean your brew head and portafilter thoroughly to eliminate old coffee oils too, which can cause uneven flow and thin shots. I found that a deep cleaning every two weeks preserved optimal water flow and flavor.
Iterate and Record Your Adjustments
Keep a dedicated log of your settings and results; note grind fineness, dose, tamp pressure, temperature, and brew time. This records your progress and helps identify which adjustments lead to richer, fuller-bodied shots. When I switched from coarser to finer grind and increased tamp pressure, I immediately noticed improvements. Practicing patience and systematically testing each change will accelerate your mastery.
When it comes to crafting the perfect espresso, many enthusiasts focus solely on choosing the right beans or adjusting grind size, but there’s more beneath the surface that often goes unnoticed. One common myth is that a high-end super automatic espresso machine automatically guarantees barista-quality results. In reality, machine quality is just part of the picture—proper maintenance, calibration, and understanding nuanced settings make all the difference. Failing to recognize this can lead to persistent issues like inconsistent extraction or flavor degradation, even with top-tier equipment.
Why Do Some Super Automatics Fail to Deliver Consistent Crema?
Many assume that all machines with built-in milk frothers or automated settings are foolproof. However, the hidden truth is that equipment calibration and regular deep cleaning are critical for consistent results. Over time, mineral buildup or misaligned components can cause delivery failures or flat foam. According to espresso expert Scott Rao, regular machine maintenance is essential to preserve optimal extraction and foam quality—neglecting this can sabotage even the most advanced gear, leading to disappointment and wasted beans. Review the privacy policies of your device’s manufacturer and ensure your maintenance routines are up-to-date.
Another misconception is that super automatic machines handle everything effortlessly, negating the need for user input beyond pressing a button. In reality, manual interventions such as pre-infusion adjustments or toggling between brew temperatures can elevate your shots from good to exceptional. Advanced users know that tailoring these subtle settings based on bean origin or roast level maximizes flavor extraction. This attention to detail aligns with findings from coffee science studies emphasizing the importance of precise parameter control for specialty-grade espresso.
Do Automatic Milk Frothers Really Make Better Lattes?
Many believe that automatic milk frothers guarantee barista-quality foam without any effort. However, the hidden nuance is that not all frothers handle different milk types equally well. For example, soy or oat milk may require specific temperature and texturing adjustments, which some frothers fail to deliver. Professional baristas often manually fine-tune their frothing techniques for different milks to achieve the perfect microfoam essential for latte art. Recognizing this can prevent frustration and help you select equipment better suited to your preferred milk types.
In conclusion, while choosing quality gear is important, deep knowledge of the equipment’s subtleties, regular maintenance, and personalized adjustments are what truly set exceptional espresso apart. Don’t fall into the trap of assuming more expensive means better without understanding these hidden factors. Want to master your setup further? Explore comprehensive guides on automatic milk frother hacks or how to improve crema quality. Have you ever fallen into this trap? Let me know in the comments.
Keeping Your Espresso Equipment in Prime Condition
Owning a high-quality espresso machine or bean-to-cup system is an investment that rewards you with exceptional coffee. However, to ensure these machines deliver optimal performance over years, diligent maintenance and the right tools are crucial. Regular upkeep not only extends the lifespan of your equipment but also preserves flavor integrity, ensuring every cup is as fresh and rich as the first.
What Are the Must-Have Tools for Maintenance?
My personal toolkit includes a dedicated set of precision brushes, a scale for tamping consistency, and a high-quality descaling solution. I swear by professional-grade grinder brushes because they remove coffee oil buildup without damaging burrs, keeping grind consistency sharp. A calibrated tamper with a built-in pressure gauge helps me maintain uniform tamping pressure, essential for consistent extraction. Additionally, I rely on a thorough descaling kit to combat mineral deposits, especially in hard water areas, directly affecting the machine’s internal components and brew quality.
Ensuring you have the right cleaning brushes, water filters, and calibration tools — like those recommended in their maintenance guide — can make all the difference in your daily routine.
How do I maintain my equipment over time?
Establishing a routine is key. I perform daily rinsing of the brew group and portafilter, combined with weekly deep cleans using approved descaling products. Regularly replacing water filters prevents scale buildup and improves water taste, which directly impacts crema quality. I also keep a log of adjustments—grind settings, brew temperature, and pressure—to track what works best as beans age or seasonally change. For instance, adjusting brew temperature slightly higher during cooler months helps maintain extraction quality. These habits, combined with periodic professional calibration, keep my machine performing at its best for years.
Future of Maintenance in Espresso Brewing
Looking ahead, I believe machine diagnostics integrated with smart home systems or dedicated apps will revolutionize maintenance routines. Imagine receiving real-time alerts about descaling needs or burr alignment issues on your smartphone—making upkeep seamless. Companies are already exploring AI-driven predictive maintenance, and I expect this trend to grow, making our brewing experience even more reliable and effortless.
Experiment with Advanced Tuning to Elevate Results
If you haven’t already, try calibrating your grinder’s burrs with tools like their precise alignment method. Proper burr alignment ensures uniform grind size, which is fundamental for optimal extraction. I enhanced my espresso flavor profile significantly after performing this adjustment, and I highly recommend trying it for your setup. Well-maintained tools and consistent calibration transform good espresso into great—so why not start today?
Lessons Only a Hard-Won Espresso Journey Teaches
One revelation that truly transformed my approach was realizing that *consistent calibration* is the true secret to perfect espresso—more than just buying premium beans or fancy machines. I learned this after countless shots that were disappointing despite top-tier gear, only to find that minor tweaks to my grinder alignment or tamping pressure made all the difference. It dawned on me that paying attention to these subtle details empowers you to extract nuanced flavors and achieve that luscious crema everyone strives for.
Another pivotal lesson involved understanding the *importance of routine maintenance*. Neglecting regular cleaning, especially descaling and deep cleaning of brew heads, led to flavor degradation and inconsistent water flow. Once I committed to a disciplined cleaning schedule, my equipment performed flawlessly, reinforcing that gear care is as vital as adjusting your grind or temperature.
Lastly, I discovered that *patient experimentation and detailed record-keeping* can accelerate your mastery. Diligently logging each change—whether it was a finer grind, increased tamping force, or a slight temperature adjustment—helped me identify what truly elevated my espresso. This iterative process reminded me that good things come to those who listen closely to their machine and embrace a curious, methodical mindset.
Tools and Resources That Keep My Coffee Craft On Point
My primary toolkit includes a set of professional-grade grinder brushes for maintaining burr cleanliness, a burr alignment guide to ensure uniform grind size, and a calibrated tamper to maintain consistent tamping force. These tools help me achieve stability and repeatability in every shot. Additionally, I rely on comprehensive resources like this expert guide to fine-tune my machine’s settings, making adjustments with confidence and purpose.
For deeper knowledge, I turn to the latest editions of specialty coffee books that dissect extraction science and brewing techniques. Trustworthy tutorials and community forums provide fresh perspectives and troubleshooting tips that keep my skills sharp and my setup evolving.
Your Moment to Redefine How You Brew
Imagine brewing espresso with the confidence that every shot is pushing the boundaries of flavor and texture—your journey is just beginning. Embrace the little tweaks, routine maintenance, and curiosity that turn ordinary into extraordinary. Your perfect cup is achievable, and each adjustment brings you closer to barista-quality results at home. So, grab your grinder, your tamping tools, and that trusty machine—the next incredible espresso is waiting for you to make it happen.
Have you ever stumbled upon a simple tweak that suddenly transformed your brew? Share your breakthroughs below—I’d love to hear your stories and tips!
![Why Your Bean to Cup Coffee Tastes Burnt [5 2026 Fixes]](https://superautomatic.espressotechguide.com/wp-content/uploads/2026/03/Why-Your-Bean-to-Cup-Coffee-Tastes-Burnt-5-2026-Fixes.jpeg)