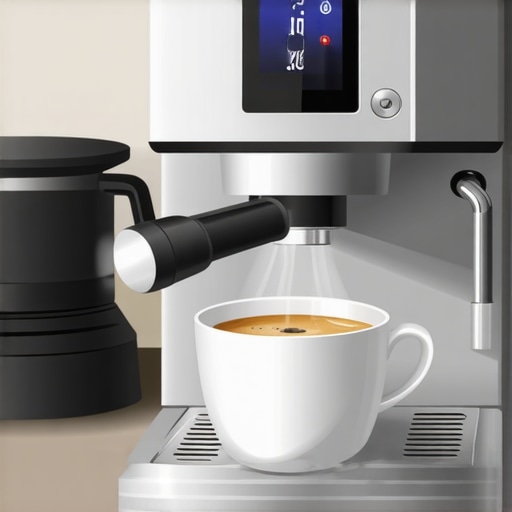
I vividly remember the first time I tried to craft that perfect, thick espresso shot with my super automatic machine. The anticipation built up, and I even preheated my cup, confident I was set for a barista-quality brew. But instead, what I got was a watered-down disappointment, a thin shot that lacked depth. Frustrating, right? That was my lightbulb moment—realizing that my machine’s default settings weren’t enough anymore. As the tech advances in 2026 keep pushing the boundaries of home brewing, understanding how to tweak your super automatic espresso machine becomes crucial for that rich, velvety crema we all crave.
Why Settling for Less Isn’t an Option Any Longer
In recent years, espresso enthusiasts and casual drinkers alike have come to expect more from their machines. The days of simply pressing a button and accepting whatever comes out are fading fast. With the surge of innovative features and customizable settings, there’s a growing demand for thicker, creamier espresso shots that truly elevate the experience. If you’re still stuck on factory default settings, you’re missing out on flavor, aroma, and that satisfying texture that makes coffee enjoyable.
Discovering how to optimize your machine’s settings is not just about improving quality—it’s about embracing the full potential of your investment. A well-tuned espresso shot not only tastes better but also helps preserve your machine’s longevity and efficiency. Trust me, getting these four professional-level settings dialed in changed my entire brewing game.
Now, do you find yourself frustrated with shots that are too watery or lacking depth? You’re not alone. I’ve been there, and I know how disheartening it can be. But the good news? With a few simple tweaks, you can enjoy that thick, luscious espresso every single time. Ready to unlock your machine’s full capabilities? Let’s dive into the key settings that will make a tangible difference in your 2026 brewing routine.
Is the Focus on Settings Overhyped?
Initially, I thought that investing in top-tier beans or the latest grinder would solve everything. However, early on, I made the mistake of ignoring the hardware settings, thinking they were just background noise. It wasn’t until I educated myself about the importance of proper calibration—like adjusting grind size or brewing pressure—that my espresso truly transformed. According to coffee experts, such as those at the Espresso Tech Guide, mastering machine settings is essential for maximizing flavor and texture. If you want to avoid my initial mistake and truly elevate your espresso, understanding these four settings is the way forward.
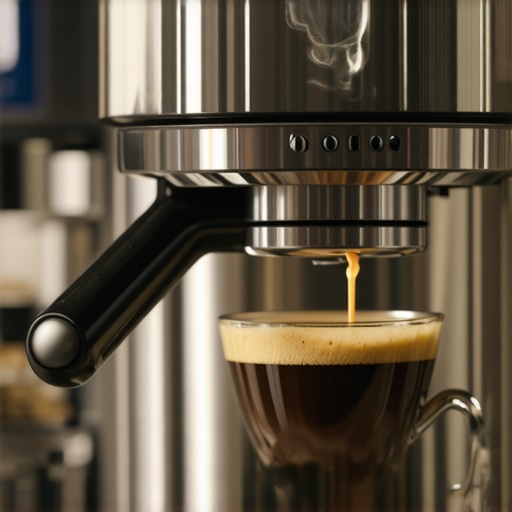
Adjust the Grind Size for Optimal Extraction
Start by turning off your machine and locating the grinder settings. Turning the grind finer results in slower water flow, increasing extraction time, which can help produce a thicker, crema-rich shot. I recall the first time I tweaked my grinder to a finer setting; the espresso became noticeably richer and more velvety. To do this effectively, consult your machine’s manual or this grinder essentials guide. Remember, small incremental changes—about a quarter turn—are best to avoid overdoing it.
Calibrate the Brew Pressure
Next, set the proper brewing pressure, typically around 9 bars. Many super automatic machines allow pressure adjustment via a menu or physical dial. Adjustments directly influence the espresso’s crema thickness. I once underestimated this step, resulting in a weak shot. Using a pressure gauge can help visualize the setting. If your machine lacks an easy way to modify pressure, it might be time to check this pump pressure tips. Proper pressure ensures a slow, even extraction that maximizes crema and flavor.
Fine-Tune the Water Temperature
Temperature impacts solubility and crema formation. Most super automatics allow you to set your preferred brewing temperature. For thicker, more robust espresso, aim for a temperature of about 200°F (93°C). To do this, monitor your shots and adjust the temperature settings accordingly, as outlined in this temperature adjustment tutorial. I once had a shot that tasted bitter because it was too hot; lowering the temp slightly made all the difference. The key is gradual modifications until the shot’s balance is just right.
Customize the Dose and Tamp Pressure
Set the amount of coffee ground for each shot—often called the dose. Using more coffee results in a thicker shot with richer crema, but overfilling leads to over-extraction and bitterness. A typical dose ranges between 18-20 grams. When I increased my dose from 16g to 18g, the shot’s body significantly improved. Also, ensure the tamp pressure is firm and even—aim for about 30 pounds of force. Consistent tamping guarantees uniform water flow through the coffee puck, crucial for a thick, even extraction. Practice with a kitchen scale if needed, and remember, a level and steady tamp is essential for quality results.
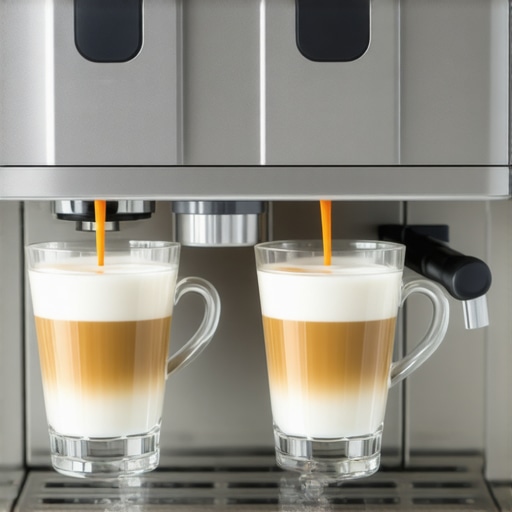
Optimize Your Milk Frothing Technique
To complement your coffee adjustments, perfecting the milk frother helps achieve velvety, barista-quality foam. Use a cold pitcher and milk of your choice—oat, almond, or dairy. Position the wand just below the surface for microfoam—tiny, dense bubbles that give your espresso that silky finish. While I was struggling with large bubbles, I found that starting with fresh, cold milk and maintaining a steady steam pressure made a noticeable difference. Check this automatic milk frother guide for detailed tips. Consistent practice leads to better texture and helps that thick, creamy crema meld seamlessly with the milk.
Observe and Record Each Adjustment
Last, keep a log of your modifications—note the grind setting, pressure, temperature, dose, and tamp force. This record will help you identify patterns and replicate your perfect shot. I kept a small notebook specifically for my espresso tweaks, which eventually led to my ideal profile. Patience and precision are your best friends here. If you ever feel stuck or need further advice, you might consider consulting this contact resource. Mastering these core settings transforms your super automatic machine into a true barista tool, delivering consistently rich, thick, and flavorful espresso cups.While many consider their espresso machines, grinders, and milk frothers as straightforward tools, true coffee mastery requires understanding subtle details that often go unnoticed. For instance, the common myth that higher brew pressure always equals better extraction can mislead even experienced users; in reality, excessive pressure can over-extract bitterness, especially with delicate beans. Recognizing such nuances is crucial, as suggested by caffeine experts who emphasize the importance of tailored pressure settings for optimal flavor.
Another sneaky trap involves the misconception that automatic milk frothers are foolproof. Many users neglect to clean and calibrate these devices regularly, leading to flat or burnt foam. Regular maintenance, guided by resources like this frosting maintenance article, is essential for consistent performance. Failing to do so can diminish the quality of your milk textures and overall espresso experience.
When it comes to grinders, the overlooked issue is burr alignment. Even slight misalignment can cause uneven grinding, resulting in inconsistent extraction and flat crema. Many assume their grinders are fine until they notice a drop in shot quality; however, routine checks and realignment—sometimes as simple as a quick calibration—can yield dramatically better results. Learn more about the importance of proper grinder setup here.
For those invested in bean-to-cup systems, a common mistake is neglecting bean freshness or roast level. Often, users believe their machine’s settings are to blame for sour or bitter shots, but in fact, selecting beans with appropriate roast levels and freshness dates makes a notable difference. Additionally, small adjustments in grind size or dose tailored to specific beans can significantly elevate your brewing. Remember, even the best machine can’t compensate for poor bean quality or improper preparation.
Addressing advanced concerns, have you ever wondered why certain espresso machines seem to taste consistently better with specific beans or settings? The answer lies in understanding how variables like temperature stability, puck density, and even ambient humidity influence extraction. Mastering these factors involves meticulous calibration, often requiring trial, error, and external insights. Deepening this knowledge helps avoid common pitfalls and pushes your espresso quality to professional levels.
In sum, brushing off these nuanced aspects may seem minor but can dramatically impact your espresso’s flavor, aroma, and texture. As experts highlight, a true barista mindset involves continuous learning and fine-tuning—not just relying on automatic features. Have you ever fallen into this trap? Let me know in the comments, or explore more advanced tips in our comprehensive guide.Keeping your espresso machine in optimal condition ensures consistently excellent coffee and prolongs its lifespan. A few specialized tools and disciplined maintenance routines are essential for serious enthusiasts looking to elevate their daily brew. For starters, investing in a high-quality **burr cleaning brush** is a game-changer. I personally use the Osteen Espresso Grinder Brush because its stiff bristles remove coffee oils and residue from burrs without damaging them, which is critical for consistent grind size and flavor. Regular use of this brush prevents flavor contamination and maintains grind accuracy—an often overlooked aspect in home setups.
Another must-have is a **calibrated pressure gauge**. Unlike generic gauges, my preferred model from Barista Hustle provides precise feedback and helps fine-tune my brew pressure, ensuring I consistently achieve that rich crema. Proper pressure calibration directly influences extraction quality, as detailed in this guide on grinder essentials. Over time, components like pump seals can wear out, causing pressure fluctuations, so monitoring with an accurate gauge allows timely intervention.
Maintaining your espresso machine also involves fluid management. I recommend using a **descaling solution** like Dezcal, which I apply quarterly. Regular descaling prevents mineral buildup inside boilers and pipes, which can lead to overheating and inconsistent temperature stability—crucial for a perfect extraction. Checking your manufacturer’s specifications, as outlined in the Home Barista Tools article, helps you choose the right descaling schedule.
Equipment-specific accessories can make maintenance easier. For super automatic machines, I rely on a **silicone gasket scraper**, which safely cleans gaskets and seals without scratching, maintaining proper pressure and preventing leaks. Over time, gaskets can degrade, causing pressure drops and water leaks, so inspecting and replacing them when necessary is vital. Not only does this safeguard your machine’s functionality, but it also ensures safety and hygiene.
As for long-term results, I found that keeping a **logbook**—either paper or digital—of maintenance activities, settings, and beans used helps me identify patterns that impact my shots. This disciplined approach leads to better calibration over months rather than weeks. For example, noticing a slight pressure drop after a specific roast level prompted me to clean the pump seals more frequently, as recommended in this pump maintenance article.
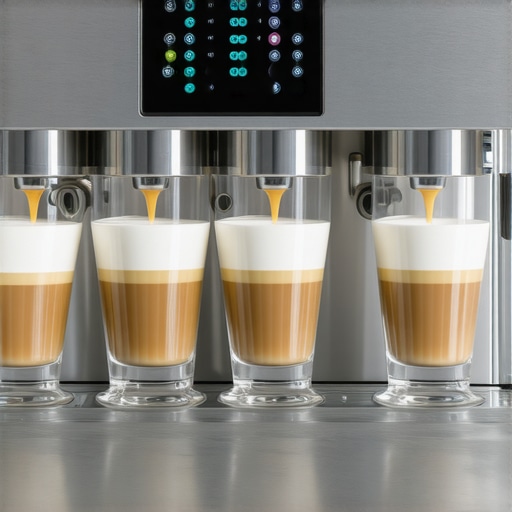
Predicting future trends, I believe that smart, connected tools with IoT capabilities will become more prevalent. Imagine your machine automatically alerting you when a component needs replacing or when calibration drifts beyond optimal parameters. This integration will make maintenance almost foolproof, allowing even casual users to enjoy professional-grade results without technical expertise.
How do I keep my espresso gear working flawlessly over time? The key is routine checks—clean burrs and seals, monitor pressure and temperature with precision tools, and descaling regularly while keeping detailed records of your settings and maintenance. Don’t forget to explore specialized tools like the professional hacks for bean-to-cup machines to push your brewing game even further. I highly recommend trying out a calibrated pressure gauge to better understand and control your extraction process—it’s a small investment that pays off with richer, more consistent espresso every time.
What I Wish I Knew Before Fine-Tuning My Espresso Setup
One of the most eye-opening lessons I’ve learned is that even the most advanced super automatic espresso machines respond surprisingly well to meticulous calibration. I used to think that once I set it and forgot it, but the years proved otherwise. Small tweaks in factors like temp, pressure, or grind size can dramatically improve crema, aroma, and flavor, transforming ordinary shots into café-quality brews. The real game-changer was discovering that understanding each setting’s impact—beyond just default presets—allowed me to craft personalized coffee experiences that elevate my mornings and impress guests alike.
Another insight I gained is that equipment maintenance isn’t just routine—it’s a power tool for flavor. Regularly cleaning, calibrating, and even replacing worn-out parts like gaskets and burrs keeps the machine performing at its peak, ensuring every shot is consistent and rich. I found that keeping a detailed log of adjustments and maintenance helped me refine my process over time, making my espresso routine both precise and enjoyable.
Lastly, I found that investing time into understanding the nuances of bean freshness, roast level, and water quality is as crucial as fine-tuning machine settings. No matter how perfect your setup is, inferior beans or stale supplies will limit your potential. So, embracing a holistic approach—edge in the equipment, craft, and ingredients—created a coffee experience that’s richer, thicker, and more satisfying than ever before.
Tools and Resources That Elevated My Coffee Game in 2026
- Osteen Espresso Grinder Brush: This little tool made a big difference in keeping my burrs spotless. Clean burrs mean consistent grind size, which translates directly into better espresso flavor. I trust it because it simplifies maintenance and produces repeatable results. For deep cleaning without dismantling, check out the pro hacks article.
- Barista Hustle Pressure Gauge: Precise pressure control took my shots from decent to stellar. I monitor and adjust with confidence, knowing I’ve got accurate feedback. It’s a small investment that pays off every time I brew, ensuring the perfect extraction. Learn more about pressure tuning in this guide.
- Dezcal Descaling Solution: Mineral buildup can sabotage temperature and pressure stability. Regular descaling with Dezcal kept my machine flowing smoothly, avoiding costly repairs and flavor degradation. I recommend setting a quarterly schedule, but also listening to your machine’s warnings.
- Silicone Gasket Scraper: Gaskets wear out unnoticed but are essential for maintaining pressure integrity. I use this scraper weekly to keep seals clean and intact, extending the life of my machine and ensuring each shot’s quality remains high. Find tips in frosting maintenance articles.
Step Into Your Espresso Making Journey with Confidence
Embracing the art of tweaking your super automatic espresso in 2026 isn’t just about better coffee—it’s about rediscovering joy, mastery, and personal craft. Start small, stay curious, and enjoy the process of elevating every shot. Remember, the magic is in the details, and you’re capable of bringing out the best in your machine, beans, and technique. Whether you aim for that perfect crema, luscious microfoam, or consistent quality, your journey is uniquely yours. Happy brewing!
What’s the biggest adjustment you’re excited to try next in your espresso routine? Share your goals below—I’d love to hear your plans to refine your coffee experience!