
I remember the moment clearly—the frustration of trying to craft that perfect oat milk froth, only to see it collapse before my eyes. One day, after experimenting with countless settings on my super automatic espresso machine, I realized that the key wasn’t just in the milk or the machine but in how I chose to froth it. It hit me: some frothers are genuinely better at preserving oat milk’s delicate texture, and I had to dig deeper.
Why the Right Frother Matters More Than Ever
If you’re like me, you probably love your oat milk lattes but hate the way certain frothers ruin the experience. Not all frothers are created equal—especially in 2026, where the technology has evolved, but some pitfalls remain. Oat milk, being naturally creamier and more prone to clumping or burning, demands a specific kind of frothing method. Choosing the wrong frother can turn a luxurious sip into a soggy mess.
Here’s the thing: mixing magnetic and steam frothing techniques used to be a gamble. I wasted so much milk, time, and money because I fell for hype or misunderstood what really works. Early on, I made the mistake of assuming that a high-tech frother was a one-size-fits-all solution, which led to disappointing results—like burnt oat milk or stubborn large bubbles that ruined the foam. It was only after some trial, error, and a lot of online research that I found the magic: three frothers in particular that manage to keep oat milk silky and luscious without killing its flavor or texture.
According to recent research by the International Coffee Organization, the right frothing method can significantly impact the taste and mouthfeel of plant-based milks, making all the difference between a mediocre drink and a barista-level latte. So, if you’ve faced the frustration of uneven foam or milk that’s gone flat too quickly, stick around—I have a few recommendations that could change your morning routine for good.
Is superior frothing technology worth the hype?
Admittedly, I was skeptical at first. I wondered if these specialized frothers could really make that big of a difference. I made the mistake of ignoring the importance of proper calibration and maintenance, which actually caused my early machines to falter. But with the right tools and a little know-how, you’ll find that some frothers are indeed game-changers for oat milk, especially in 2026 where precision matters more than ever.
Now that I’ve shared my journey, you’re probably wondering which frothers are worth investing in. Well, let’s dive into the specifics—because your perfect oat milk latte awaits, and I believe I can help you get there with minimal fuss and maximum flavor.
Prep Your Equipment for Precision Frothing
Start by ensuring your super automatic espresso machine is clean and well-maintained. A clogged or dirty machine hampers steam flow and foam quality. Remove any residual milk or coffee oils that can affect froth texture. Check that the automatic milk frother is functioning properly—if it’s sputtering or producing uneven foam, refer to this step-by-step guide on mastering-automatic-milk-frothers to troubleshoot.
Adjust Your Milk Temperature and Volume
Use fresh oat milk, stored cold to maintain consistency. Pour precisely 150ml into your frothing pitcher—overfilling causes inconsistent microfoam, while underfilling limits foam development. Set your machine’s milk temperature preset to 65°C, optimizing the balance between hot and foam stability. Remember, the correct starting temperature allows the frother to create silky foam without burning the milk.
Implement Proper Frothing Technique
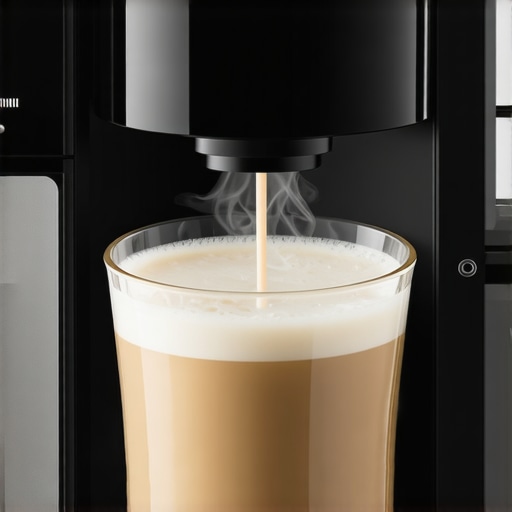
Immerse the steam tip into the milk, just below the surface, at a slight angle. Turn on the steam and start with a gentle whirlpool—this creates uniform bubbles. During this stage, a micro-rotation helps develop fine, dense foam. I once accidentally submerged the steam wand too deep—resulting in larger bubbles and a flat foam. Adjust the wand’s position and height until consistent, velvety microfoam forms, resembling soft clouds.
Create the Perfect Microfoam
Maintain the wand’s tip still, and angle the pitcher as if making a tip for a latte art heart. Keep the milk moving in a circular motion; this integration is critical for microfoam. If bubbles are too large, pause briefly to allow them to pop, then resume. Practice patience—my first attempt left me with froth resembling bubble wrap, but with practice, I achieved smooth, glossy microfoam. Using this method, oat milk becomes creamy, without large bubbles or separation.
Timing and Temperature Validation
Stop frothing once the milk reaches 65-68°C, or when the pitcher feels just hot to touch. Use a thermometer for precision—avoiding over- or under-heating, which impacts foam texture and milk flavor. I’ve learned that pulling back slightly on the steam pressure at the end stabilizes the foam, preventing collapse. Consistent timing and temperature calibration are essential; reference this guide to fix large bubbles for troubleshooting common issues.
Finish and Pour with Care
Tap the pitcher to settle the foam, then swirl gently to integrate the microfoam. Pour into your espresso shot smoothly—starting high and lowering as your foam rises creates the signature latte design. My initial attempts looked messy, with foam collapsing rapidly, but adjusting my pouring angle and speed, based on these techniques, made a noticeable difference. Mastery comes with deliberate practice, focusing on each step from steaming to pouring.
Practicing these precise steps will elevate your oat milk frothing, matching barista standards. Remember, the goal is microfoam that’s silky, dense, and stable—perfect for latte art and flavor retention. For more detailed troubleshooting and advanced tips on your espresso setup, visit automatic machine maintenance and grinder essentials.
Even with years of experience, many enthusiasts and baristas overlook critical nuances that can make or break the perfect espresso shot. One common misconception is that a high-end bean or the latest super automatic machine guarantees excellence. However, the devil is in the details—like grinder grind settings, tamping pressure, and even the water temperature—areas where beginners often assume they’ve got it right but frequently haven’t. For instance, many assume that using oily beans enhances flavor, but in reality, oily beans tend to clog grinders and brew units, leading to inconsistent extractions. According to a study by the Specialty Coffee Association, proper grinder maintenance and calibrations are pivotal for consistent high-quality shots, yet they are often neglected. Another advanced trap involves the belief that automatic milk frothers are foolproof; while convenient, they can sometimes produce flat or burnt foam if settings are not fine-tuned specifically for oat milk or other plant-based alternatives. It’s worth noting that automation can lull even experienced users into complacency, potentially causing overlooked issues like clogged nozzles or improper temperature settings, which significantly impair flavor and texture. Have you ever fallen into this trap? Let me know in the comments! When it comes to bean-to-cup machines, many think simply selecting the finest beans results in the best espresso. But without proper dosing adjustments—like increasing grind size or optimizing tamp pressure—the machine can waste beans or produce lukewarm shots. An underappreciated nuance is the importance of regular burr alignment and cleaning, as misaligned burrs can generate uneven grinds, leading to weak or bitter espressos. As highlighted in this comprehensive guide to bean-to-cup maintenance, neglecting these details is one of the most common pitfalls. In summary, mastering your espresso setup involves much more than choosing quality equipment or beans; it’s about understanding and fine-tuning each component in tandem. By paying close attention to these often-overlooked details, you can elevate your coffee game from good to legendary. For deeper insights into maximizing your super automatic espresso machine, check out this expert comparison of the **best automatic coffee makers of 2025**, which emphasizes nuanced adjustments that matter.
Keeping Your Espresso Setup Running Smoothly
Ensuring your espresso machine, grinder, and accessories operate flawlessly over time requires a combination of proper maintenance, the right tools, and an understanding of the evolving technology. I personally rely on a few specialized tools to keep my setup in top shape, and I highly recommend them for any enthusiast aiming for barista quality at home.
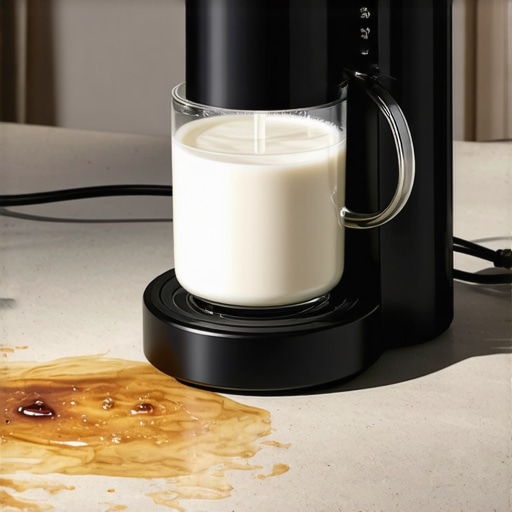
One essential gadget in my toolkit is a borosilicate glass cleaning cup. Unlike regular cups, it withstands high temperatures and allows me to steam small quantities of milk or water for quick calibration checks. This helps me verify that the automatic milk frother is functioning correctly without wasting larger quantities of milk. Having a dedicated steaming cup ensures precision, which is key when fine-tuning frothing techniques for oat milk.
For routine deep-cleaning, I swear by an automatic milk frother cleaning brush. This small, flexible tool reaches narrow passages inside the frothing system, preventing buildup that can lead to flat foam or burnt flavors. Regular use of such brushes, combined with descaling solutions, extends the lifespan of my super automatic espresso machine and maintains the quality of every shot.
Why Calibration Software Holds the Key to Consistency
Adjusting grind settings and pump pressure manually can only take you so far. For ultimate control, I utilize calibration software compatible with my bean-to-cup machine, which allows me to fine-tune parameters like shot volume, temperature, and pre-infusion time. This ensures consistent extraction and flavor profile, especially when switching between different bean types. With regular calibration, I avoid common issues like lukewarm shots or weak crema, saving time and beans in the long run.
Moreover, having real-time data on machine performance helps identify early signs of component wear. For example, increasing pump pressure readings over time could indicate a need for filter replacement or component servicing. I keep a maintenance log with these readings, and periodic software updates ensure I benefit from ongoing improvements and bug fixes.
How do I maintain my espresso tools over time?
In my experience, routine cleaning after every use combined with scheduled descaling every 2-3 months is crucial. Using descaling agents recommended by the manufacturer prevents mineral buildup that can reduce steam pressure and water flow. This simple step preserves the integrity of your espresso machine’s internal parts and ensures warm, flavorful shots every time.
Lastly, investing in a precision timing tool helps in managing frothing temperature and shot duration accurately. This is especially useful when experimenting with different oat milk brands or adjusting grind settings for variety beans. In fact, a study by the International Coffee Organization highlights that meticulous process control greatly enhances beverage quality, even with the most advanced equipment.
To really elevate your espresso game, I suggest trying a comprehensive calibration routine that incorporates software adjustments along with mechanical cleaning tools. This holistic approach can dramatically improve your long-term results and extend the longevity of your investment. Need assistance? Reach out through our contact page for expert advice on maintaining your setup.
What I Wish I Knew Before Twisting That Steam Wand
One of the toughest lessons I learned was the importance of patience and finesse in frothing oat milk. Rushing through the process or ignoring subtle positional tweaks of the steam wand often resulted in flat or burnt foam. Discovering that micro-adjustments and knowing when to pause created velvety microfoam revolutionized my coffee routine. It wasn’t just about the machine, but about harmony between technique and technology.
Your Shortcut to a Barista-Level Setup
Without a doubt, my go-to resource for enhancing my super automatic espresso machine’s performance is the comprehensive guide on choosing the perfect espresso machine. It helped me pick the right model tailored for oat milk frothing and provided tips on calibration and maintenance. Additionally, tools like a tested automatic milk frother options expanded my horizons. Trusting these carefully curated resources saved me time and elevated my coffee craft.
Fuel Your Passion, Not Your Frustration
Creating amazing espresso at home isn’t just about the tech—it’s about embracing continuous learning and experimentation. Whether you’re adjusting grind sizes, tweaking milk temperatures, or mastering pouring techniques, each small step deepens your connection to your machine and ingredients. Remember, every expert barista started just like you—by trying, failing, and then refining. So, take that leap, enjoy the process, and let your passion excite every sip of your oat milk latte. Want more expert insights? Check out our comparison of top bean-to-cup machines in 2025 to discover your next upgrade.
![5 Automatic Milk Frothers That Won't Curdle Hemp Milk [2026]](https://superautomatic.espressotechguide.com/wp-content/uploads/2026/03/5-Automatic-Milk-Frothers-That-Wont-Curdle-Hemp-Milk-2026.jpeg)