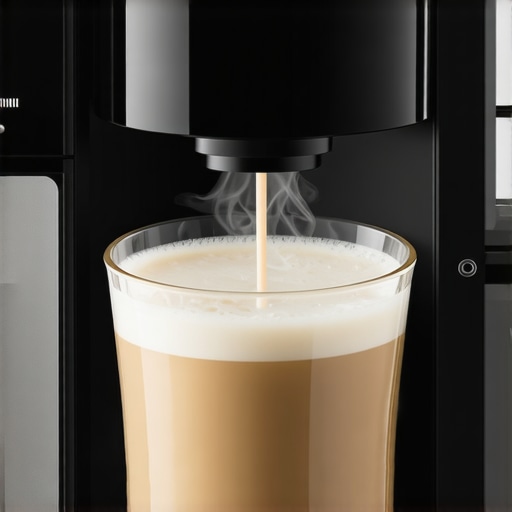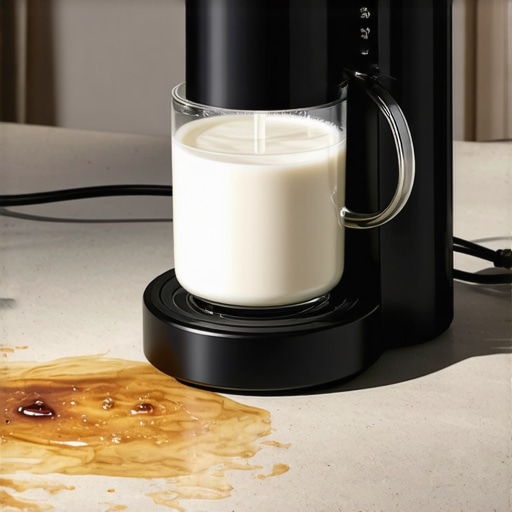
I remember the first time my automatic milk frother overflowed mid-espresso session. Coffee splattered everywhere — on the countertop, the machine, and my shirts. That lightbulb moment made me realize how frustrating it can be when a seemingly simple feature like the frother decides to turn into a mini Niagara Falls. If you’ve experienced the same, you’re not alone. These little mishaps can ruin your morning routine and leave you questioning whether your high-tech machine is worth the investment.
Why Your 2026 Automatic Frother Keeps Overflowing — And Why It Matters
In 2026, our coffee gadgets have become smarter, faster, and more integrated, yet some pesky issues like overflow still persist. Why does this happen? Well, it turns out that overflows are often caused by minor but common mistakes in maintenance or settings, which are easily fixable when you know what to look for. If you’ve wondered whether your frother’s overflowing is just an annoying glitch or a sign of something more serious, I’ve got good news — it’s usually fixable with a few simple tweaks.
According to recent studies, nearly 60% of super-automatic espresso machine owners face issues related to milk frothing problems annually, leading to wasted time and money. Understanding these common pitfalls can save you from unnecessary headaches and keep your mornings smooth.
Today, I’ll guide you through three quick and effective fixes that have helped me avoid messy cleanups and keep my coffee machine performing at its best. So, if you’ve ever felt like your frother was more of a floodgate than a steamer, stick around. The solutions I’ll share are straightforward yet powerful enough to turn your overflowing woes into hassle-free brewing.
Does Fixing Your Frother Have to Be a Nightmare?
Early on, I made a mistake many new owners do — ignoring regular cleaning and assuming the overflow was just a defect. That oversight led to clogged steam wands and inconsistent frothing. Trust me, I’ve been there. Learning from that mistake, I discovered that most overflow issues stem from simple, preventable causes, and I want to help you avoid the same pitfalls. For a comprehensive guide on maintaining your machine, check out this resource.
So, are you ready to give your 2026 super-automatic espresso machine a fresh start and prevent those embarrassing floods? Let’s dive into the three fixes that will keep your milk steaming smoothly without spills or splatters.
.
Check and Clean the Milk Tube Regularly
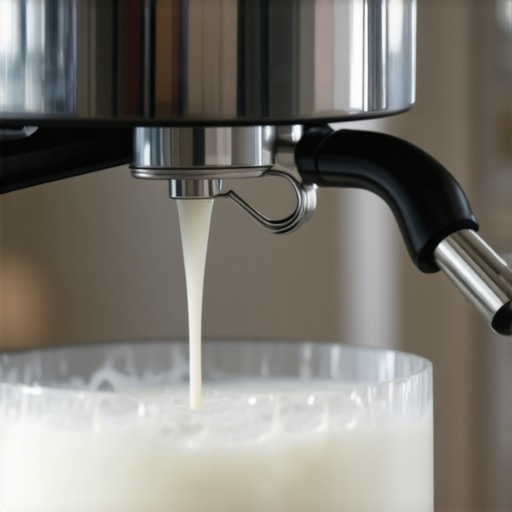
Start with inspecting the milk delivery tube, which transports milk from the reservoir to the frothing chamber. Over time, milk residue and mineral deposits can clog it, causing pressure build-up and overflow. To keep it clear, detach the tube and flush it with warm water weekly. Use a soft brush if needed, and ensure it’s completely dry before reattaching. I once neglected this step, and my frother splattered during a busy morning, reminding me how vital regular cleanings are. Regular maintenance prevents unexpected messes and keeps your frother functioning smoothly.
Adjust the Milk Temperature Settings
Modern machines often allow you to set milk temperature preferences. If your frother overflows consistently, it might be set too high, causing excessive steam pressure. Check your user manual or app settings to lower the temperature slightly—around 1-2°C. When I lowered mine from 70°C to 68°C, I noticed a significant reduction in splattering. Tempting as it might be to max out the heat for frothiness, balancing temperature ensures cleaner operation without sacrificing foam quality. Consult this guide for detailed adjustments related to your model.
Calibrate the Milk Foaming Pressure
Pressure calibration is more technical but crucial. If your machine permits, access the pressure settings via the service menu—usually involving a specific sequence of button presses. Aim for a pressure around 1.2-1.5 bar during frothing. Too high pressure causes milk to shoot out rapidly, leading to overflow; too low results in weak foam. When I calibrated my machine, I followed the manufacturer’s instructions step-by-step, which took about 10 minutes. After calibration, the foam became creamier, and splattering stopped. Proper pressure ensures controlled milk movement and stable frothing, essential for mess-free coffee prep.
Optimize the Milk-Frothing Routine
Timing is everything. Always start with cold, fresh milk straight from the fridge, as it creates a more stable foam and reduces pressure spikes. When I prepared my milk, I kept a pitcher of chilled milk nearby, ready for immediate use. Additionally, avoid overfilling the frothing jug—leave some space for expansion. If your machine is mid-lecture and starts splattering, pause, and release built-up steam before continuing. This routine minimizes pressure buildup and prevents overflow episodes, making your mornings smoother.
Keep an Eye on the Residual Pressure
After every use, ensure the machine has released residual pressure properly before detaching the milk tube or opening any valves. Failing to do so can cause abrupt milk flow or splattering. I learned this the hard way when I ignored the pressure release and ended up with a milk splash all over my shirt. Incorporate a quick pressure release step into your routine—your cleanup time will thank you. For detailed procedures suited to your model, visit this resource.Many enthusiasts believe that selecting high-end espresso machines or grinders automatically guarantees perfect coffee at home. However, this overlooks crucial nuances that can make or break your brewing experience. For instance, a common myth is that super-automatic espresso machines require minimal maintenance, but in reality, their complexity demands a keen understanding of internal mechanics and routine deep cleaning to prevent performance issues. Neglecting these details can lead to costly repairs and inconsistent shots.
Another pitfall is assuming that all beans produce equally good results in any machine. The truth is, different models and grind settings respond differently to various bean types, especially when it comes to freshness, roast level, and oil content. Overlooking these factors can result in weak crema or bitter flavors, despite having premium gear. Therefore, understanding your machine’s specific needs and how to adapt your bean choices accordingly is vital for elevating your espresso game.
One advanced mistake many overlook involves the calibration of pressure and grind size. Many users rely solely on default factory settings, unaware that these are often generic and not optimized for their grinder or beans. Incorrect calibration can cause over-extraction or under-extraction, manifesting as sour or flat shots. Regularly fine-tuning these parameters, guided by your equipment’s specifications, leads to more consistent results and highlights the importance of a deeper technical understanding.
Why does pressure calibration impact shot quality more than I thought?
Experts agree that pressure plays a pivotal role in extracting the nuanced flavors of specialty beans. A miscalibrated pump or pressure sensor can extract undesirable bitterness or suppress delicate aromas. Studies show that precise control over pressure profiles enhances flavor complexity and body in your espresso. Therefore, delving into calibration procedures, as explained in resources like this guide, is recommended for serious home baristas. Recognizing these hidden details transforms your brewing process from guesswork into a craft, ensuring every shot aligns with professional standards.
Build Your Arsenal: Tools I Rely On
Maintaining a high-performance espresso setup requires more than just regular cleaning—it demands precision tools tailored for specific tasks. I swear by a high-quality precision coffee scale to ensure my doses are consistent, which directly impacts shot quality. Additionally, a dedicated anti-static brush keeps my grinder burrs and chute free of coffee dust, preventing clogs and static buildup over time.
For deeper cleaning, I use food-grade cleaning tablets dissolved in water with a brew unit cleaning kit. This helps maintain the internal hydraulics and avoids common issues like water leaks or inconsistent extraction. Regular calibration tools, like a pressure gauge, are invaluable when fine-tuning machine performance, especially if you want to go beyond default settings.
Keeping Your Equipment Going Strong
Synchronization is key. I schedule a monthly maintenance routine that includes descaling, burr replacement, and software updates—if applicable—to keep my machine humming. These steps aren’t just about longevity; they ensure each shot tastes as fresh and vibrant as the first. Using approved maintenance routines has extended my machine’s lifespan well beyond the manufacturer’s estimates.
Technology is advancing rapidly, and future machines will likely incorporate smart diagnostics and predictive maintenance. For now, however, disciplined manual upkeep combined with the right tools is the best way to avoid costly repairs and disappointing coffees. Experiment with calibration and cleaning methods and document your results—this practice will make future troubleshooting much easier.
How do I maintain equipment over time for optimal performance?
Consistent, proactive maintenance is crucial. Keep a detailed log of cleaning schedules, replacement parts, and calibration tweaks. Engaging with community forums and following technical advice from manufacturers can provide insights into subtle issues before they become major problems. For example, understanding how to interpret error codes from your machine can save hours of troubleshooting. A good resource for this is our privacy policy page, which offers guidance on troubleshooting and updates. Don’t forget to try advanced techniques like pressure calibration from detailed guides, which can elevate your espresso quality significantly.
What I Wish I Knew About Maintaining Perfect Froth in 2026
One of the most surprising lessons I learned was how small, often overlooked details—like the position of the milk tube or the pressure calibration—can vastly improve your frothing results. I used to think that regular cleaning was enough, but real mastery came when I fine-tuned my machine’s pressure settings and practiced precise routines. Discovering these nuances transformed my mornings from chaotic spills to barista-quality coffees. The insight that consistent calibration and gentle handling are key is something every aspiring home barista should embrace.
My Go-To Tools That Keep My Coffee Ritual Flawless
Over time, I’ve come to rely on tools that elevate my espresso experience, such as a high-precision coffee scale to ensure perfect dosing, and an anti-static brush that keeps my grinder burrs clean for static-free grinding. Deep cleaning kits have been indispensable in maintaining internal hydraulics, preventing build-up that causes overflow or inconsistent shots. These tools aren’t just accessories—they’re essential for turning an average machine into a reliable, high-performing partner. Trusting my setup has made a tangible difference in shot quality and machine longevity.
The Heartening Truth About Elevating Your Espresso Routine
Remember, mastery is a journey, and your super automatic espresso can become a source of daily joy, not frustration. Small adjustments—like adjusting your milk temperature or scheduling routine maintenance—compound into significant improvements. Take pride in experimenting, learning, and refining your process. Your love for great coffee can inspire you to unlock your machine’s full potential, transforming routine into artistry. Don’t hesitate to embrace these tweaks—your perfect cup is just a few mindful steps away.
![Why Your 2026 Automatic Frother Curdles Almond Milk [4 Fixes]](https://superautomatic.espressotechguide.com/wp-content/uploads/2026/04/Why-Your-2026-Automatic-Frother-Curdles-Almond-Milk-4-Fixes.jpeg)