
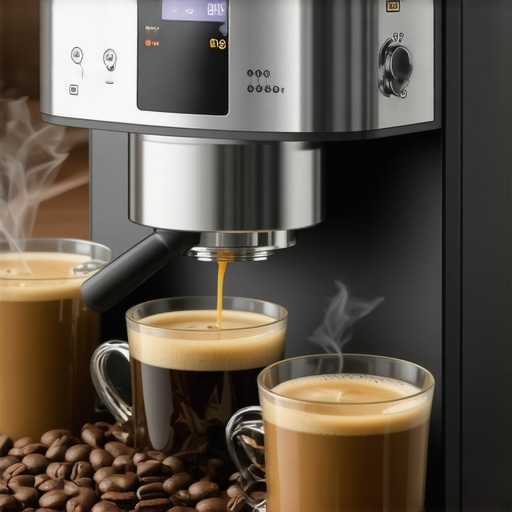
Ever been mid-sip, only to hear that dreaded squeal from your espresso machine and realize your perfect shot is ruined? I’ve been there. One morning, my beloved bean to cup machine refused to dispense coffee properly, and I was convinced I’d have to replace the entire unit. That lightbulb moment made me realize how much a simple clog can disrupt our daily caffeine ritual—and how easily it can be fixed with the right know-how.
In this post, I’m going to share my personal experience and walk you through four practical tips to stop the sludge and clear a clogged brew unit. If your machine is stubbornly refusing to deliver that rich crema or is just plain not functioning right, don’t worry. We’ve all been there, and I’m here to help you get back to your perfectly brewed mornings.
Why Ignoring Clogs Can Cost You More Than Just a Bad Coffee
Could a simple blockage ruin your machine’s insides?
Suppose I had dismissed that squealing noise and ignored the warning signs. I might have ended up with a costly repair or a new machine altogether. Early on, I made the mistake of trying to manually force the brew unit without proper cleaning procedures, which only worsened the issue and risked damage. Remember, a little preventive maintenance can save you plenty of money and frustration down the line.
According to recent research, regular cleaning extends the lifespan of your espresso equipment significantly—sometimes by years. Keeping your brew unit free of debris and build-up isn’t just about good taste; it’s about preserving your investment. And if you’re wondering whether these efforts are worth it—absolutely. Proper maintenance prevents common issues like clogs, which, if left unaddressed, can cause mechanical failures.
So, if you’ve faced that sinking feeling of a clogged brew unit, stay tuned. We’ll get into the nitty-gritty of how to tackle this problem efficiently. Whether it’s scaling buildup or stubborn coffee grounds, I’ve got tips that make cleaning manageable and straightforward—no special tech skills required. Let’s dive into the practical steps to reclaim your espresso excellence.
Disassemble with Precision
Start by turning off and unplugging your espresso machine. Remove the brew group or brew unit, which is often accessible by opening the front panel or removing a panel at the top or side. Think of it like taking apart a puzzle—gently but firmly. As I did during my last cleaning, I used a soft cloth and a small screwdriver to detach all accessible parts. Regular disassembly prevents stubborn clogs from building up unnoticed and makes cleaning easier.
Identify and Remove Blockages
Inspect the brew unit for coffee grounds, mineral deposits, or oily residues. A common issue is coffee oils baking onto the metal parts, leading to build-up. Use a soft brush or a damp cloth to wipe away loose debris. I once found a thick layer of coffee oil coating the shower screen, which I cleaned with a mixture of hot water and a degreasing cleaner, similar to cleaning greasy cookware. This step restores flow and prevents future clogs.
Soak and Scrub Effectively
Prepare a descaling solution or use a mixture of equal parts water and white vinegar. Immerse the removable parts in this mixture for 15-30 minutes to dissolve mineral deposits. When I cleaned my machine, I soaked the brew head components overnight, which loosened stubborn scale particles. After soaking, scrub gently with a soft-bristled brush to remove any remaining residues. This process rejuvenates internal pathways, ensuring water flows unimpeded.
Rinse and Reassemble Properly
Thoroughly rinse all parts with clean water to remove vinegar or descaling solution residues. Dry everything completely to prevent corrosion. Reassemble the brew unit carefully, ensuring all clips and screws are securely in place. Remember, a loose component can cause leaks or further blockages. Once reassembled, run a cleaning cycle or a test brew without coffee to confirm smooth water flow. I did this after my first deep clean, and it restored the machine’s performance perfectly.
Adjust and Maintain to Prevent Future Clogs
Choose high-quality, non-oily beans to reduce oil build-up. Regularly descale your machine following manufacturer guidelines—usually every 2-3 months. Keep the grinder well-adjusted to prevent excess fines or coffee powder from entering the brew unit, which can cause blockages. For advanced maintenance, consider periodically replacing seals or worn parts to maintain optimal flow. For personalized tips, you can consult this detailed guide on automatic milk frother maintenance or explore clog prevention in super-automatic systems. Staying proactive with regular cleaning and component checks is the best way to keep your espresso pristine and your mornings uninterrupted.Many enthusiasts believe that simply choosing the latest model guarantees perfect coffee, but in reality, understanding the subtle intricacies of your equipment makes all the difference. For example, there’s a widespread misconception that more expensive espresso grinders automatically produce better shots. While higher-end grinders often offer finer adjustments and durability, the key lies in proper calibration and maintenance. A common mistake is neglecting burr alignment, which can lead to inconsistent grind size and muted flavors. Regularly checking and adjusting your grinder according to expert guidelines—like those found in our comprehensive espresso grind essentials—can significantly elevate your brew.
Beyond equipment, there’s a myth that automatic milk frothers always deliver barista-quality foam without effort. However, many users overlook the importance of adjusting frothing parameters for different milk types or neglect cleaning cycles that maintain foam consistency. In fact, advanced users tweak temperature and pressure settings to optimize foam stability, especially with alternative milks like oat or soy. For detailed tips, check out our automatic milk frother guide.
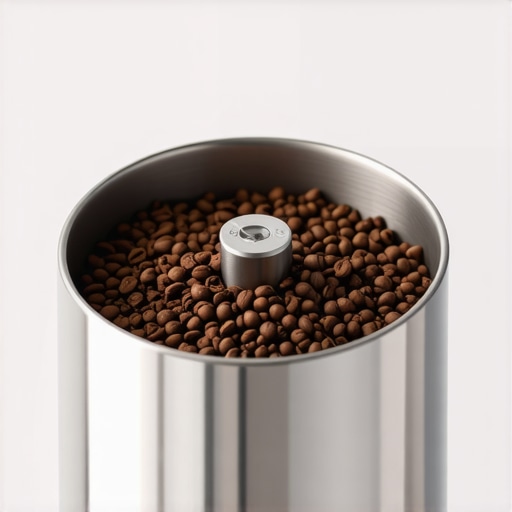
When it comes to bean-to-cup machines, many get tripped up by the misunderstanding that all beans are suitable for automatic systems. In reality, the roast level, oil content, and bean origin impact performance and maintenance needs. Dark oily beans, for example, are notorious for clogging systems if not managed properly, but selecting beans with lower oil content can prevent frequent clogs—saving you time and money. A good starting point is our dark roast bean tips. Regularly cleaning and descaling also debunk the myth that maintenance is burdensome; in fact, proactive care extends your machine’s lifespan and ensures consistently rich shots.
Advanced users often ask, “How can I fine-tune my espresso gear for maximum flavor while avoiding common pitfalls?” A crucial step is paying attention to the subtle interplay between grind size, tamp pressure, and water temperature. For instance, even slight misadjustments in grind size can lead to over-extraction or under-extraction, resulting in sour or bitter notes. Experts recommend periodic calibration using tools and techniques outlined in our grinder adjustment guide. It’s these details that distinguish a good home setup from a true barista-quality machine.
Have you ever fallen into this trap? Let me know in the comments. Mastering your equipment isn’t about buying the most expensive gear but understanding the hidden nuances that unlock its full potential. Dive deeper into these topics and optimize your coffee experience today.
On the journey to perfect coffee, having the right tools and understanding proper maintenance is crucial. Personally, I rely on a few specialized items that make upkeep more manageable and ensure long-term performance. One essential device in my toolkit is a digital burr grinder calibration station. Why? Because even slight misalignments in the burrs can lead to inconsistent grind size, affecting shot quality and causing extra wear on my grinder. Regular calibration with an accurate device helps me maintain optimal settings, preventing clogs and ensuring every shot is consistent. You can learn more about this process in our burr alignment guide.
Next, I invest in a high-quality descaling solution that is formulated explicitly for espresso equipment. Routine descaling removes mineral deposits that build up over time, especially if your water source is hard. I schedule a thorough descaling every three months using a trusted extractor, avoiding the common mistake of neglecting this step—something I’ve learned from experience can lead to poor extraction and machine failure. Pro tip: Always follow manufacturer guidelines for descaling products to avoid damaging internal components.
For cleaning and sanitation, I use a portable ultrasonic cleaner. This device is perfect for deep cleaning small parts like shower screens, steam wands, and group connectors. The ultrasonic waves effectively remove coffee oils and scale from hard-to-reach places, which often cause blockages and flavor degradation. Regular use keeps my super automatic espresso machine running smoothly and extends its lifespan.
Looking ahead, I predict that incorporating smart diagnostic tools will become increasingly common. Devices capable of monitoring internal pressures, temperature consistency, and clog detection will help users troubleshoot and schedule maintenance proactively, much like automotive diagnostic scanners. Eventually, apps integrated with these tools could provide real-time alerts and detailed step-by-step guides to fix issues immediately. This evolution will lessen reliance on guesswork and make maintaining complex espresso systems more accessible to enthusiasts and casual users alike.
How do I maintain my espresso gear over time?
Consistent, scheduled maintenance is key. This means following a routine of regular cleaning, descaling, and component checks, aligned with your machine’s specifications. For instance, replacing worn seals and gaskets every six to twelve months can prevent leaks and buildup that lead to clogs. Additionally, monitoring your grinder’s burr condition and recalibrating it when you notice uneven extraction or fluctuations in flow enhances flavor stability. A well-maintained grinder, paired with a good-quality bean supplier—preferably one offering beans with lower oil content like those discussed in our dark roast bean tips—ensures minimal clogging and consistent performance.
If you’re serious about optimizing your maintenance routine, consider upgrading your toolkit with advanced equipment like an automatic diagnostic sensor system. These innovations forecast future trends and will likely become a standard part of passionate home barista setups. To explore more about long-term care strategies, visit our comprehensive guide.
Finally, I challenge you to try calibrating your espresso grinder with an external calibration device this month. I promise, the improved consistency and flavor clarity will make the effort worthwhile. Remember, proper maintenance isn’t just about fixing problems; it’s about proactively preventing them and ensuring your machine continues to serve exceptional coffee for years to come.
Uncovering Hidden Truths That Changed My Coffee Routine
One of the most important lessons I learned was that even the most advanced espresso machine requires a personal touch. Relying solely on technology isn’t enough; understanding the quirks of my own machine made a huge difference. I discovered that minor adjustments, like tuning my grinder or paying attention to water quality, significantly improved the final flavor and prevented clogs. These insights taught me that true mastery comes from combining technical knowledge with attentive care, transforming my daily coffee into a ritual of mindful maintenance rather than mere routine.
A Pocketful of Tools for Eternal Freshness and Performance
I trust a few key tools that keep my coffee game strong. A calibrated burr grinder ensures consistency, preventing oily beans from causing blockages. A high-quality descaling solution keeps mineral deposits at bay, extending my machine’s lifespan. An ultrasonic cleaner helps me reach those hidden crevices where oils and scale linger. Lastly, a simple calibration kit for my grinder keeps my shots precise. These tools, combined with a proactive maintenance mindset, save me time and guarantee a richer, more satisfying espresso experience—no magic involved, just diligent care. For more in-depth tips, check out our espresso grinder essentials.
Stay Curious, Keep Brewing
The future of coffee preparation is bright and full of potential improvements, especially as new diagnostics and smart maintenance tools emerge. I encourage anyone passionate about their espresso to stay curious and invest in understanding their equipment thoroughly. Remember, expert-level coffee isn’t just about buying top-tier gear but about knowing how to care for it. So why not start today—review your grinder adjustments, schedule a descaling, or explore new beans with lower oil content? Your perfect cup is waiting, and with a bit of knowledge, you’ll get there faster than you think. Ever wondered how a simple tweak can elevate your brew? Share your experiences below or ask me any questions about your machine’s upkeep.
![Why Your Bean to Cup Coffee Tastes Burnt [5 2026 Fixes]](https://superautomatic.espressotechguide.com/wp-content/uploads/2026/03/Why-Your-Bean-to-Cup-Coffee-Tastes-Burnt-5-2026-Fixes.jpeg)