![Why Your 2026 Bean to Cup Shot Looks Like Tea [4 Fixes]](https://superautomatic.espressotechguide.com/wp-content/uploads/2026/04/Why-Your-2026-Bean-to-Cup-Shot-Looks-Like-Tea-4-Fixes.jpeg)
I remember the moment clearly. I was eagerly preparing my morning espresso, only to be met with a pale, watery shot that looked more like a herbal infusion than rich coffee. Frustration washed over me. I had invested in what I thought was the perfect bean to cup machine, yet somehow, my espresso was tasting and looking off. It was a lightbulb moment—realizing that even the most advanced super automatic machines can produce disappointing shots if certain issues aren’t addressed. This experience inspired me to dig deep into the common pitfalls that cause your 2026 bean to cup shots to resemble tea, and more importantly, how to fix them.
What’s Behind the Pale and Watery Espresso? The Real Causes
In the journey to craft that perfect shot, many enthusiasts overlook the subtle technical glitches that can turn a robust espresso into a weak, tea-like brew. Often, the problem stems from issues like grind size, machine calibration, or even the flavor profile of your beans. For instance, using too coarse a grind will allow water to pass through too quickly, resulting in a weak extraction. Similarly, an unclean brew unit or malfunctioning sensors in your super automatic espresso can also be culprits, leading to inconsistent shots.
Early on, I made the mistake of thinking that adjusting the brew time alone would solve the problem. But as I later discovered through comprehensive guides—like the detailed 2026 fixes for weak shots—the underlying issues are often more nuanced. Sometimes, it’s as simple as aligning the grinder burrs properly, or as critical as ensuring your water filtration system is functioning perfectly, since contaminants can impair extraction quality.
Are We Overlooking the Small Details That Make a Big Difference?
Trust me, the details matter. A small misalignment in your grinder or neglecting to clear clogs during routine maintenance can drastically affect your shot quality. As I learned from experience, regular cleaning and calibration can prevent that watery, tea-like disappointment. That’s why I urge you to examine every step of your process—something I wish I had paid more attention to early on. Feeling stuck? You’re not alone, and the good news is, these problems are entirely fixable with some targeted troubleshooting.
In the upcoming sections, I’ll share practical tips and step-by-step fixes that can turn your 2026 bean to cup machine into the barista’s dream. If you’ve faced this exact issue—watery, pale shots that taste like tea—keep reading. We’re about to get to the root of the problem and restore that rich, aromatic espresso you crave.
Accessibility note: For more detailed insights, you might find it helpful to explore guides on choosing the right espresso machine or improving grinder performance. Let’s dive into how to fix that watery brew once and for all!
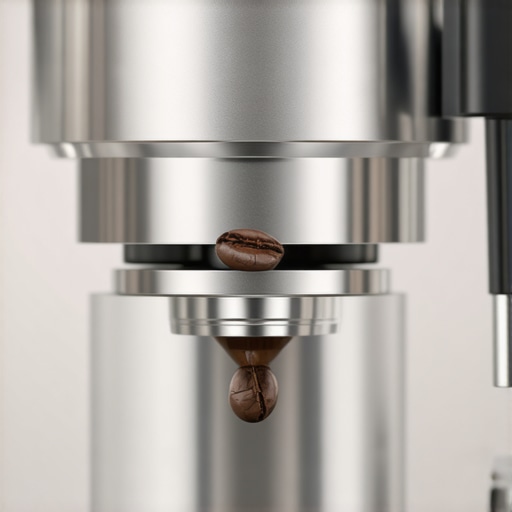
Calibrate Your Grinder for Consistent Flavor
My first breakthrough came when I finally aligned my espresso grinder properly. Instead of guessing, I took precise measurements and tweaked the burrs according to the alignment guide. I disassembled the burr chamber, cleaned out old grounds, and adjusted the burrs until they just touched without resistance. This process is like tuning a musical instrument—small adjustments lead to harmonious extraction. After a messy morning of trial and error, I optimized the grind size to a finer setting, resulting in a much fuller, creamier shot.
Refine Your Grind Size Precisely
Adjustments shouldn’t be broad strokes. Use a scale or a consistent method to measure your grind settings; I used a standard single dose of beans and ground for 10 seconds, then observed the flow rate. Too coarse? The water sluices through too quickly, resulting in weak extraction. Too fine? It stalls the flow or causes bitter flavors. For a quick fix, refer to the grind adjustment tips that helped me turn my shot from pale to bold.
Clean and Maintain Your Brew Path
Clogged filters or build-up in the brew unit can cause water to bypass coffee and produce a watery shot. I scheduled routine cleaning, including descaling and backflushing my super automatic machine. I also inspected the brew group for obstructions—removing coffee grounds trapped in hard-to-reach spots. Think of it like clearing a clogged drain; the flow of water is crucial for proper extraction. Regular maintenance prevented my shots from tasting like weak tea.
Target Clogged Water Pathways
If your machine refuses to prime the pump or dispenses only water, check these common clog spots. Disassemble the brew unit carefully, clear out residual coffee, and soak parts if needed. This hands-on approach restored water flow and improved shot quality dramatically.
Adjust Machine Settings for Optimal Extraction
Many users overlook the importance of configuring their machine correctly. I calibrated the pre-infusion time and shot duration using the settings guide. Fine-tuning these parameters allowed me to extract richer flavors without bitterness or watery taste. It’s akin to setting the right temperature on your coffee maker; precision matters. Remember, small parameter tweaks yield substantial gains in shot quality.
Experiment with Pre-infusion and Dose
Set the pre-infusion to gently soak the coffee puck before full extraction. I started with 2 seconds and increased to 4, noticing more aroma and crema. Similarly, adjusting the dose—adding or reducing coffee quantity—can impact extraction. Use the dosing tip to find your ideal balance for a rich, full-bodied espresso.
Optimize Water Quality and Temperature
Poor water quality can dull flavors and cause extraction issues. I installed a high-quality water filter and regularly replaced it, guided by the filter maintenance. Also, ensure your machine’s temperature preset matches your beans—higher temps typically extract more flavor without bitterness. A stable temperature ensures that your shot isn’t lukewarm or over-extracted, delivering a deep, aromatic profile.
Maintain Optimal Water Temperature
Use the machine’s calibration mode or an external thermometer to verify. If too low, increase the brew temp slightly; if too high, adjust accordingly. Consistency in water temperature is key to avoiding watery, tea-like brews, especially with light roasts that are sensitive to over-extraction.
Many coffee enthusiasts believe that purchasing a high-end super automatic espresso machine guarantees perfect shots with minimal effort. However, this misconception can lead to complacency and overlooked nuances that significantly impact your brewing results. Let’s dig deeper into some of the most widespread myths and reveal the hidden nuances that only seasoned baristas and experts understand.
First, a common fallacy is that automatic milk frothers can replace manual steaming without affecting quality. While they offer convenience, many users underestimate the importance of mastering the frothing process. Automatic systems can curdle non-dairy milks or produce inconsistent foam if not properly calibrated, which may ruin your latte art attempts. Exploring expert tips on automatic milk frother mastery reveals that manual fine-tuning often yields a superior crema and texture.
Another pervasive myth is that espresso grinders are a set-and-forget component, assuming that the factory settings are universally optimal. In reality, even minor adjustments in grind size can elevate your shot complexity, aroma, and crema. Discarding the idea that “one size fits all,” experienced baristas routinely tweak their grinder settings for different beans and roasts. For detailed guidance, see espresso grinder essentials.
Many believe that bean to cup machines are inherently more reliable than traditional setups. Yet, neglecting routine maintenance or misunderstanding the machine’s settings can lead to weak or bitter shots. Even the best equipment requires a nuanced approach—regular cleaning, calibration, and water quality management are vital. Avoiding quick fixes and focusing on machine selection and maintenance is crucial for longevity and performance.
What Advanced Tactics Are Often Overlooked by Serious Home Baristas?
Beyond basic calibration, advanced users recognize that microbial buildup in internal components like automatic milk frothers or brew units can subtly alter flavor profiles over time. According to industry experts, incorporating pro adjustments and deep cleaning ensures consistent extraction and flavor purity. Failing to address these nuances is a trap that even professional baristas work hard to avoid. Have you ever fallen into this trap? Let me know in the comments.
By challenging these myths and adopting a more nuanced understanding, you can transform your home espresso experience from mediocre to extraordinary. Remember, mastering your machine involves more than just purchasing the latest model—it’s about understanding the subtle details and resisting the temptation to settle for easy fixes. For tailored advice and troubleshooting, don’t hesitate to visit our contact page.

Keep Your Coffee Bar Running Smoothly with the Right Tools
The secret to consistently extraordinary espresso lies not just in initial setup but in diligent maintenance and the right equipment to support it. Over the years, I have found that investing in specific, high-quality tools can drastically reduce downtime, improve shot quality, and extend the lifespan of my super automatic espresso machine. From precision calibration to deep cleaning, these tools are my go-to arsenal for ensuring my coffee setup remains in peak condition.
First, a high-accuracy digital scale is indispensable. I use mine to measure coffee doses precisely, ensuring consistent extraction every time. This is critical because even a small variation can lead to watery or bitter shots. Next, a burr grinder with ceramic burrs has revolutionized my grind consistency and heat management. I recommend the espresso grinder essentials guide for selecting and maintaining your grinder to prevent flavor degradation and static buildup over time.
Routine cleaning is vital, and for that, I rely on specialized brushes and cleaning tablets designed for espresso machines. A set of fine, soft brushes helps me reach into tight spots like the brew group and steam wand, removing coffee oils and mineral deposits that could impair performance. Deep cleaning at scheduled intervals prevents issues like clogging and bacterial growth, both of which can subtly ruin your brew quality.
For thorough descaling, I use an external descaling device that connects with my machine’s water pathway. This approach ensures a more comprehensive clean than relying solely on internal descaling programs, which may miss hidden limescale build-up. Additionally, a TDS (Total Dissolved Solids) meter is a game-changer—this device measures water quality, enabling me to adjust filters and water source to optimize flavor extraction and minimize scale buildup, which is crucial as mineral deposits can cause long-term damage, according to the detailed high-altitude maintenance article.
How do I maintain my espresso setup over time?
Developing a regular maintenance routine is key. I schedule weekly quick cleans of my brew group, daily wiping of the steam wand, and monthly deep dives with descaling and burr calibration. Investing in a good-quality water filter and replacing it regularly is paramount, as poor water quality accelerates machine wear and affects taste. Remember, your espresso machine and grinder are akin to high-performance sports cars; they demand care and precision to operate optimally over many years.
Looking ahead, I predict that automation and IoT integration will continue to grow in this niche, providing smarter maintenance alerts and predictive diagnostics. Equipment like smart descalers and self-cleaning filters will become standard, making long-term upkeep easier. Until then, implementing these proven tools and routines will keep your espresso machine performing at its best, delivering those perfect shots every time.
Feeling inspired? Start with a precision grinder calibration following the burr alignment guide. It’s one of the most impactful improvements you can make today. Happy brewing!

What I Wish I Knew Before The First Brew
One of the most invaluable lessons I learned was that perfection isn’t achieved overnight but through meticulous attention to detail—every grind, every clean, every calibration counts. I once thought that a high-end super automatic could solve all my problems—a false sense of security. The real breakthrough was understanding that my equipment’s potential is unlocked only through continuous learning and adjustment. That “aha” moment when I finally aligned my grinder burrs perfectly and calibrated my machine to match my beans’ roast profile transformed my espresso game forever. Remember, mastery is a journey, not a destination.
Tools That Changed How I Approach Espresso
Investing in a good digital scale was a game-changer. Precise measurement of coffee doses ensures consistency, preventing those oddly weak shots. A high-quality burr grinder with ceramic burrs improved grind stability and flavor extraction, as detailed in this guide. Regular deep cleaning tools like specialized brushes and descaling devices kept my machine performing optimally, reducing downtime and flavor compromise. These tools, coupled with a TDS meter for water quality, created a maintenance routine that keeps my espresso tasting as fresh as on day one.
Your Next Step Towards Espresso Excellence
Now it’s your turn to elevate your brewing. Start small: calibrate your grinder with precision, maintain a regular cleaning schedule, and experiment with water temperature settings. Remember, the key is patience and persistence—each tweak brings you closer to that perfect shot. If you want tailored advice or troubleshooting tips, visit our contact page. Your espresso journey is uniquely yours, and every perfect shot is a step toward mastering your craft.