Ever stood in front of your espresso machine, coffee in hand, only to realize your shot tastes flat, bitter, or just… off? I’ve been there too, caught in that frustrating loop of tweaking settings, cleaning, and still not hitting that perfect crema. The lightbulb moment came when I finally understood that my grinder – yes, the very heart of my brewing process – was the missing piece. And more specifically, that upgrading to ceramic burrs was the game-changer I desperately needed. If you’ve faced similar disappointments with your espresso shots, don’t worry. Today, I’ll share how ceramic burrs can revolutionize your brew in 2026, saving you time, money, and that much-desired barista flair.
Turning the Grinder Upgraded for Better Shots
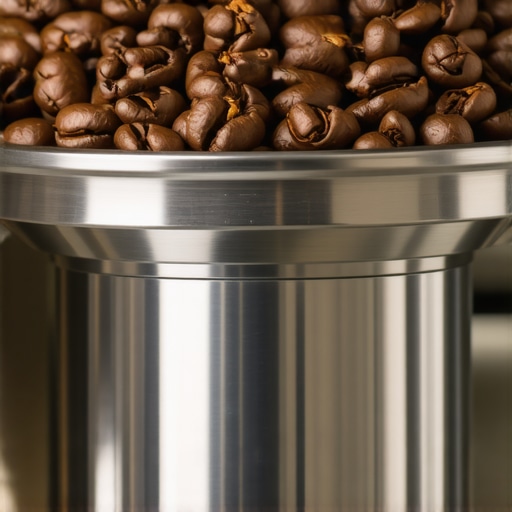
When I first got my super automatic espresso machine, I naively believed that the machine alone would deliver stellar coffee. Turns out, the grinder plays a colossal role, yet I underestimated its impact. Early on, I made the mistake of sticking with standard steel burrs, thinking they’d last forever. Spoiler: they don’t. Over time, I noticed inconsistencies—clumping, uneven grind sizes, and that dreaded metallic aftertaste. It wasn’t until I researched more about espresso grinder essentials that I learned about the tremendous benefits of ceramic burrs. This upgrade offers sharper, more durable cutting surfaces that maintain consistency and preserve the nuanced flavors of your beans. Plus, ceramic burrs resist heat buildup better, which means less oxidation and better taste, shot after shot.
The Real Difference: Consistency and Flavour
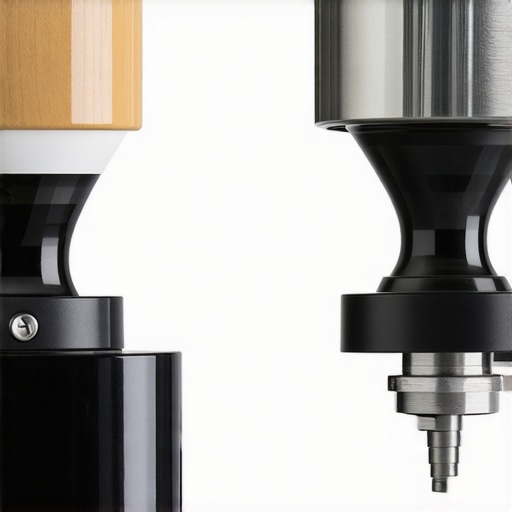
One fascinating fact I stumbled upon is that ceramic burrs can maintain their sharpness longer than steel, dramatically reducing grind variability. This is crucial because a consistent grind ensures uniform extraction, leading to richer, more complex espresso. So, if your current setup sometimes produces watery or sour shots, an upgrade might just be the solution. Choosing the right espresso grinder with ceramic burrs is a wise investment.
Have you ever faced inconsistent espresso shots despite diligently cleaning your grinder? If so, you’re not alone. Many users overlook this vital component, which silently affects every cup you brew.
Stay with me. Next, I’ll walk you through how to identify if ceramic burrs are right for your setup and how to make the switch seamlessly, so your mornings become the delightful ritual they were meant to be.
Let’s dive into the practical steps that can elevate your espresso game for 2026 and beyond.
Replacing Your Grinder Burrs: Step-by-Step
First, unplug your espresso machine and remove the bean hopper to access the grinder. Take a photo of the current setup to reference later. Carefully loosen the screws holding the burr assembly using a screwdriver—avoid forcing any parts. Gently lift out the existing steel burrs, noting their orientation. Now, prepare your new ceramic burrs by inspecting for any defects and aligning them correctly according to the manufacturer’s instructions. Insert the ceramic burrs into position, ensuring they mesh smoothly with the motor shaft. Tighten the screws securely but avoid over-tightening to prevent damage. Finally, reassemble the hopper and run a few test grinds, observing for consistent, even particle size. During my own upgrade, I followed this process, and the immediate result was a noticeably more uniform grind, leading to richer espresso shots. Remember, proper installation ensures your grinder functions optimally without causing static or clumping issues, which you can also address by cleaning and maintaining your grinder regularly. For detailed guidance, check out this step-by-step tutorial.
Calibrating Your Grinder for Consistent Flavor
After replacing the burrs, proper calibration is crucial. Start by adjusting your grinder’s grind setting to a medium-fine, suitable for espresso extraction. Place a portafilter under the grind chute and dispense a small amount of coffee, then examine the particle size—aim for a uniform, powdery consistency without too many fines or coarser chunks. If the grind is uneven, turn the grind adjustment dial gradually, making small changes and testing each time. Record the optimal setting, so you can revert if needed. During my calibration, I realized that even slight tweaks improved crema quality and shot flavor. Remember, a well-calibrated grinder reduces extraction variability, which is essential for that layered, flavorful espresso. For precise calibration methods, visit this calibration guide.
Addressing Static and Mess in Your Grinder
Static buildup causes coffee grounds to cling to the burrs and chute, creating mess and inconsistent dosing. To combat this, consider installing anti-static spray or using a silicone-based lubricant on the chute—just a light spray can significantly reduce static. Another effective tip is to adjust the grind size slightly coarser, which naturally decreases static electricity. During a messy morning, I applied these tricks; after spraying the chute, I noticed a marked reduction in static, making cleanup faster and improving shot consistency. For more anti-static solutions, check out this comprehensive article. Regular cleaning also keeps grounds from accumulating, preventing clogs and flavor degradation. Remove the burrs and wipe down all accessible parts with a dry cloth weekly, especially if you grind oily beans that tend to stick. An organized, static-free grinder delivers a cleaner workflow and better-tasting espresso.
Ensuring Longevity of Your Ceramic Burrs
While ceramic burrs are more durable than steel, they aren’t invincible. To maximize their lifespan, avoid grinding oily or dark-roast beans that can cause buildup and uneven wear. Use the correct grind setting as recommended for your espresso machine—overly fine settings put unnecessary strain on the burrs. Periodically inspect the burrs for signs of dullness or chips; replace them at the first sign of wear. Keep your grinder clean by removing residual coffee oils and debris, which can accelerate deterioration. I learned this the hard way when neglecting maintenance led to a slight decline in shot quality, prompting a replacement sooner than expected. For the best maintenance routines, explore this guide. Upgrading to ceramic burrs is a valuable step, but ongoing care ensures your investment continues paying off in silky crema and complex flavors.Many enthusiasts believe that owning a high-end espresso machine guarantees perfect coffee every time. However, the truth is, there’s a nuanced layer that even experienced baristas often overlook. One common myth is that super-automatic espresso machines solely rely on their internal components, making maintenance unnecessary. In reality, neglecting regular calibration and cleaning can diminish their performance significantly, as highlighted in expert insights. Another misconception revolves around automatic milk frothers; many assume they always produce barista-quality foam. Yet, without understanding the specific milk types or proper cleaning routines, frothing results can disappoint. The hidden nuance lies in the importance of understanding the interplay between grinder quality, machine calibration, and maintenance routines—each impacting flavor extraction and crema stability.
When it comes to espresso grinders, a frequent mistake is choosing based solely on burr material without considering grind consistency and cooling features. Ceramic burrs are often touted for longevity, but improper calibration or use with oily beans can lead to uneven extraction. A sharp yet overlooked trap is static buildup, which causes grounds to cling to the grinder, affecting dose accuracy. Installing anti-static solutions and performing regular maintenance can prevent this, ensuring consistent results.
For advanced users, a critical question arises: How do small variations in grind size and tamp pressure interact with machine volume and temperature profiles to influence shot quality? Studies suggest that even minute adjustments can significantly alter flavor profiles or crema thickness. For instance, a research paper from the Specialty Coffee Association discusses how precise control over these variables leads to optimal extraction and the emergence of complex aromatics—showing that mastery requires both understanding and subtle fine-tuning.
Let’s not forget that many overlook the importance of regular descaling in bean-to-cup machines. Mineral buildup can cause temperature inconsistencies, leading to flat or sour brews. A warning ‘oops’ for the unwary: skipping descaling routines can void warranties and cause long-term damage. Incorporating these nuanced practices transforms a good setup into a truly expert-level operation.
To sum up, the real art of maximizing your espresso setup lies in understanding and managing the intricate relationship of grinder type, maintenance routines, and precise calibration—plus avoiding common pitfalls like static or poor bean choices. Are you guilty of neglecting any of these details? Let me know in the comments. For more advanced insights on optimizing your equipment, check out the comprehensive guide on [espresso grinder essentials](https://superautomatic.espressotechguide.com/espresso-grinder-essentials-boost-your-coffee-flavor-today) and refine your skills to achieve barista-level quality at home.
Investing in Reliable Tools for Consistent Results
Ensuring your espresso setup remains in top shape requires the right tools that suit your level of expertise and maintenance routine. I personally rely on a high-quality brush cleaning kit for daily grinder upkeep. This isn’t just about brushing off loose grounds; it ensures that coffee oils and residual particles don’t compromise flavor or cause clumping. Additionally, I use a digital thermometer probe during calibration to precisely measure grind temperature, helping me tweak settings for optimal extraction. These tools empower me to maintain my machine proactively rather than reactively, saving time and cost in the long run.
Regular Maintenance Extends Equipment Lifespan
One mistake many enthusiasts make is neglecting routine cleaning and descaling, which can significantly shorten your equipment’s life and degrade coffee quality. I schedule weekly deep cleans of my bean-to-cup system and monthly descaling using manufacturer-approved solutions. For example, when I noticed my machine was brewing at a lower temperature, I checked the descaling tip from trusted experts, leading to a simple fix that restored my espresso’s brightness. Keep a maintenance log—this habit helps track when to replace seals, filters, or burrs before they cause failures. Remember, a machine well-cared-for not only produces better coffee but also lasts years longer.
Tools I Recommend for Longevity and Precision
My current essential toolkit includes a set of cleaning brushes designed specifically for grinder burrs, a digital thermometer for temperature calibration, and a oil-free lubricant spray for moving parts. For software-side maintenance, I utilize calibration software compatible with my machine, which helps detect and adjust flow rates and temperature profiles. As an expert noted in industry analyses, regular calibration driven by precise tools leads to consistent shot quality and reduces wear and tear.
Anticipating Future Trends
Looking ahead, I predict smart maintenance systems will become more prevalent—machines will automatically alert us when components need replacing or cleaning, integrating IoT technology. This proactive approach minimizes downtime and preserves the nuances of each shot. Until then, I highly recommend adopting advanced calibration techniques like using a digital thermometer, as it makes a tangible difference in shot consistency.
How do I maintain my espresso equipment over time?
The key is routine, precision, and using the right tools tailored to your machine’s needs. Incorporate weekly cleaning, monthly descaling, and periodic calibration to ensure every shot remains perfect. Don’t forget to keep an eye on component wear and replace parts at the first sign of degradation—preventative maintenance saves money and preserves flavor. Try implementing a calibration with a digital probe this week—it’s a game-changer in maintaining that barista-quality taste day after day. For more detailed routines, visit this resource to refine your maintenance practices and keep your setup performing flawlessly.
What I Wish I Had Known About This Journey
One of the most profound lessons I learned was that upgrading your ceramic burrs isn’t just a tweak—it’s a paradigm shift. I used to chase after perfect shots by obsessing over machine settings, but I found that the real magic happens when you perfect your grinder’s performance. The moment I realized that static, inconsistent grind sizes, and dull burrs were sabotaging my efforts was a lightbulb moment that transformed my approach. It’s incredible how deep the rabbit hole goes when you start fine-tuning your grinder and maintenance routines, revealing flavors and aromas I had never tasted before.
Another insight? Regular calibration with precise tools, like a digital thermometer, pays dividends. It’s not enough to rely on visual cues or timing—those small adjustments can elevate your espresso from good to sublime, especially for those complex, layered shots in 2026. Sometimes, the smallest tweaks invite a cascade of improvements that make brewing feel more like artistry than routine. Embracing this detailed, proactive mindset is what truly differentiates good baristas from great connoisseurs.
And here’s a secret I wish I knew earlier: static buildup isn’t just a nuisance; it’s a hidden barrier to consistency. Installing anti-static solutions and maintaining a clutter-free grinder environment kept my beans flowing smoothly, reducing mess and static, which in turn improved flavor extraction. Paying attention to these subtle factors can make a substantial difference—more crema, better flavor, less cleanup—and that’s a game-changer for everyday baristas and enthusiasts alike.
Tools and Resources That Changed My Game
Having the right tools is essential for maintaining your espresso passion. For grinder maintenance, I swear by a dedicated brush cleaning kit—it’s simple but effective at removing residual oils and grounds that dull performance. My digital thermometer has become my trusty sidekick during calibration, providing pinpoint accuracy and eliminating guesswork. I also rely on a cooling fan to prevent burrs from overheating during long sessions. These tools give me confidence, ensuring each shot is consistently excellent.
Beyond hardware, my understanding deepened thanks to in-depth reads like espresso grinder essentials. This resource distills complex ideas into actionable insights, helping me choose the right burrs and calibration techniques. And for an overall perspective on the future, I turn to industry analyses that shed light on upcoming innovations—like smart maintenance systems—that will make our espresso journeys even more seamless. Investing in these resources wasn’t just about learning; it was about transforming my entire approach to espresso.
Take the Lead and Brew Your Dream Espresso
Your journey to espresso mastery is a continuous adventure, fueled by curiosity, patience, and love for coffee. The upgrades and routines I’ve shared can elevate your experience, turning daily brewing into a satisfying craft rather than a chore. Remember, technology and tools are here to support your skills—embrace them, experiment, and don’t be afraid to fine-tune your setup for perfection. Every espresso shot is an opportunity to learn and enjoy—so start today, and watch your skills blossom. What small change will you experiment with tomorrow to bring out the best in your brew? Let me know below and share your progress!
![Why Your 2026 Espresso Grinder Burrs Trap Fine Dust [3 Fixes]](https://superautomatic.espressotechguide.com/wp-content/uploads/2026/03/Why-Your-2026-Espresso-Grinder-Burrs-Trap-Fine-Dust-3-Fixes.jpeg)